Party Favors
September 4th, 2012
Happy Wednesday. The Taylored Expressions Birthday Bash continues today, but in all the stamping I was doing, I never got to the Halloween sets that are being featured today. I thought I’d pop in quickly to show you the little favors I created for the staff lunch last week.
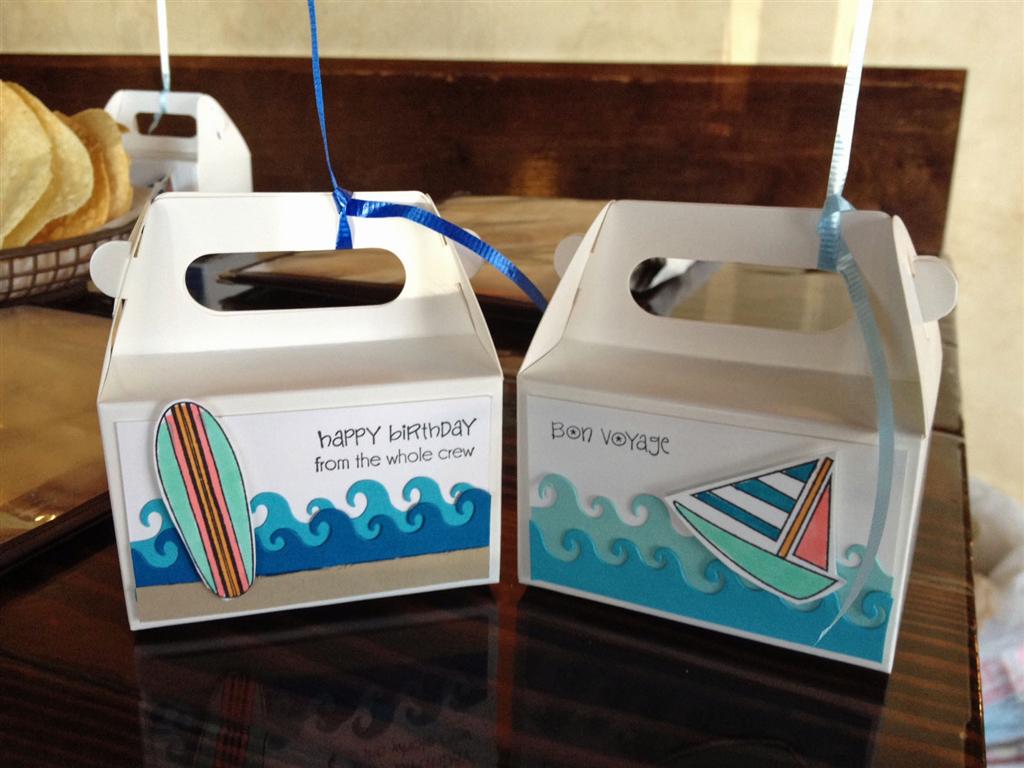
The question was how do you combine a going away for one guy with a surprise birthday party for another? Well in this case, the birthday boy is an avid surfer and the going away theme was “Bon Voyage” so it worked out perfectly! Surf board is from TE Hangin’ Out at the Beach. Sailboat is from TE Bon Voyage. Wave die is from TE also. I purchased the Boxes from Pick Your Plum recently. I love getting their daily e-mail and every once in awhile I find a deal I just can’t pass up, like these favor boxes.
I was super thankful to my two great friends and co-workers, Darla and Lisa, for coming over the night before the lunch and helping me put these together! We were in such a hurry that I forgot to take pictures and just snapped this one with my phone right before the party began. There was a balloon tied to each box and a few of them ended up at the ceiling of the restaurant! LOL!
Thanks for stopping by. I’ll be back tomorrow with TE Release Day and a sample from a set I’m SUPER excited about it!
-Jami
WOW! What a Weekend!!!
November 21st, 2011
Happy Monday! We had quite the eventful weekend here! If you read my last post, then you are aware that we had an appointment for someone to come meet Roger on Saturday and most likely take him home. Friday was Curt’s day off and I swear all we did all day was discuss Roger and what we should do. In the afternoon we ran some errands that included buying some toys and food to go with Roger. Each purchase we made seemed to stab at our hearts. And we recognized that each day Tessa seemed to get along a bit better with Roger and maybe it would indeed be ok. We questioned if perhaps God really meant Roger for us, in the way that I am absolutley certain that He intended Tessa for us. Finally aorund 7:30 pm, Curt uttered the fateful words “I think we should keep him.” I called and cancelled the appointment.
So…please welcome Roger Dog Sibley!!

You might notice his tag. 🙂 On Saturday, we bought him a new collar and a tag with his name and our phone numbers on it. We also bought him a bed. We took him to the vet for a check up and to get his shots started. The vet believes he is between 1 and 1 1/2 years old and gave him a clean bill of health. He seems quite happy to be staying. And Tessa seems pretty ok with it too…except when Roger wants my attention when she is in my lap…LOL!

So…ok everyone…now you can say “I told you so!” Gosh that was an agonizing and emotionally exhausting week!
That was Friday and Saturday…now on to Sunday! I was registered to take a Configurations Class at the Inspiration Emporium Warehouse in Anaheim on Sunday afternoon. Although I was excited about the class, truth be told, I didn’t really want to go when it came right down to it. I had to rush to get there from church, it was pouring down rain, and I was tired and just wanted to chill with the pups. But, boy oh boy am I ever glad I went. IT WAS A BLAST and I am beyond thrilled with the outcome of my project. Here are several photos –
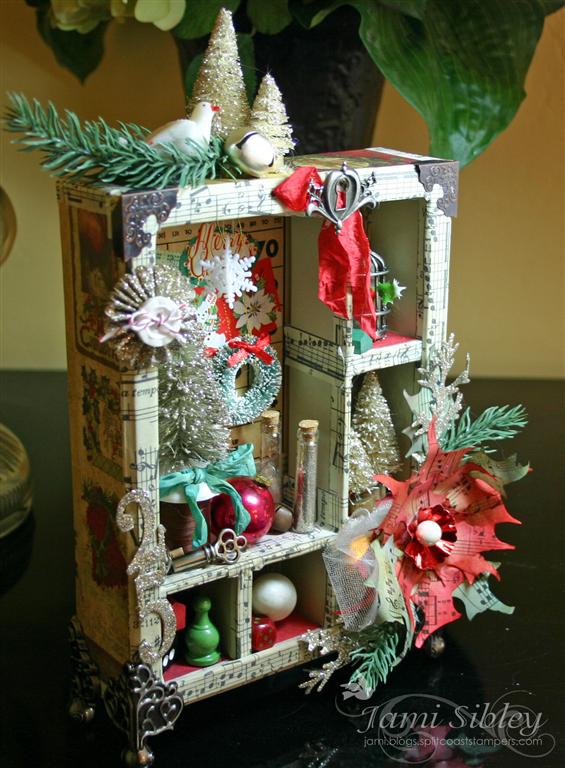
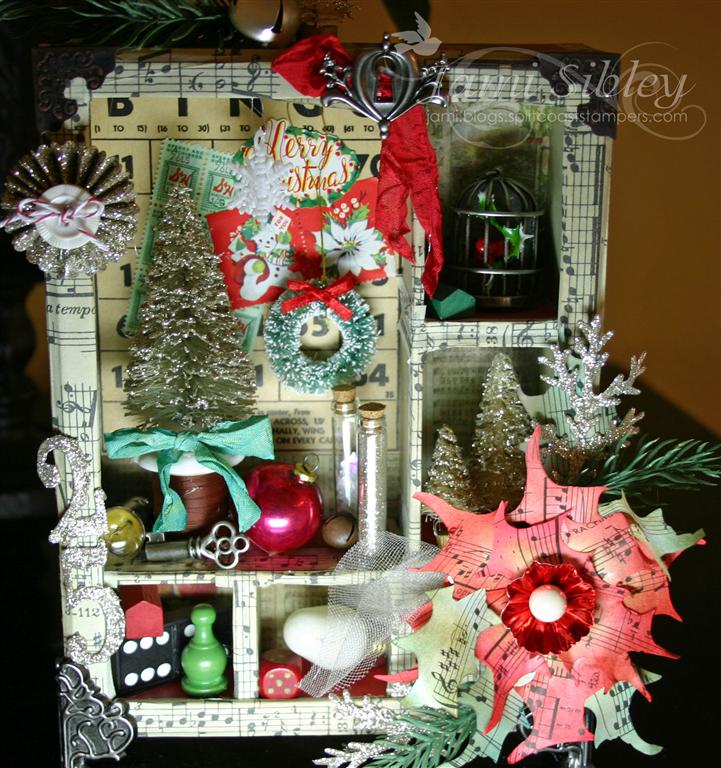
Michelle Fowler was an incredible instructor and I look forward to taking more classes from her in the future. It had been so long since I had taken a class, I almost didn’t know how to act. LOL! Here are some close ups –
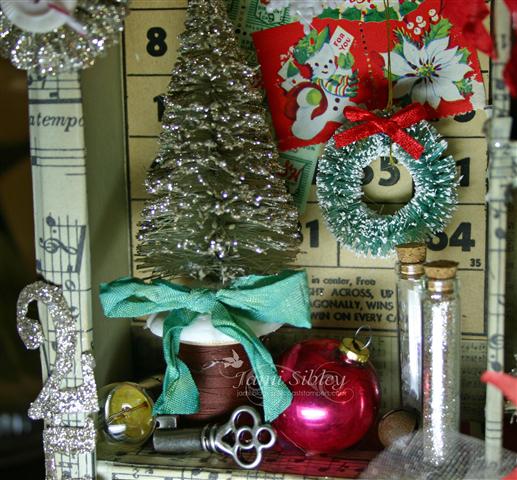
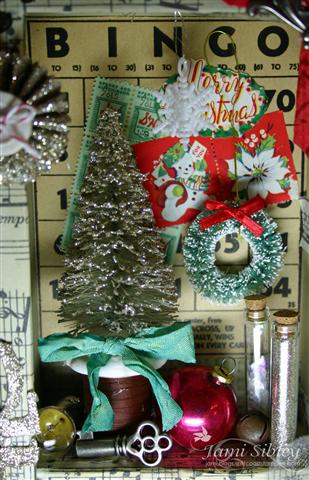
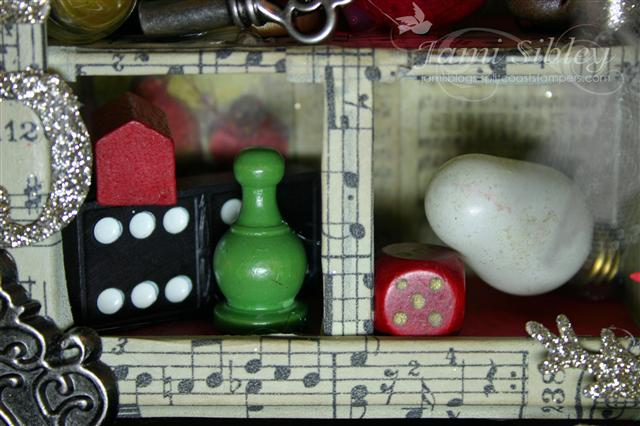


Yes, that’s a little Tim Holtz birdcage with a sprig of holly inside and a vintage Monopoly piece! Here I am with the teacher, Chelle.
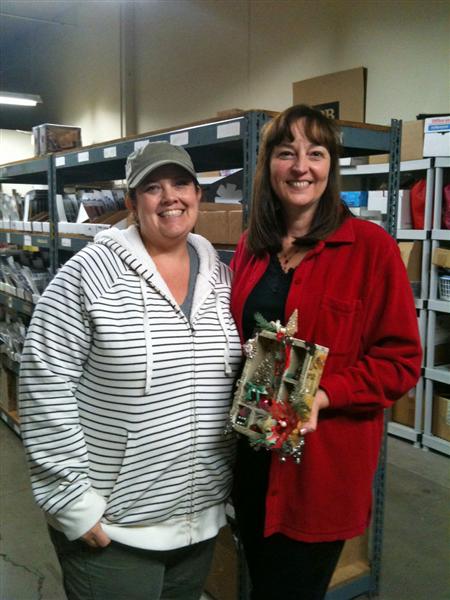
And here I am with friends Rachel Stzonyk (fellow TE Sketch Crew Member) and, of course, owner of Inspiration Emporium the sweet Joy Kennedy.
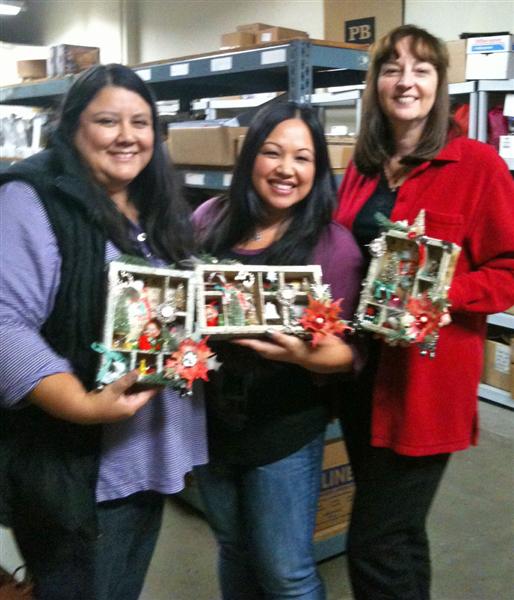
I think the class was scheduled for 3 hours, but we were there for 5 hours. It was the fastest 5 hours EVER! Can’t remember when I have had so much fun crafting. And of course the photos just don’t do it justice. I would highly recommend everyone get a Configurations box, some Tissue Tape and 12 x 12 papers and try one of these!
Thanks for stopping by and sharing in my eventful weekend! We have a short week ahead with tons to do, and then hopfully some fun and relaxation over the holiday weekend. I hope you’re having a great Monday!
![]()
Taylored Expressions October Release Sneak Peeks Day 2
October 4th, 2011

October Release At a Glance
- We have sneak peeks to share Monday through Wednesday. All of the new products will be available for purchase on Thursday, October 6th at 8 am PST. You’ll find it all in the Fresh out of the Oven Department at the Taylored Expressions Store.
- Join us as a fan on Facebook for an early peek at the stamp sets, as well as a SPECIAL Facebook GIVEAWAY, on Wednesday night beginning at approximately 6 pm PST.
- Mystery Baker’s Dozen Blog Giveaway: Each day, one lucky blog commenter will be chosen by random draw to win a $10 TE Gift Certificate. Winners will be chosen from a different Baker’s Dozen blog each day and will be announced on Taylor’s blog on Release Day! Be sure to hop around to see all the sneak peeks and leave comments on each and every blog for more chances to win. Limit one comment per blog per day, please. Comments close Wednesday 10/5 at 7pm PST for the drawings.
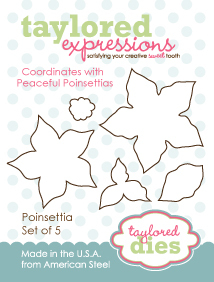
Welcome to Day 2 of the TE Sneak Peeks! We have 2 fabulous sets to show you today – Totally Tags and Peaceful Poinsettias. My sample showcases Peaceful Poinsettias illustrated by Nancy McKinney for the Whimsical Wishes collection. It’s a full size (5.75″ x 8.5″) set with 16 images and it has so many options for creating gorgeous poinsettias! You can stamp outlines and color with Copics, you can stamp solid images with ink, and you can die cut and layer to your heart’s content with the coordinating Poinsettia Taylored Die set! I had so much fun playing with this set and I know you’re going to be amazed when you see what the Baker’s Dozen came up with!
My project is a $2.49 picture frame I picked up at Michael’s. I wanted to frame the photo of Tessa that we used on our Christmas cards last year. Look at my sweet baby wearing her Christmas coat! (Click on the photos to see them larger.)
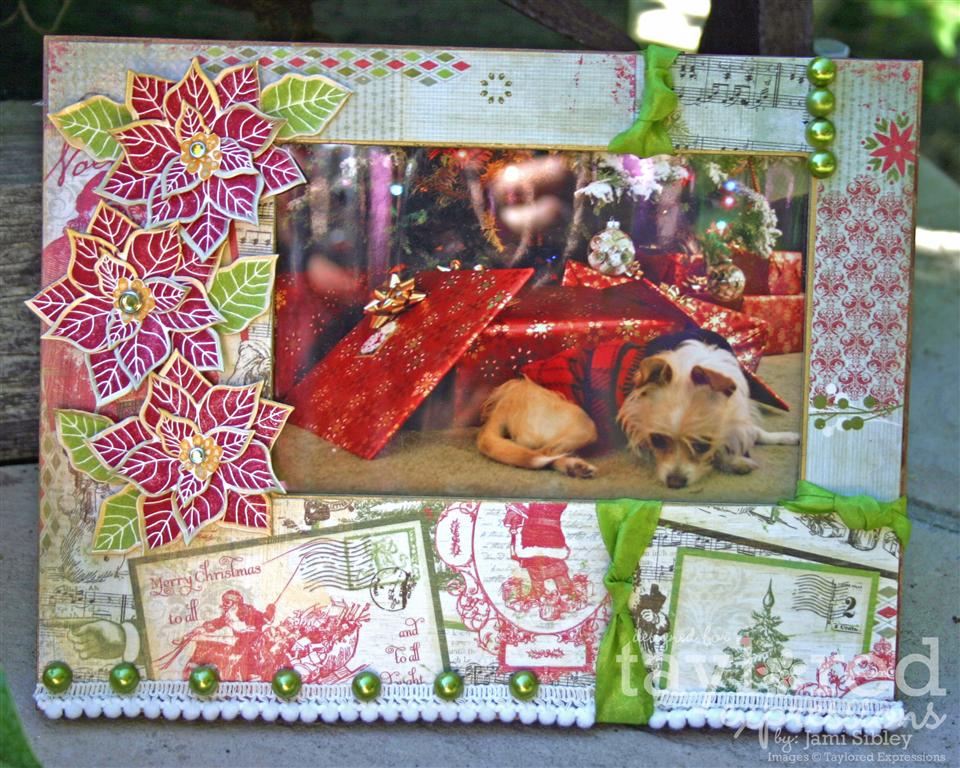
I used papers and ribbon from the Holiday Wonder Project Pantry (also available Thursday.) The papers were adhered with Mod Podge and then covered with Shimmer Mod Podge which has a pretty gold shimmery finish. The dimensional poinsettias are the star of the show though!
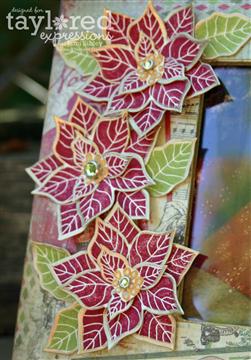
Here’s what I did to achieve this look:
- Stamped the solid layer images onto ivory cardstock with Cherry Cobbler, More Mustard, and Lucky Limeade ink
- Die cut all my pieces with the Poinsettia Taylored Dies
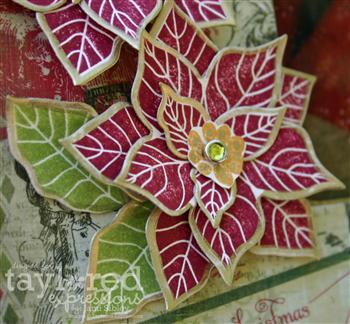
- Used a Krylon Gold Leafing Pen to go around all the edges – love the rich elegant look of this!
- Placed each piece on a piercing mat (a mouse pad would also work) and used an embossing stylus to emboss into all the veins on all individual layers and leaves
- Used my knuckle to impress deeply into the center of each flower layer
- Lined up the layers on the piercing mat and used my piercer to punch a hole for a rhinestone brad
- Attached all layers together with the rhinestone brad
Once I got going, all of those steps went pretty quickly. I’m excited to have a new Christmas decor piece and I’m anxious to play with this stamp set even more! Let’s see what the Baker’s Dozen has cooked up!
- Charmaine Ikach
- Danielle Lounds
- Jodi Collins
- Karen Giron
- Karen Motz
- Melissa Sauls
- Melody Rupple
- Regina Mangum
- Sankari Wegman
- Taylor VanBruggen
- Tori Wild
- Wanda Guess
- Jen Shults – Guest Designer
Thanks for stopping by! Even more peeks are on the way tomorrow!
![]()
My First Paper Bag Album
September 29th, 2011
Happy Thursday! Sorry for the delay. I had hoped to have this up by Monday, but it’s just always somethin’. LOL!
I held my September Stamp Class two weeks ago and the project was a paper bag album – my very first paper bag album ever! I had gotten gorgeous paper kits from My Mind’s Eye (Lush Collection) and was dying to do a special project with them in class. During my August class I spouted off that we would make paper bag albums, despite the fact that I had never made one and at that point really didn’t have a clue as to how it was done. But I had wanted to make one for years and this seemed like the perfect opportunity to learn! I watched a bunch of videos on YouTube, which I was extremely grateful for, but ultimately chose a more simplictic approach that worked really well for me. The Rocket Scientist helped me put together a video to show you the album page by page as well as a little tutorial on how it’s constructed. I even have a couple of tips in case you want to teach something similar in a class like I did. I hope you enjoy it.
[youtube]https://www.youtube.com/watch?v=V3uVPvlora8[/youtube]
Some of the ladies in my class asked that I post still photos also for easy reference. So here’s the book, page by page.
Here’s the cover (the scallop is made with the TE Medium Scallop Die and the leaf is a SU punch):

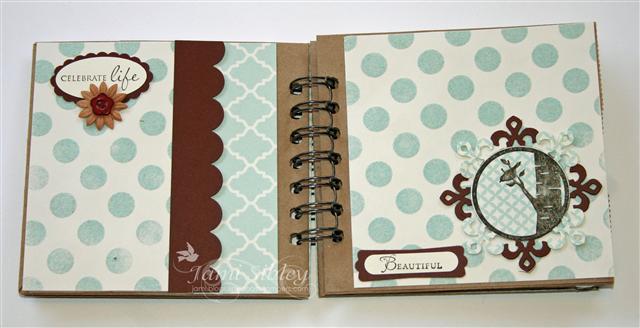
Pages 1 and 2:
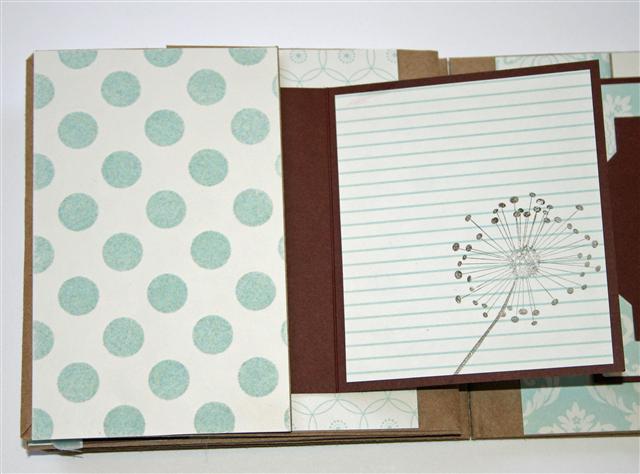
Pages 3 and 4 (under the scallop is a little pocket for a memento):
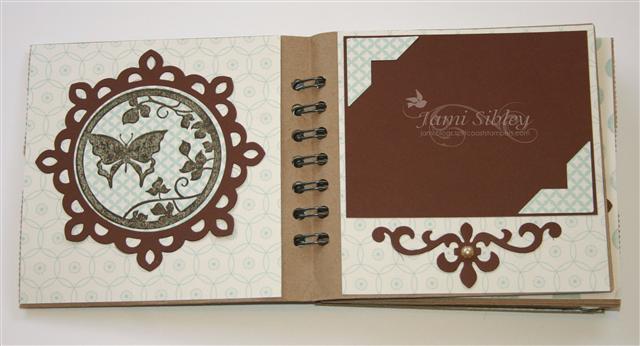
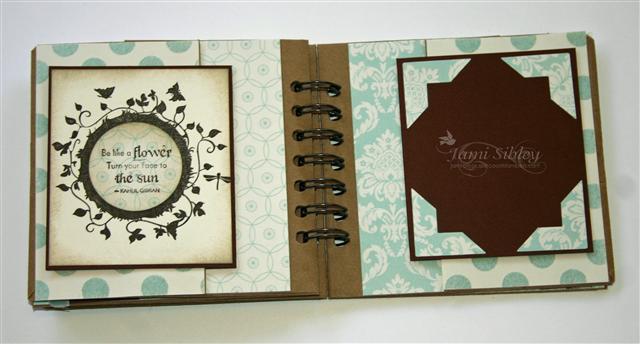
Pages 5 and 6:
Pages 7 and 8 (these are little fold-over cards tucked into pockets created by the feet/flaps of the bags):
Page 7 – showing the journaling card open:
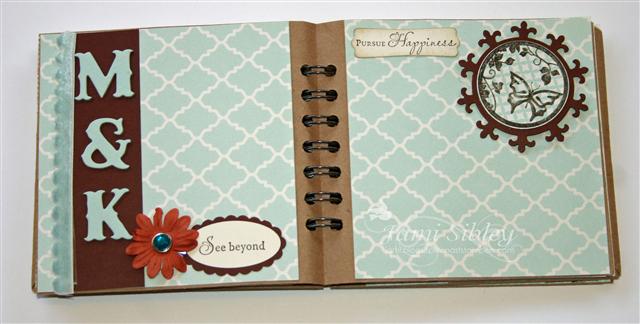
Pages 9 and 10:
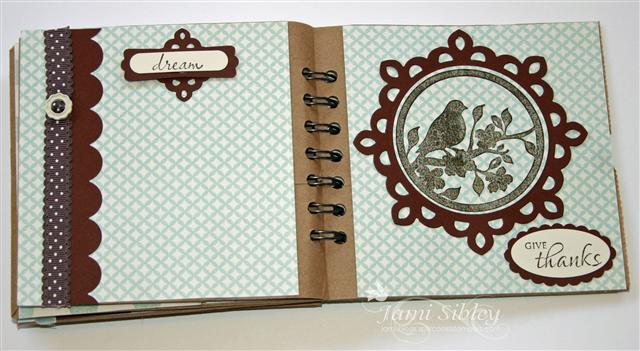
The insert cards (these are tucked into the 3 bag top openings):
This project was created with 3 brown lunch sacks, the MME Lush kit, my Cinch Binding Machine, Spellbinders Fleur de Lis Dies and stamps from Taylored Expressions: Embrace Beauty, Summer Afternoon, Celebrate Life, Discover Your Wings.
I created mine for my niece and her husband who will be celebrating their First Wedding Anniversary soon with a little trip. There are plenty of spots to add photos as well as opportunities to journal about the trip. I hope they like it. I was tickled pink with it! I had so much fun with this project that I want to do one for Christmas now! Oh and did you see the card I created to go with it? Just scroll down one post or click here.
So tell me, have you ever made a paper bag album? If you haven’t, you really need to! Check out my video and let me know if you have any questions. I will admit that this was a big project for an evening class, but really it went pretty smoothly and I think everyone loved the result. Next month we’re back to cards though. 😉
![]()
Birthday Bag
July 19th, 2011
Happy Tuesday! It seems so weird to be getting ready to go to work while seeing all the photos from CHA on my Facebook feed. But, alas, I can’t just sit and daydream all day. LOL! Before I head out to the office I wanted to share another prjoject we made in my class last week. This might be my favorite.
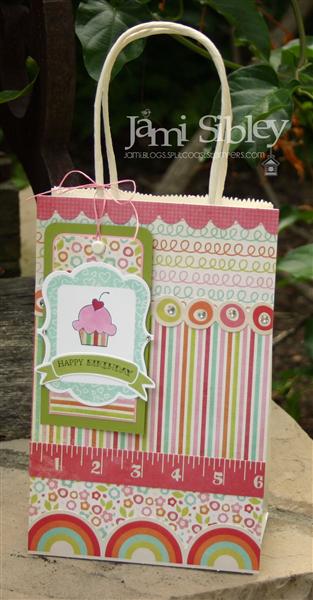
It’s a birthday gift bag and matching tag. I had almost forgotten how easy and fun it is to decorate custom gift bags. I always keep a stash of white and kraft bags on hand, but am often in too much of a hurry when it comes time to wrap a gift to actually decorate them. This bag is approximately 5.25″ x 8.5″ – perfect to be covered with a half sheet of cardstock and some fun patterned papers. I think I might do up a few of these to have on hand. 🙂

Here’s a close up of the tag made with TE stamp sets Kid at Heart and It’s a Banner Day 1 along with the coordinating TE dies for both sets. Inks are the new SU Pool Party and Lucky Limeade. I think that would also make a really cute focal point on a card!
Thanks for stopping by. I gotta run. Have a great day!
![]()
Rescue Remedies Card Set
July 7th, 2011
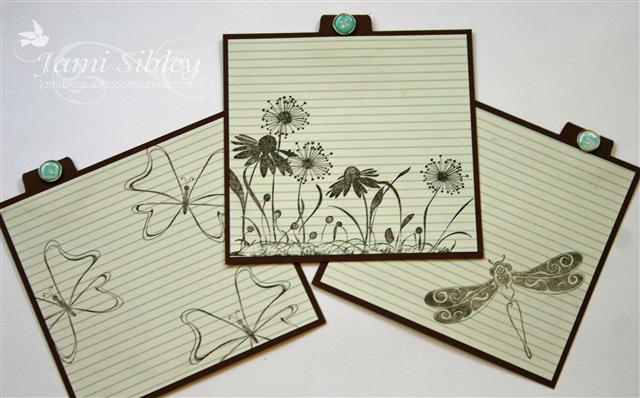
Happy Thursday! I printed out the Sweet Sunday Sketch Challenge over the weekend and sat down to play with it on Monday. I have a basket of newer stamp sets and sets I’ve come across recently that I want front and center so I’ll use them. As I flipped through the sets in the basket with sketch in hand I found the perfect set to use – Rescue Remedies from Waltzing Mouse. I recently purchased the 6×6 pack of Hometown Summer paper by Pink Paislee and thought they would be fun with this stamp set. As I got everything out to make choices, I couldn’t make just one card, so I made a set of 4 instead. I just love how they turned out and it was so much fun mixing colors and patterns and finding ribbons and such!
Here’s the full set –
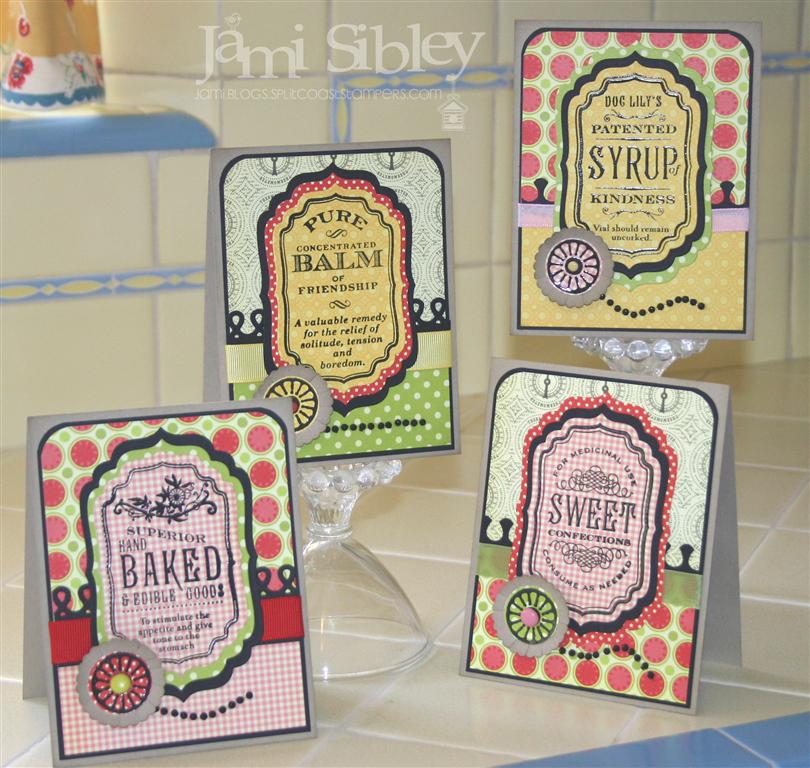
It’s funny because when we saw this line of paper of CHA, Taylor fell in love with it, but it didn’t do much for me. Then several of the Baker’s Dozen used it in samples for Green Acres during the May release and I decided I needed it. Well now I absolutley LOVE it! I embossed the images with black craft/pgment ink (didn’t I mention recently that I hate using that stuff?) and clear embossing powder. Such a bold look! The black decorative strip is from a TCP border die – I used the die cut piece on 2 cards and the left over piece on the other 2. I recnely purchased Spellbinders Labels Four Small dies to go with the the Labels Four that I already had. I’m so glad that Spellbinder finally has started to make “small” versions of some of the poplular lables dies. I wish they would have named them 4 1/2, etc. because I think the word small might confuse some people. It just means that the new sets layer in between the original sets – something so many of us have wanted for so long! Here are individual photos of each card. Click on any photo to see it larger.


I put them all on kraft card bases and used black cardstock matting and black rhinestones to tie in with the black embossing and make everything pop! Aren’t they cute? I think they’ll make a great gift!
Thanks for stopping by. I’ll be back tomorrow with a new Taylored Expressions Sketch Challenge.
![]()
Thankful – for so many things…
November 18th, 2010
Happy Thursday! Not only is it time for the monthly Taylored Expressions Blast from the Past Blog Hop, but I’m also teaching my monthly stamp class tonight! And as things worked out one of my class projects for tonight fits perfectly into the theme of the hop “THANKFUL”. I am super excited about this project and I hope you like it too! Click on any of the photos to see them larger.
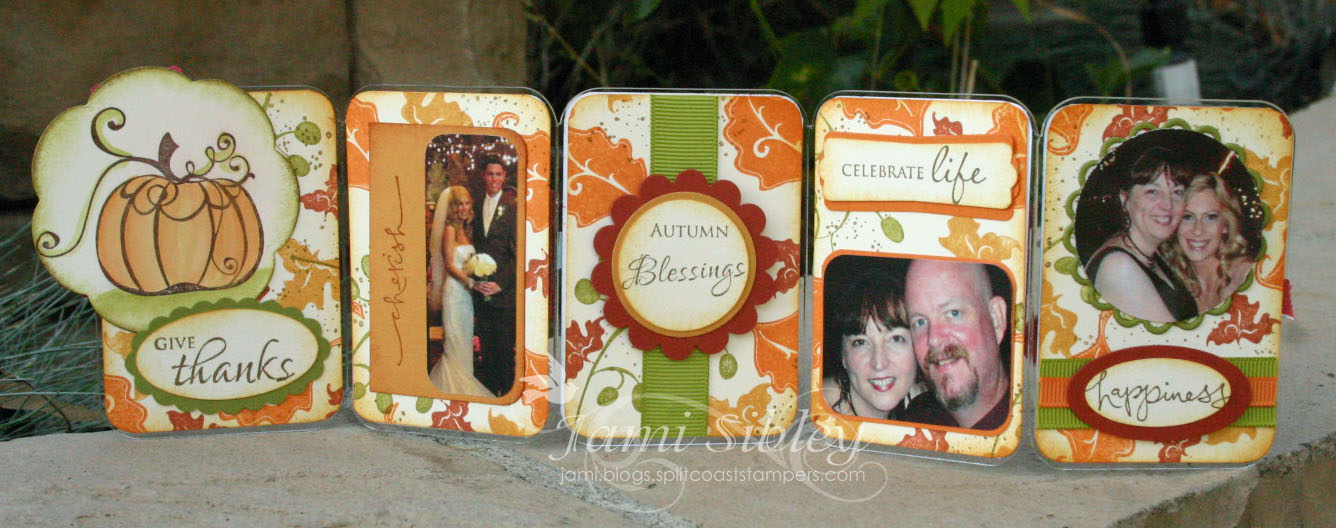
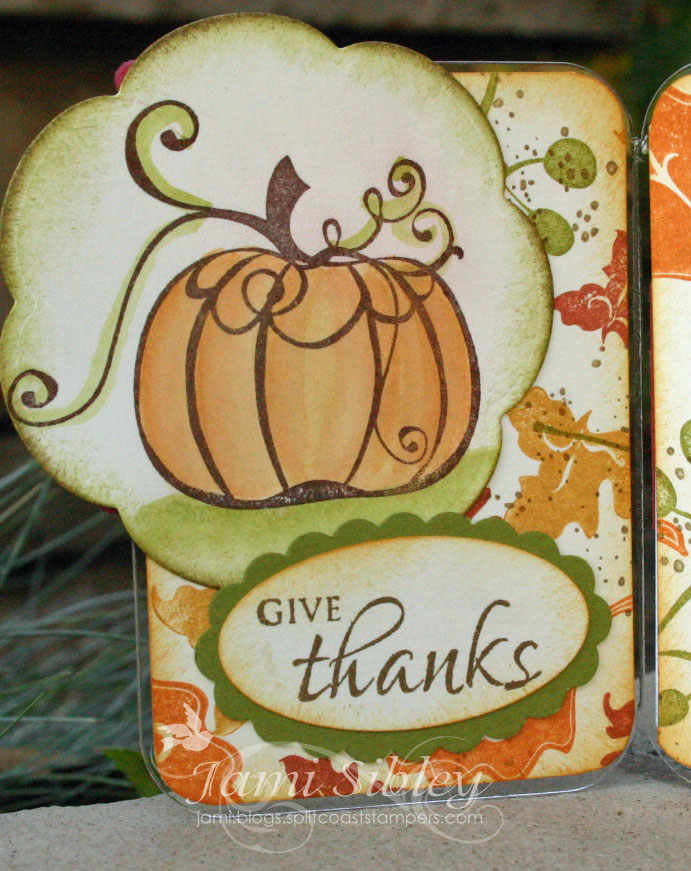
We will be decorating an acrylic mini accordion album from the TE Store using the TE stamp set Celebrate Life (that’s the Blast from the Past part) as a special home decor project. We’ll stamp a half sheet one sheet wonder and cut it into the panels and then embellish with photos and sentiments. Here are some closer looks at the panels.

I stamped the pumpkin with brown Stazon and watercolored it with Mustard and Pumpkin SU dye ink. It was cut out with the Blossom Nestabilities.
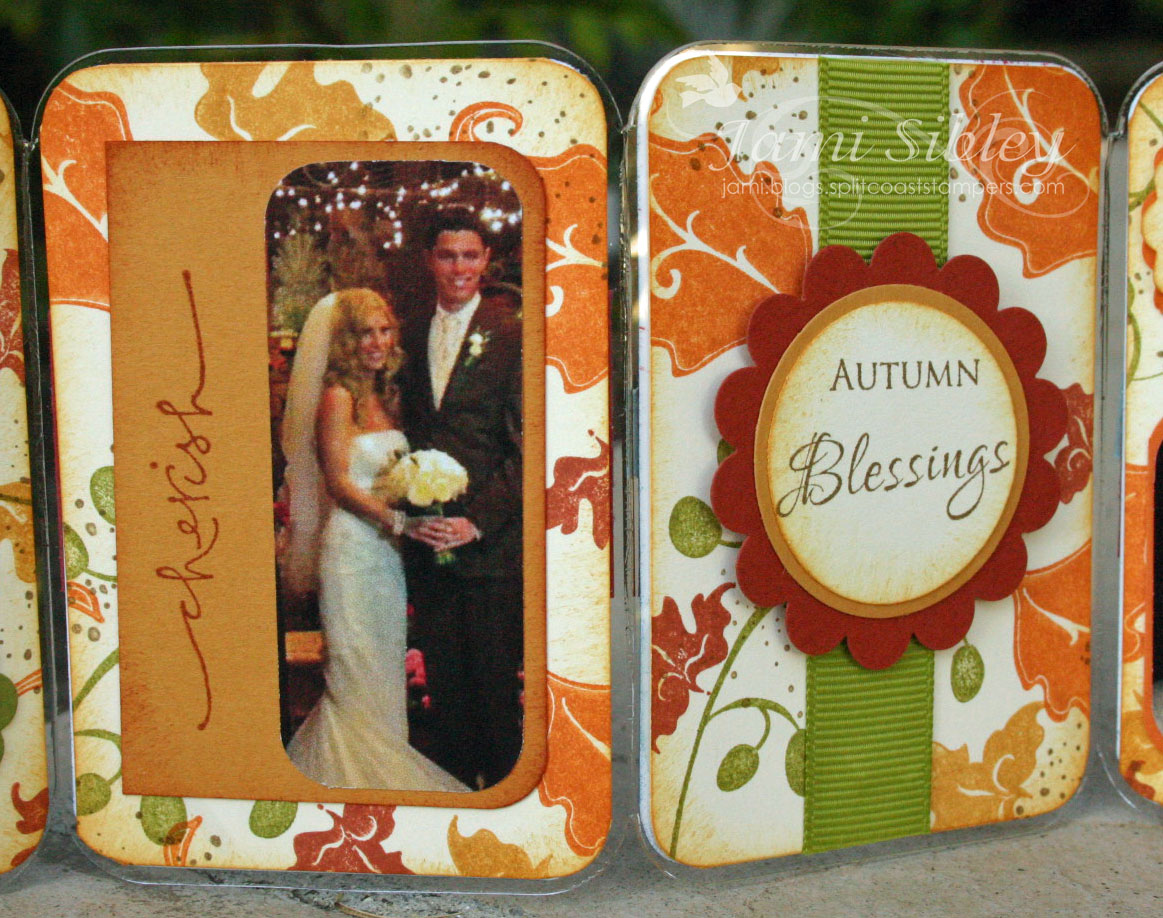
I used photos from our niece’s gorgeous Fall themed wedding. These pictures were just printed out on regular copy paper on my home computer. I can always replace them later with better quality photos, but I was actually surprised at how good these look.
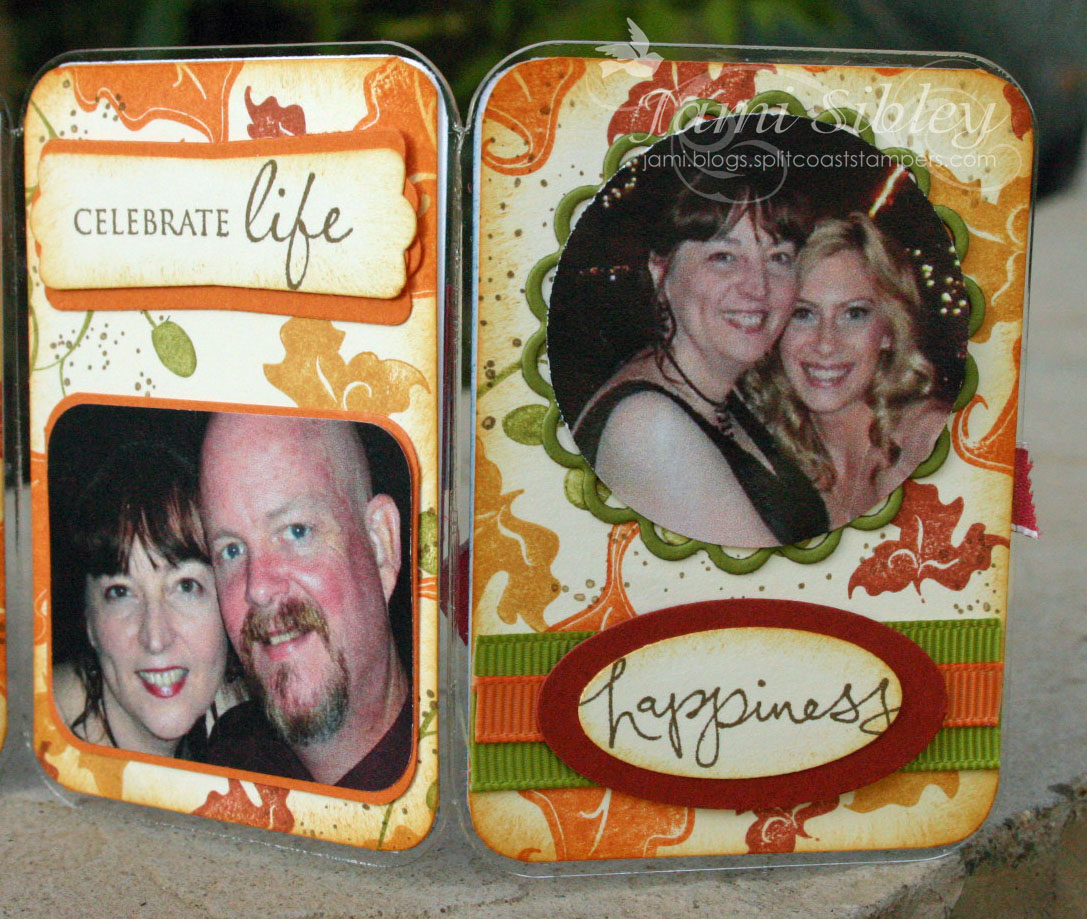
Isn’t this such a FUN project? I needed to keep it simple enough to work in a class setting, but I would like to do another now where I could go crazy using anything I want. By the way – I tried two types of adhesives to attach the cardstock panels to the acrylic – Scotch Quick Dry and Tombow Multi – and both worked great! I was worried that might be a bit of a problem, but not at all.
Here ‘s the full list of players in today’s TE Blast From the Past Blog Hop –
| 1. | Taylor VanBruggen | 19. | Lisa Hjulberg | |
| 2. | Monika Davis | 20. | Joan Ervin | |
| 3. | Rebecca Ednie | 21. | Chris Loritsch | |
| 4. | Regina Mangum | 22. | Jen Arkfeld | |
| 5. | Tracy Clemente | 23. | Jen Tapler | |
| 6. | Cassie Trask | 24. | Peggy McCurry | |
| 7. | Pattie Goldman | 25. | Melody Rupple | |
| 8. | Sankari Wegman | 26. | Michelle Single | |
| 9. | Libby Hickson | 27. | Charmaine Ikach | |
| 10. | Kelly Collins | 28. | Stephanie Kraft | |
| 11. | Cyd Paiva | 29. | Jami Sibley | |
| 12. | Bonnie Ratzloff | 30. | Tangii Crain | |
| 13. | Karen Motz | 31. | Arielle Gordon | |
| 14. | Stacey Schafer | 32. | Jessica Willison | |
| 15. | Dana White | 33. | Ashley N Newell | |
| 16. | Terri Trotter Earley | 34. | Bronwyn Velazquez | |
| 17. | Jodi Collins | 35. | Donna Baker | |
| 18. | Carole Chesser |
I bet you thought I was finished, huh? Nope! Not only are we decorating one side of the acrylic mini accordion album for Autumn…we are also decorating the other side for Christmas!!! Wanna see? Click on the photo to see it larger.
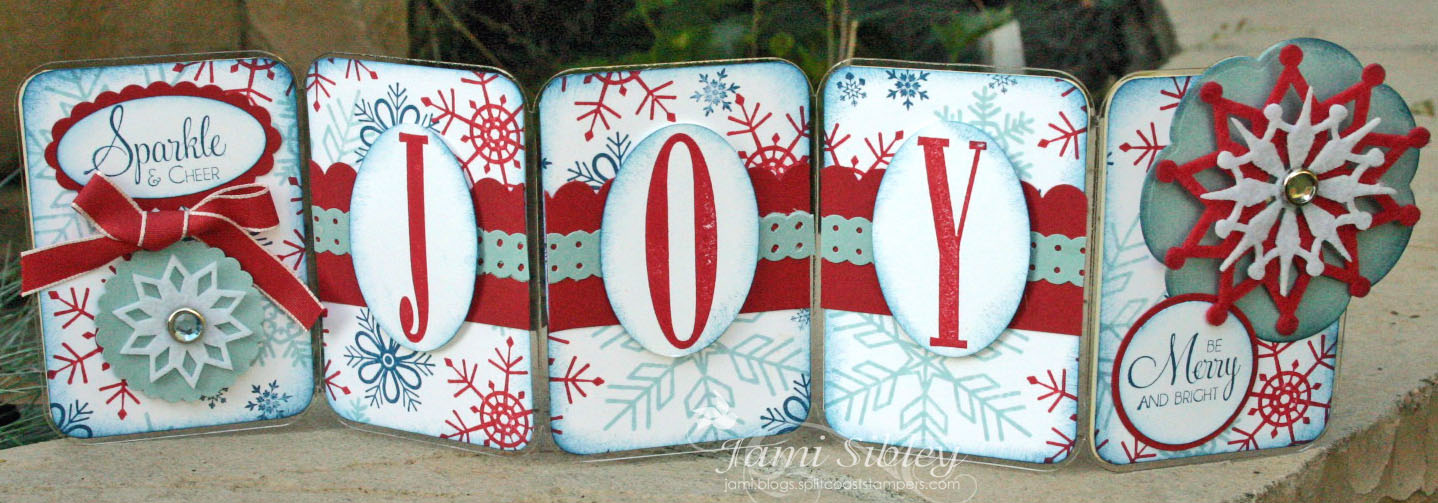
For this side we’re using TE Winter Wonderland and Sparkle & Cheer in Baja Breeze, Riding Hood Red and Not Quite Navy. I got the felt snowflakes from the SU Clearance Rack recently (but you could certainly die cut your own) and the large alpha stamps are retired SU. Notice how I used the blossom die back to back for the pumpkin on one side and the snowflke on the other?
Let me know if you’d like to see more detail on how this project is done. I might even try to make a little video over the weekend. These would make great gifts for teachers, co-workers, and friends. I can hardly wait to help my class create these tonight! Thanks for stopping by.
![]()


