Taylored Expressions Release Day
September 3rd, 2015
Happy Thursday! It’s Release Day at Taylored Expressions! All the products that have been peeked this week are now available in the TE Webstore! I have quite a variety of samples to share with you today. As I mentioned on Monday, once I got started playing with this stuff, I just couldn’t stop. And really, I’ve only touched the tip of the ice berg with this incredibly fun release! I hope you’ll head over to the TE Blog (once you’ve finished my post, of course!) and see all the new products and go on the hop with the whole Creative Team! SO.MUCH.TO.SEE!!!

My first sample above is a simple sympathy card featuring the new On the Prairie Embossing Folder. I used some Prismacolor pencils to do just a little bit of coloring and then the whole panel was spritzed with Sheer Shimmer Spritz – Sparkle. Of course, you can’t see it in the photo, but it gives the card a beautiful subtle shimmer.
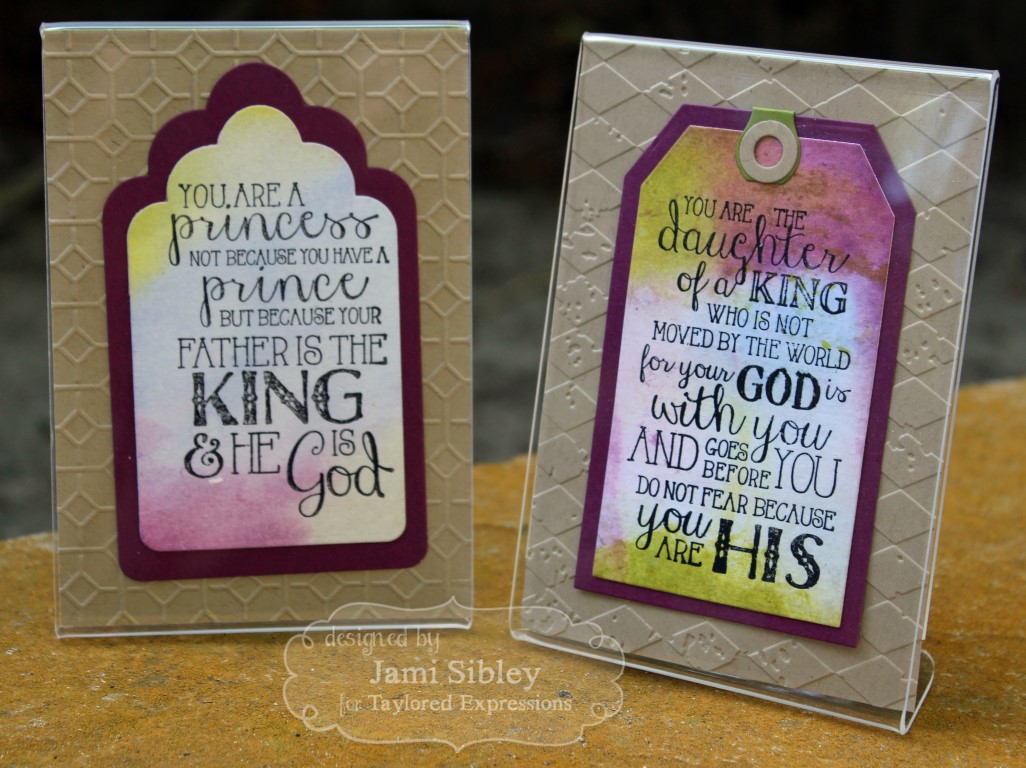
Next up is a pair of little art pieces I made for the girls who work with me in the church office. These are 3.5″ x 5″ acrylic stand up frames – perfect for little desk decor. Of course I used colors to match our office. I used watercolor paper for both of them and embossed these awesome new A la Carte sentiments – He is God and Daughter of the King with black pigment ink and clear powder.

For the first one above, I went for subtle color by painting on the Distress inks with a waterbrush onto very wet watercolor paper. The one below is more bold. I used the smoosh technique. I rubbed the ink from the little Distress cubes onto a large acrylic block and then smooshed that onto the damp watercolor paper.
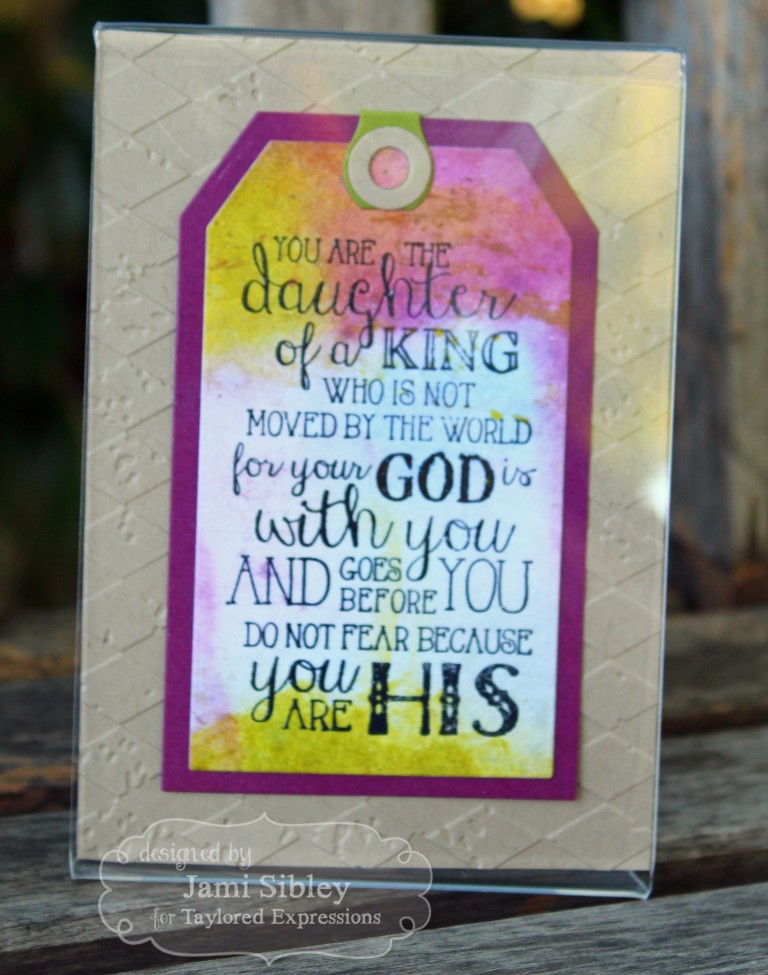
Nothing is ever quite perfect. Oops – I realized after this was all put together that I forgot to punch the hole out at the top of the tag. LOL! Oh well! My last sample for the week is below and it’s one of my favorites! I love this adorable Petite set, Pixie Dust, with the princess illustrated by Danielle Lounds. I used two of the new Little Bits dies with the previously released Color Block Cutting Plate. This was such a fun card to create!

Thanks so much for stopping by. I haven’t blogged this much in a week in a very long time! I do hope you’ll take some time to check out the whole hop today – click over to the TE Blog for the hop list – and maybe treat yourself to some shopping at Taylored Expressions! If you have a minute, please let me know what your favorite product is from this new release!
Supplies
Sympathy
On the Prairie Embossing Folder, Care & Comfort II Stamp Set, Prismacolor Pencils, Sheer Shimmer Spritz – Sparkle
Royal Treatment
Stamps: Pixie Dust
Dies:Color Block Cutting Plate, Little Bits – Carriage and Crown
paper: Hellow Happiness Matched Kit
Other: Wink of Stella Gold Brush Pen, Copics, foam tape
Desk Sign – Daughter
Stamps: Daughter of the King
Dies: Tag Stacklets 2, Tag Reinforcements
Embossing Folder – Harlequin
Tag Background created with Distress inks smooshed onto watercolor paper. Sentiment was stamped in black pigment ink and heat embossed with clear powder. Tag was spritzed with Sheer Shimmer Spritz – Sparkle
Desk Sign – Princess
Stamps: He Is God
Dies: Tag Stacklets 1

Tag Background created with Distress inks watercolor with a water bruch onto watercolor paper. Sentiment was stamped in black pigment ink and heat embossed with clear powder. Tag was spritzed with Sheer Shimmer Spritz – Sparkle
Taylored Expressions September Sneak Peeks, Day 3 – More Happy
September 2nd, 2015
Happy Wednesday and welcome to day 3 of the Taylored Expressions Sneak Peeks for September. Today I have two more cards to show you featuring the new stamp set C’mon Get Happy along with some adorable new dies, Mini Bloomers and Bloomers Greenery.
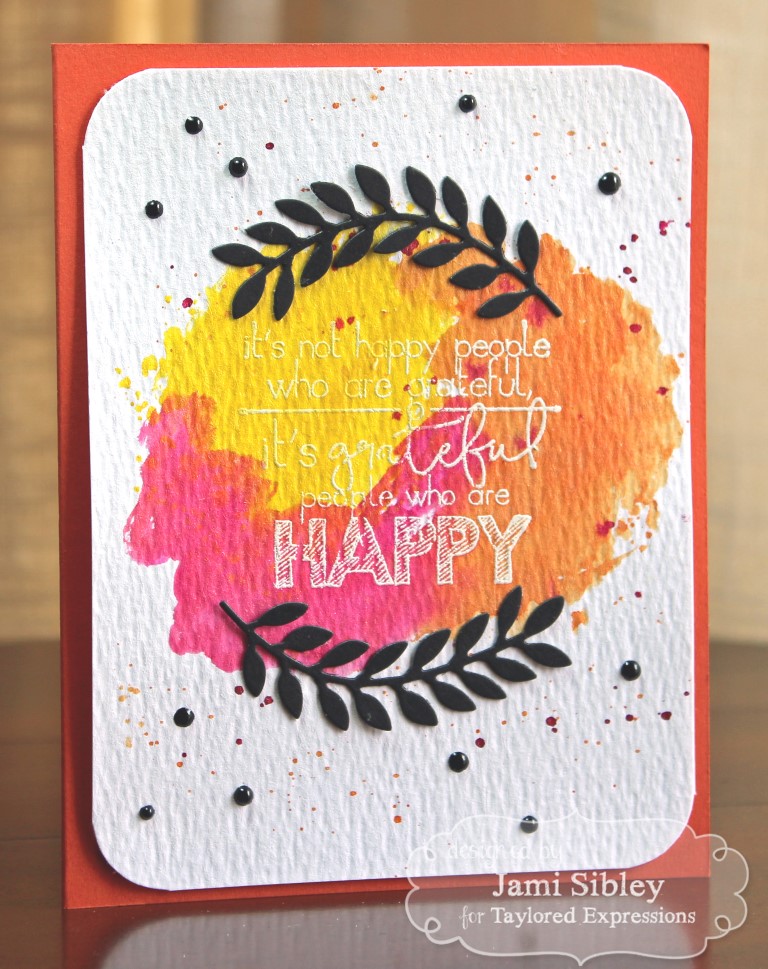
For my first card, I tried embossing the sentiment in white (white ink and white powder) on to Tim Holtz watercolor paper. The result was cool, but a little hard to read. So, in the sample below, I used black pigment ink and clear embossing powder and I switched to the smooth side of the watercolor paper. In both samples, I used Twinkling H2O’s to paint over the embossed sentiment. (Click on them to see them larger.)
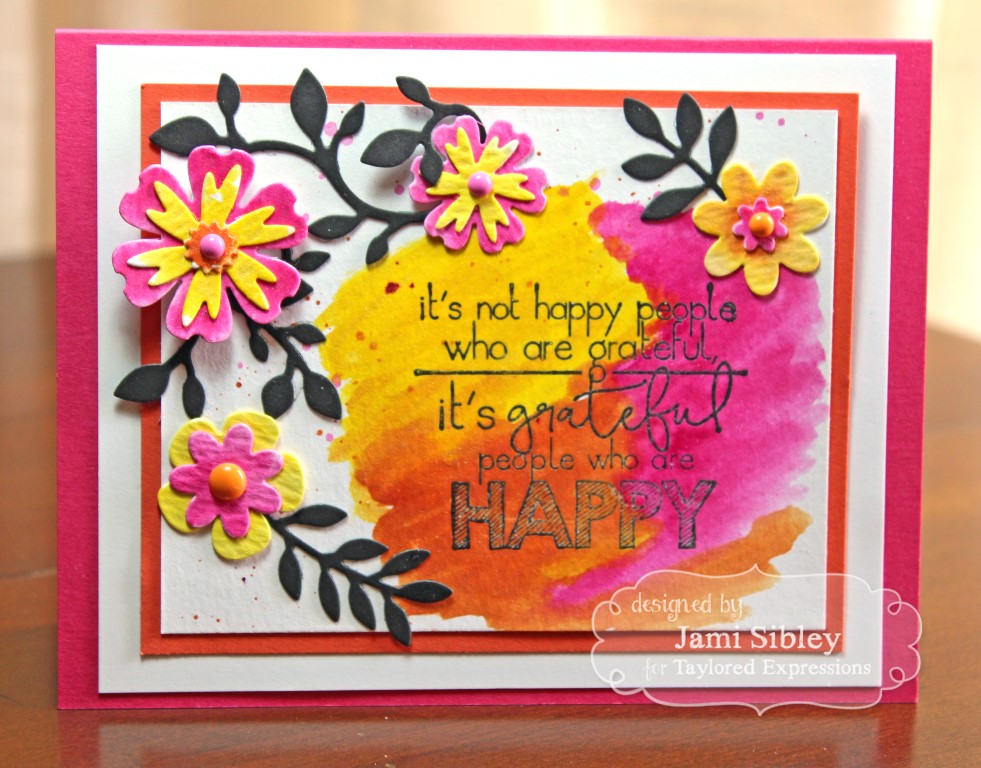
For this card, I cut the blooms from watercolor paper and painted them with the same Twinkling H2O’s used over the sentiment. The photo just doesn’t capture the pearly, sparkly happiness of this card!
Supplies
Happy Bloomers
Stamps: C’mon Get Happy
Dies: Mini Bloomers, Bloomers Greenery
Other: Twinkling H2O’s, Enamel Dots, Clear Embossing Powder over black pigment ink, Foam tape
Taylored Expressions is celebrating Release Week with some fabulous giveaways! Visit the TE Blog each Sneak Peek Day this week for details on how you can enter to win.
Happy Greenery
Stamps: C’mon Get Happy
Dies: Bloomers Greenery
Other: Twinkling H2O’s, Pico Embellisher, White Embossing Powder over white pigment ink, Foam tape
Thanks so much for stopping by! There are a ton of new products being introduced today, so I know you’ll want to hop over to the TE Blog to get all the new product info and to get links to the Creative Team playing in the hop today!
Taylored Expressions September Peeks, Day 2 – C’mon Get Happy!
September 1st, 2015
Welcome to Day 2 of the Taylored Expressions September Sneak Peeks. TE has a new stamp set coming out that I am particularly excited about it. It’s called C’mon Get Happy. I don’t know about you, but I love making cards just for the fun of doing it. I especially love scene building. But often, when I am almost done, I struggle to find the right sentiment. I often want something generic, like “thinking of you” or “just because”, or “sending you smiles” and that’s where this set comes in. It’s a bunch of simple, happy sentiments both large and small to finish off just about any card!
Today I have two similar cards to share with you. I’ll tell you why they are so similar, after you take a look. First is the card I set out to make.
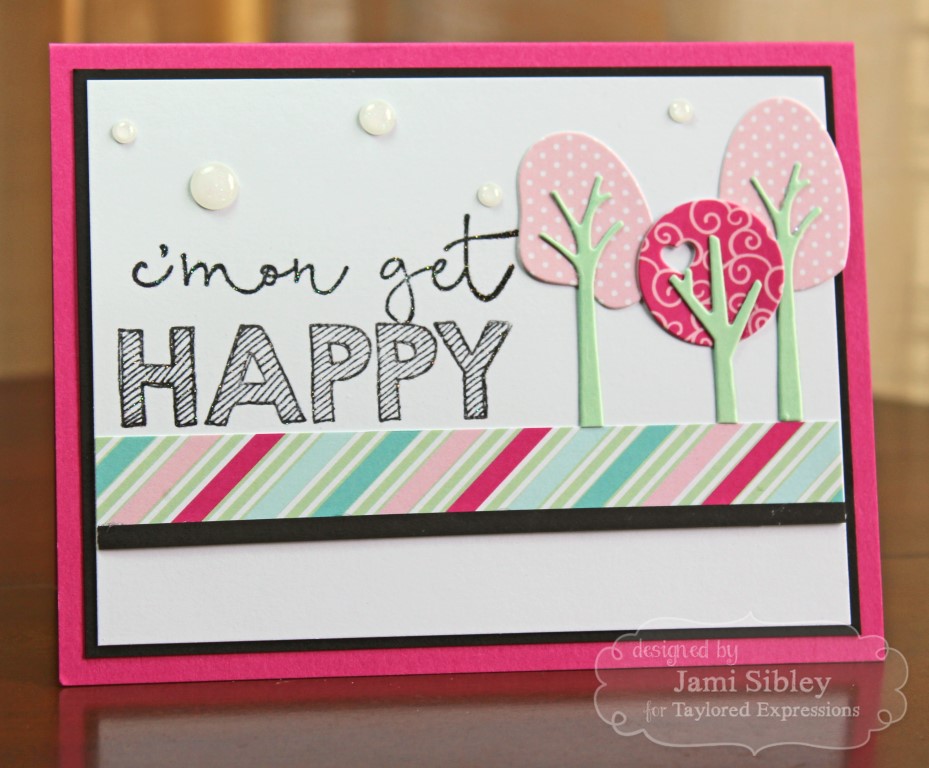
This card features the new Build-a-Scene Trees. As soon as I got these dies, I knew I wanted to create some pink trees! Happy, right? Hard to see in the photo, but the sentiment was stamped in black pigment ink and heat embossed with kaleidoscope embossing powder for a softer sparkly look.
Here’s my second sample.
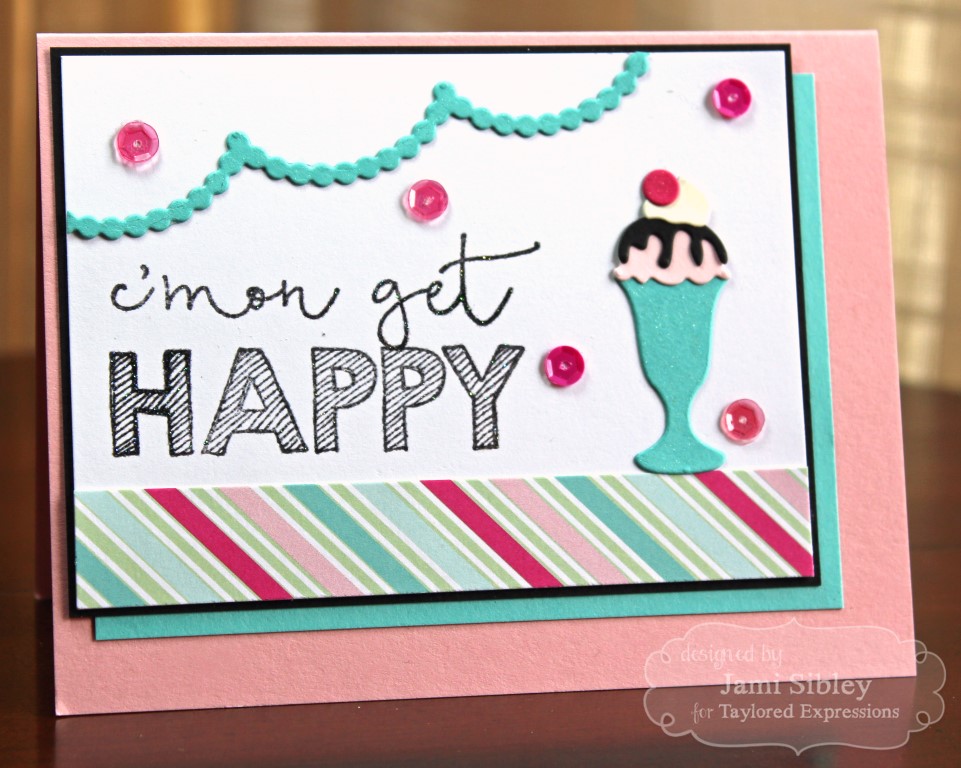
This time I paired the sentiment with the new Little Bits – Ice Cream Sundae die and added one of the banners from Skinny Mini Party Borders die set.
So why are these cards so similar? Well, I started off to execute my vision for the first card, but before I got the trees adhered I somehow managed to smudge black ink along that bottom white portion of the main panel. Have you ever done that? I was so sad, but I started over. When I was done with the tree card, I decided there had to be a way to save my first attempt. I sliced that bottom portion off and away I went! The lesson here: don’t be too quick to give up and throw something in the trash!
Supplies
C’mon Get Happy Trees –
Stamps: C’mon Get Happy
Dies: Build-a-Scene Trees
Paper: Hello Happiness Matched Kit
Other: Doodlebug Glitter Sprinkles – Lily White, Kaleidoscope Embossing Powder over black pigment ink
Taylored Expressions is celebrating Release Week with some fabulous giveaways! Visit the TE Blog each Sneak Peek Day this week for details on how you can enter to win.
Happy Sundae –
Stamps: C’mon Get Happy
Dies: Skinny Mini Party Borders, Little Bits – Ice Cream Sundae
Paper: Hello Happiness Matched Kit
Other: Wink of Stella Clear Brush Pen, Doodlebug Sequins, Kaleidoscope Embossing Powder over black pigment ink
Thanks so much for stopping by! There are a ton of new products being introduced today, so I know you’ll want to hop over to the TE Blog to get all the new product info and to get links to the Creative Team playing in the hop today!


