Taylored Expressions November Peeks – Calendar Critters
November 4th, 2015
Buckle your seat belt – I have a lot of stuff to share today as part of the Taylored Expressions November Sneak Peeks! You know that I’m always excited about TE releases, but I am over the moon about this particular suite of products:
Calendar Critters stamp set
Calendar Critters Coordinating Dies
Critter Correspondence stamp set
Build a Scene Calendar dies
Have you seen the cute 3×4″ pre-printed calendars that TE has had in the store the past couple of years? I have tried/wanted/hoped/wished to decorate these for gifts, but have never accomplished the task. While there are many possibilities for stamps and dies to work with those calendars, I wished for a cute, contained set that would simply cover all 12 months and fit just right. Well… here you go! Danielle illustrated these little critters and she hit it out of the park! Are you ready to see some samples? Grab a cuppa and here we go…. (click on any photo to see it larger.)

The Calendar Critter stamp set includes 12 adorable critters along with a word or short phrase for each month of the year. Let’s see some close-ups.
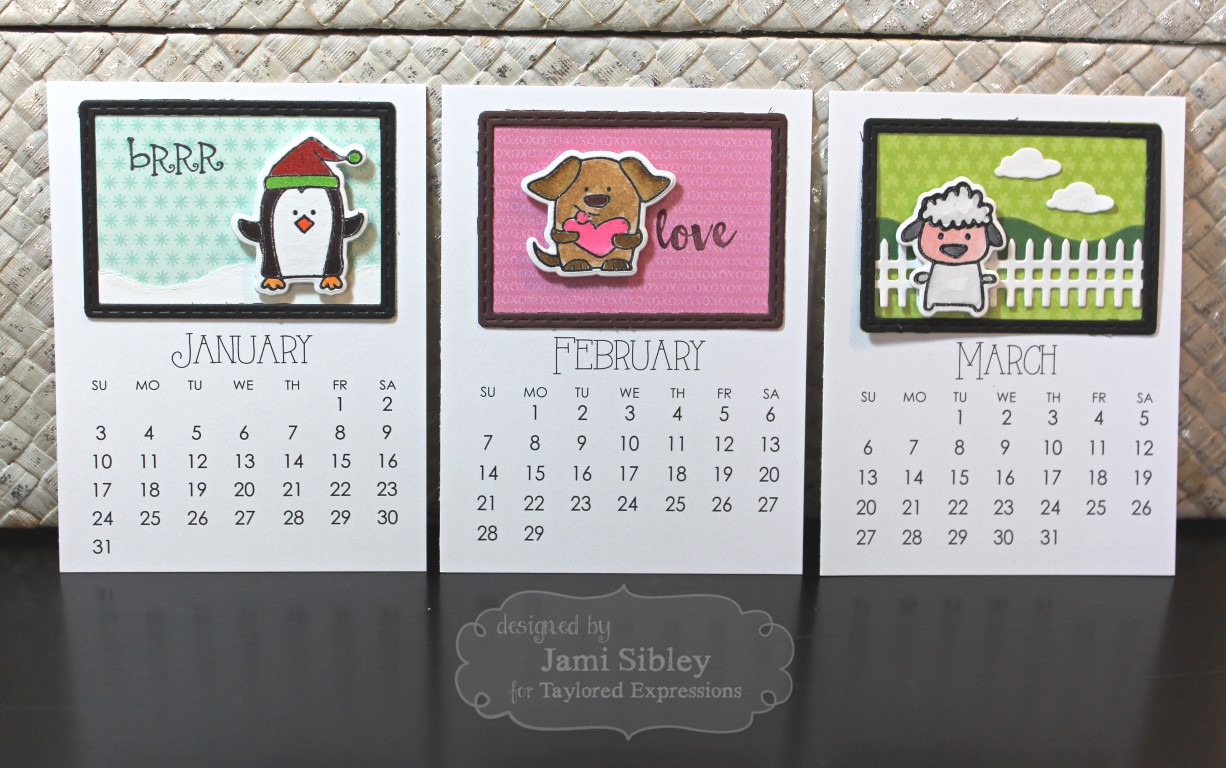
Of course there is a coordinating die set, so each little critter can be cut out. I popped all mine up on foam tape.
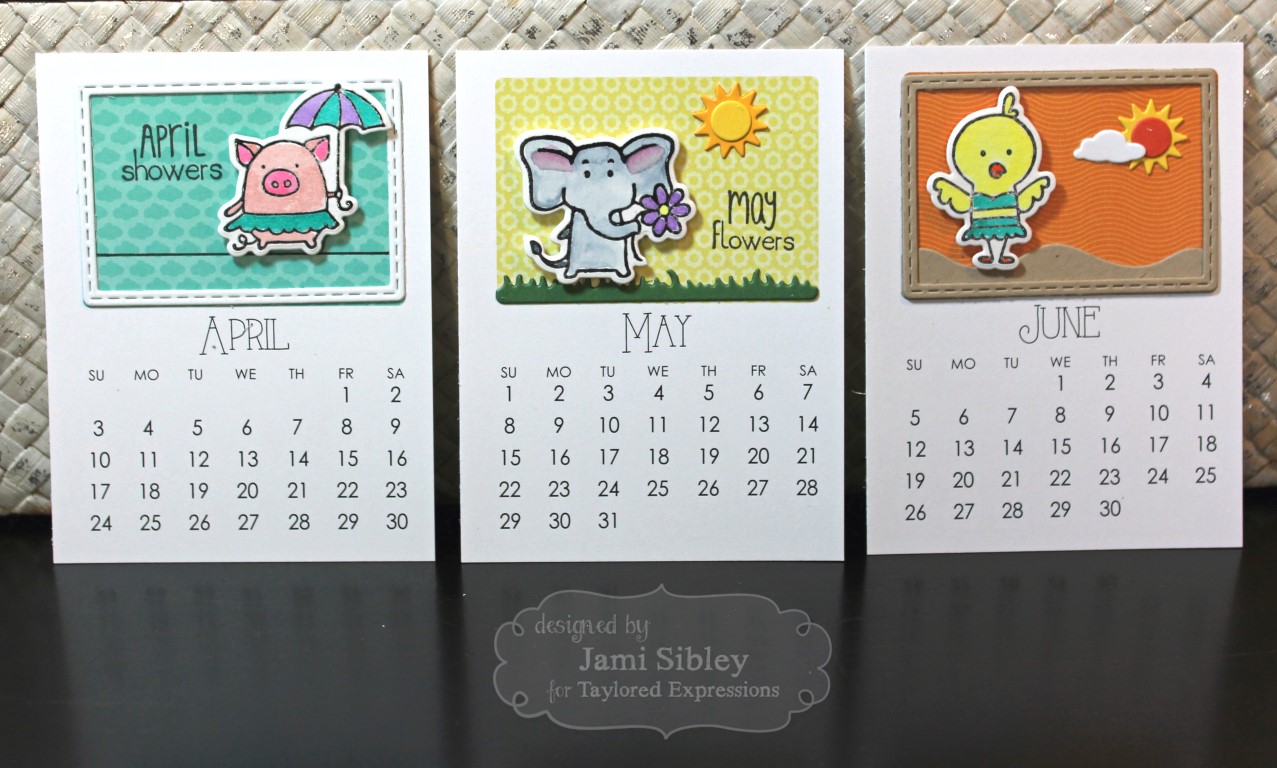
Plus, we have this perfect little die set called Build a Scene – Calendar. It includes a stitched frame, a mini rolling hill, mini grass, fence and sky stuff (cloud, sun, moon). ACK! Cute or what??
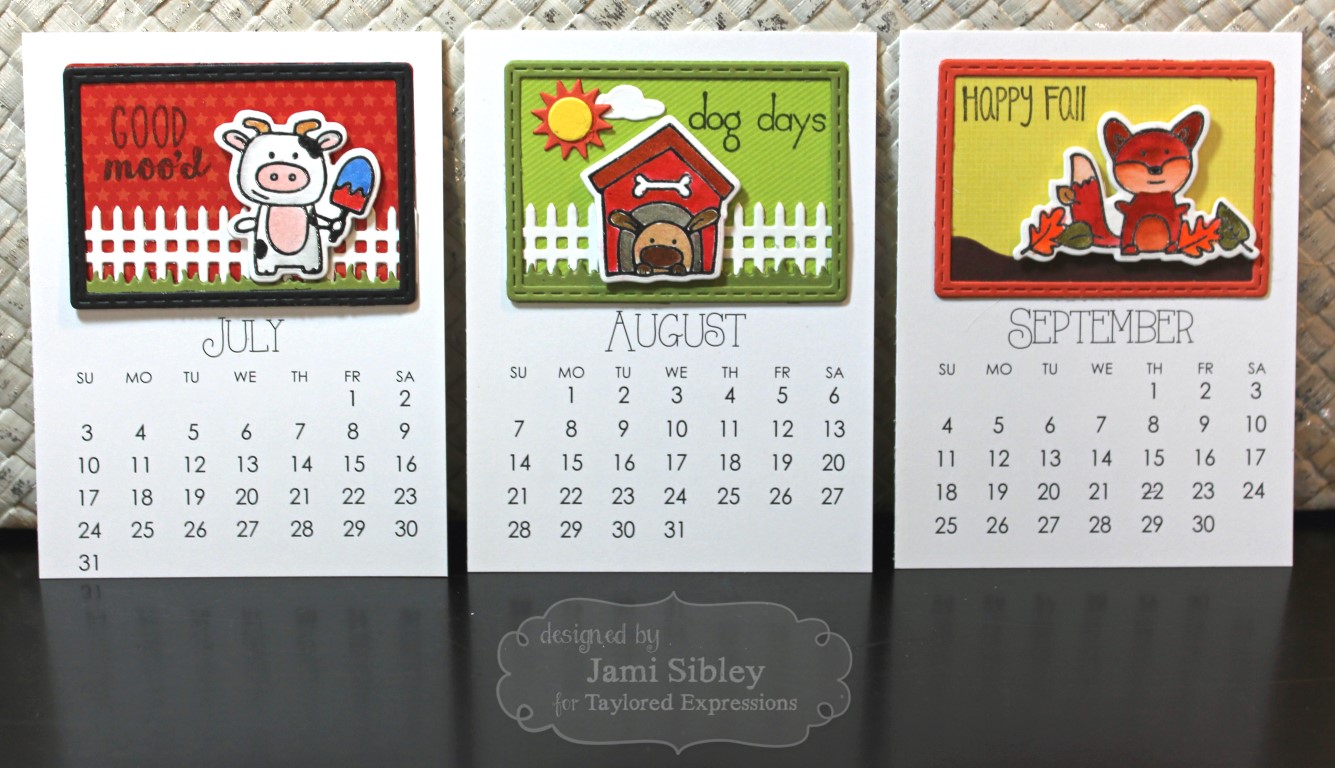
So, with the one stamp set and two die sets, there are almost endless possibilities for ways to put together calendar pages!

Seriously, how can you resist this! But, wait! There’s more! The Critter Correspondence stamp set supplies you with 12 sentiments to make each critter the focal point of a card! Creating card sets has always been one of my very favorite stamping projects. I had so many ideas for these sets, that instead of creating one set of 12, I decided to make 3 sets of 4 to show some different possibilities.
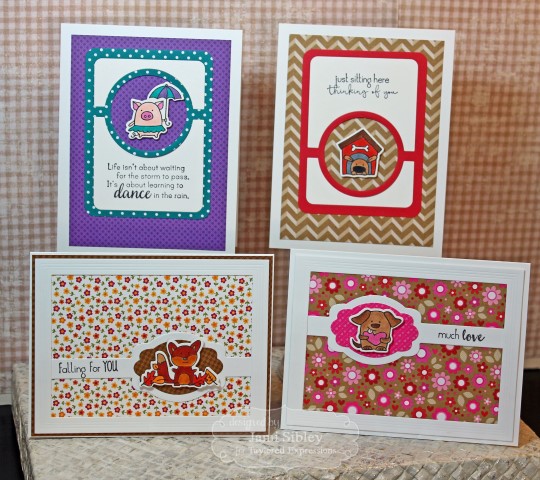
In this set, I’ve used the largest of the Frame in Frame dies along with the Band It 2 dies on the bottom 2 cards. On the top two cards I used the Circle Showcase die. I have to tell you something really funny. When we were developing the concept for this set, I actually dreamed of the pig image. I saw a pig in a tutu holding an umbrella and walking a tightrope. When I woke up, I immediately e-mailed the idea to Taylor. I thought for sure she would just laugh and think I was crazy, but she actually asked Danielle to draw it! I love it so much!
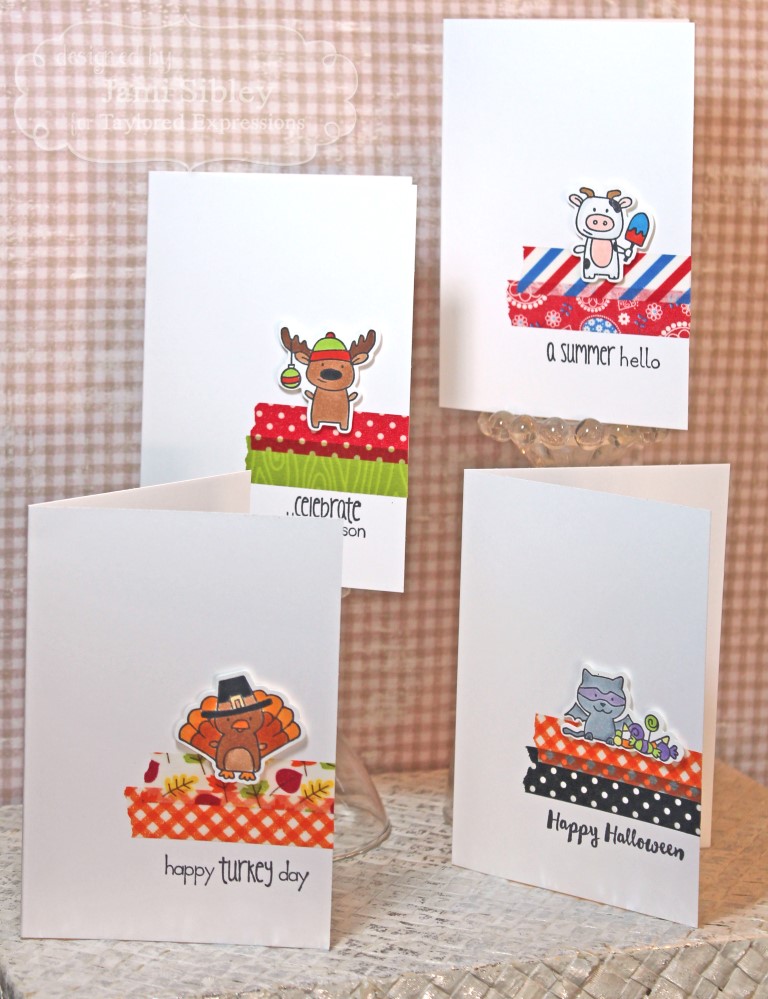
Here’s a really simple set that allowed me to dig into my washi stash. It would be awesome to make all 12 of these and give them as a gift! Another plus – the coloring is quick and simple.
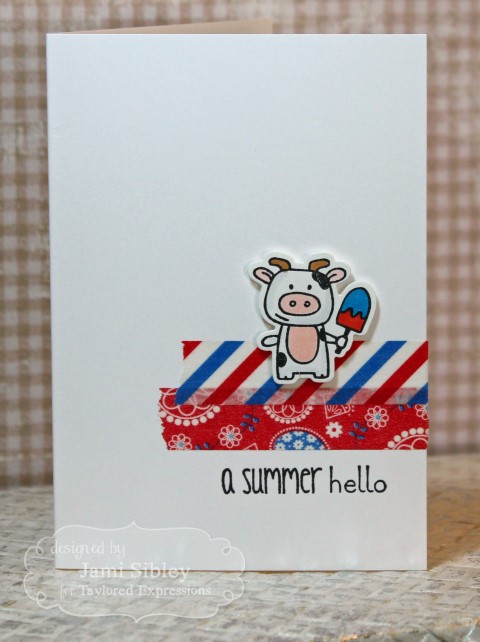
This cow holding a popsicle is another one of my favorite images!

For my 3rd and final set, I had the idea of creating a watercolor wash background for each image. I had some small pieces of Tim Holtz Ranger watercolor cs leftover from a previous project. I used my new Zig watercolor markers to scribble onto an acrylic block and smooshed that on to to little panels. Once that was dry I spritzed them with Sheer Shimmer Spritz – Sparkle. So so pretty in person! For a little extra interest I used the two new TE embossing folders Lots of Dots and Braided. This time I used the stitched frame die from the Build a Scene – Calendar set.

So, you can see that there are tons and tons of possibilities for these super cute little critters! I have a couple of really quick tips for using these stamps ans dies.
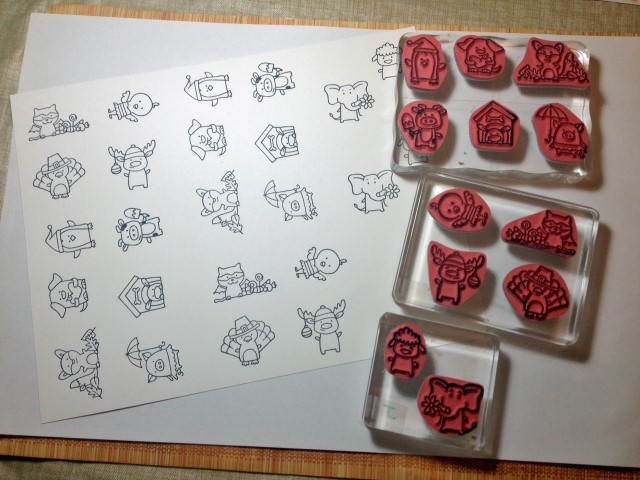
First of all – don’t stamp the critters individually. They would fit on 2 large blocks, or as I have done here on one large block, one medium and one smaller block. If you are going to make multiple sets, go ahead and stamp several pages while you have them out. You can get two full sets on piece of 8.5×11″ cardstock. Just be sure to keep a little space between them to make it easy to die cut.
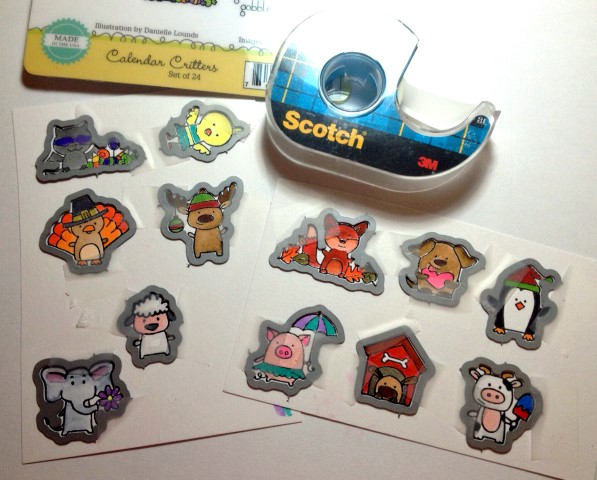
When you are ready to die cut, tape all your dies on with Scotch removable tape and cut them into 2 panels that will fit through your die cut machine. Easy Peasy! Afterwards you can keep the dies taped to the left over cardstock to make it easy to find the ones you need. And if you’ve stamped multiple sheets of images from the same block arrangement, the dies will be in the correct order for you too!
I’m sure you know someone who would appreciate a calendar set or a very simple set of notecards. I’m dying to know what you think of these stamps and dies!? Do you love them as much as I do? I’ve even planned my next class around them!
You’ll want to be sure to head over to the TE Blog for the full list of designers in the hop today! These products will be available in the TE webstore on Thursday morning, November 5th. Thanks for stopping by and for getting through my really long post today!

Taylored Expressions November Sneak Peeks – Watercolor Panels
November 3rd, 2015
This is Day 2 of the Taylored Expressions November Sneak Peeks. Everything being shown this week will be available in the TE webstore on Thursday morning, November 5th. Today I have a couple of samples of the new Watercolor Panels – Uplifting. These pre-printed panels are so much fun to play with! I recently got some of the Zig Real Brush Watercolor Pens and these panels were the perfect way to try them out!
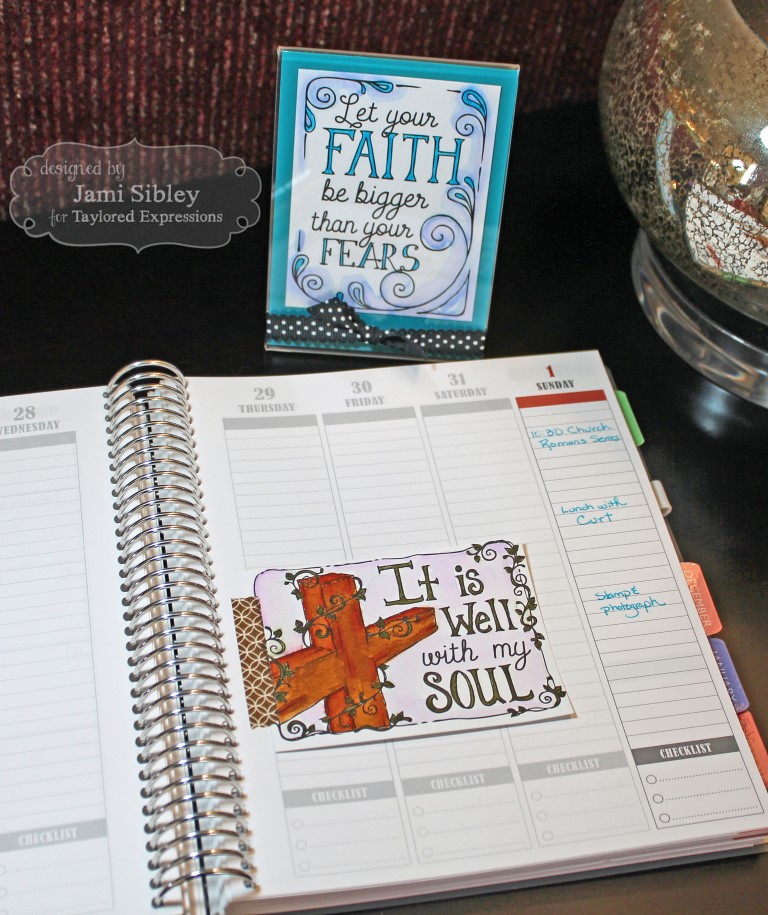
Not only are they fun to color, but there are tons of ways you can use them. Here, I put one in my planner. I just used some washi tape to hinge it in. The other one is in a 3.5×5″ acrylic frame that can sit on my desk.

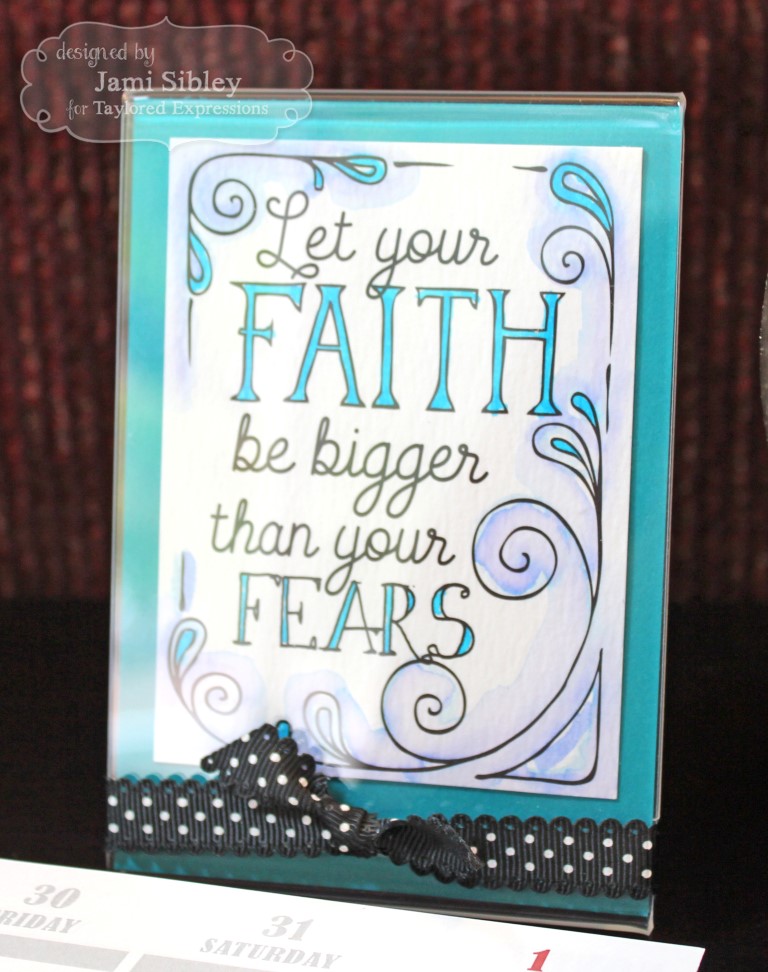
This pack of panels is loaded with wonderful reminders to point us to our Savior in all things! There are also several panels with just border artwork so you can add your own journaling or stamped sentiment. These panels would work well on card fronts, as tags, in Bible journaling, as framed art, in pocket scrapbooking, to decorate prayer journals and other notebooks, and more. What would you use them for?
Thanks so much for stopping by today. You’ll want to head over to the TE Blog to get the link list and see what the Creative Team has cooked up today as well as to find out how you can enter to win prizes this week!
Be sure to come back tomorrow. I have a bunch of samples to share!


