TESC94 Another Cute Penguin
December 11th, 2009
Happy Friday!  It’s time for another fun sketch from Taylor – TESC94 – and I encourage you to play along with us. 🙂
I have another penguin for today’s card. This one is from the Our Craft Lounge Crafty Clear set Snow Place Like Home. You know I LOVE cute penguins and I considered doing *a penguin a day*, but I’ve just got so much going on right now that I’m not sure I can commit to anything else right now – even if it’s just stamping a penguin card every day! LOL!
I paired Snow Place Like Home with my TE Pretty Please Card Kit (ummm…it might have still been out on my table.) First glance at that kit might not scream Christmas at you, but I think it works well with these cute images. (I did add some SU Old Olive cardstock for the matting.) I added some KaiserCraft rhinestones (along scallops created with a Crafter’s Workshop stencil) and some rose satin ribbon from my stash.
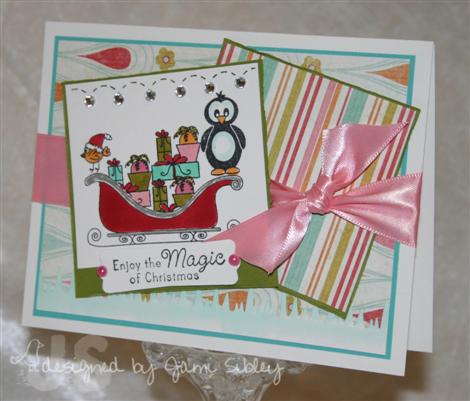
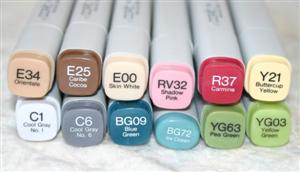
Image is colored with Copics and a Zig Painty Pen. Sentiment is from Holiday Wonder and I used my new Martha Stewart icicle punch at the bottom.
Yesterday was my BFF Ruth’s birthday. She’s been living up in Washington for the past few years and I love to send her something I’ve made. I mailed out the Sweet Occasions card set I posted last week – click here to see it. I wanted to show you what I did for the insides of the cards. Rather than stamp sentiments in each card, I made an asssortment of sentiments that she can add in as she needs them.
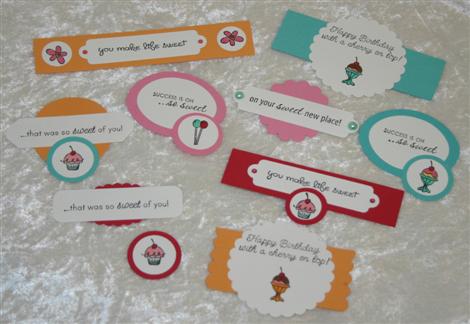
All of those sentiments and little images are included in the Sweet Occasions stamp set. Each sentiment is matted to coordinate with the cards and has Taylor’s sticky tape on the back so they are ready to be stuck in the cards as needed. I think this will make the cards more versatile and more useful than if I had finished off the cards myself.
Tonight I’m having a special class just for my Club girls. We’re meeting early for pizza and then making a card set using the Sunny Day Scrappin’ Kit. I’ll share pictures of that project soon. I’m looking forward to hanging out with the girls tonight. I hope you have a fantastic weekend. Thanks for stopping by.
ETA: Wow I was really tired when I wrote this post last night…I totally forgot to link the Sketch Crew Girls – D’oh!!!!! Let’s see what everyone else has cooked up today:

Kona for Joy
May 28th, 2009
Please join me in wishing a Happy Happy Happy Birthday to my sweet friend Joy! Joy is one of the most generous, kind-hearted, genuine people I have ever known and I am blessed to call her friend!
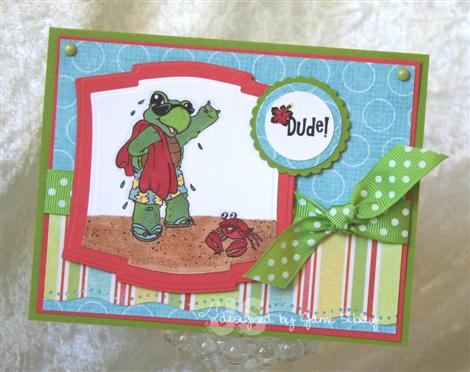
My birthday card for Joy is also a sneak peek of a new OCL stamp set that will be available exclusively through eclectic Paperie starting tomorrow (ETA: It’s up today!!) – it’s called Kona and I’m told it’s a big favorite of Joy’s. I loved the little flower with the word “Dude!”…seemed to make it ok to say “Dude!” to a girl. LOL!
I colored in our cool turtle friend with copic markers (also from eP). I chose all the colors based on the patterned paper I planned to use. That always makes coloring an image so much easier for me – to know it will coordinate with something when I’m done with it. The dotted wave border punch by EK Success just seemed like a natural here. Be sure to check out my next post a little later today for more details on supplies used on this card
I also decorated the inside of the card. 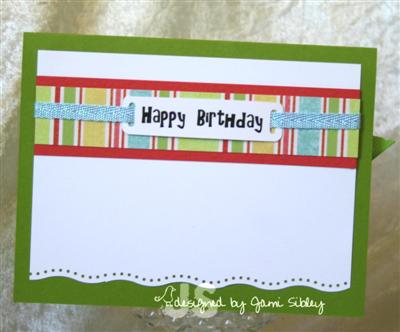 It was fun to put this computer generated sentiment on a ribbon slide (cut with a Spellbinders die.)
Thanks Cami for asking me to participate in this fun virtual birthday party for our friend Joy. You can hop over to Cami’s blog to get links to more Kona sneak peeks and more birthday wishes.
I’ll be back at 8:00 am with another post. Please be sure to check back. In the meantime – hop over to Joy’s blog and show her some birthday love!
CC210 Our Craft Lounge Flowers
March 17th, 2009
I just got some of the newer floral sets from Our Craft Lounge and I’ve been dying to play with them along with some Flower Soft. When I first saw the Color Challenge at SCS this morning I thought it sounded a litte crazy (Riding Hood Red, Summer Sun, Kraft, and optional Basic Black), but I know I have to trust my friend Jenn on these things so I decided to play along! And she was right – it worked out pretty well.

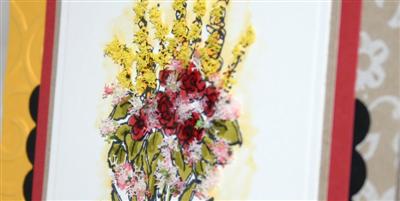
This is one of those maddening cards that looks so much better in person. I am actually super happy with it, but I am not liking this photo at all. ugh!
Card base is Kraft cardstock stamped with SU Boho Blossoms BG in white craft ink. Summer sun piece was cut with a circle nestie and then embossed with the CB D’Vine Swirls folder. Image was stamped with Memento Tuxedo Black ink on TE Choice Snow White cardstock and colored with copics. Sunny yellow and sweet pea Flower Soft were added and the crystal effects was added over the roses. The vase was covered with a spica glitter pen. Embellishments are Kaiser Craft Chino pearls and Black rhinestones. Ribbon is SU Riding Hood Red tafetta.
If you are following my Blind Date Story (start on March 11th post if you missed the beginning) – 20 years ago tonight – it’s now Friday night and my prospects for a date this weekend are not looking good. Against my better judgement I have decided not to make plans for Saturday night, *just in case* he calls. *sigh* So what do you think? Will I get a last minute date? Stay tuned romance fans! *wink*
Thanks for stopping by.
-Jami
TECC46 Nuts About You
December 12th, 2008
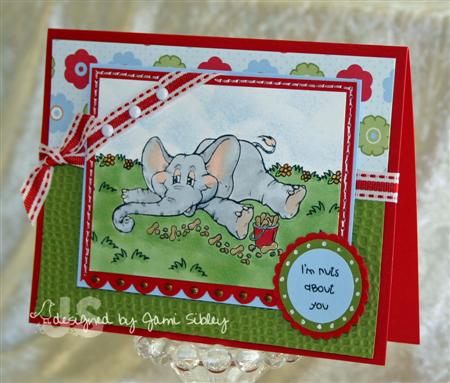
I had so much fun with today’s card for Taylor’s sketch challenge (Taylored Expressions Cupcake Challenge – cupcakes not required – get all the deets to play along over at Taylor’s blog). The large center panel is big enough for a little scene.
I’ve been dying to play more with the stamps I got from Our Craft Lounge and the set I’ve most wanted to get inky is Dr. Pea-nut. As you may already know I really hate clear stamps, but I will occassionally buy them when I love the images enough. So when Joy first told me about OCL my first question was “rubber or clear?” and her oh-so-clever answer was “both!” So some sets are available in rubber – very nice deeply etched on crafty cling – and some are clear. I hesitated to get Dr. Pea-nut when I realized it was a clear set, but I just couldn’t resist. I am thrilled to report that they stamp like a dream. I didn’t have trouble with even one image and all I did was clean them with Stampin’ Mist on my scrubber one time before inking them up! I’m a happy stamper!
It was so fun to build this little scene. Marianne did such an awesome job with all the little elements to make this work – the grass with the flowers, the little sprigs of grass, the bucket of peanuts and even a separate little pile of peanuts! All those little things made it so easy to put this together. The OCL stamps (both rubber and clear) come on a storage panel much like Taylor’s SASI line, but the OCL panel is smaller. Since OCL doesn’t have a container/binder yet, I checked the TE mini binder box and the OCL panels do fit – the holes are spaced the same.
My little scene was colored with Copic markers and the sky was sponged using the SU Cloud Template. Normally I would choose a designer paper and then color my image to coordinate, but in this case I colored the image first and then was thrilled to find that SU Summer Picnic dp would work so well. The image is layered onto Real Red with a scalloped punched bottom edge and some faux stitching around 3 sides. That is layered onto Bashful Blue. The ribbon is from my stash and I added 3 white American Crafts brads in the upper left corner and some golden brown liquid pearls along the scallops. The Blue panel is then popped up on foam tape. I really really wanted to use this sentiment so I added a little extra element of circles to the sketch layout. The card base is Real Red layered with Old Olive run through the CuttleBug and layered with the Summer Picnic DP.
Now let’s see what the rest of the Cupcake Crew has cooked up today:
…plus today’s Featured Stamper Cindy Haffner!
Also be sure to check out Our Friday Friend over at the SASI blog…and I forgot to mention that I had a card posted over there on Wednesday as well!
Happy Friday and have a great weekend. I’m planning to knock out some more Christmas shopping today (I’ve accomplished a good amount this week) and hopefully complete some hand stamped gifts as well. We still don’t have a Christmas tree…we’ll see what the weekend brings. Thanks for stopping by.

Glitter Rediscovered
November 25th, 2008
Glitter was one of my original loves in stamping. I used to say *Glitter makes everything better*! I remember a number of years ago the Art Institute Glitter booth to be one of my favorites at the local rubber stamp convention. Back then I bought a kit that included several colors of glitter and later added some to that collection. I even took a whole class on glitter creations with a wonderful local teacher. Well, let’s face it – glitter is messy – especially colored glitter. I moved to only using Dazzling Diamonds glitter and eventually just moved away from any glitter, only using occassionally. And with the advent of Stickles, glitter seemed almost *old-school*. LOL!
Using that Fire Engine Red glitter from the TE Key Ingredients Kit on my project yesterday re-awakened my love of glitter! Real glitter is so much sparklier (is that a word?) than Stickles or any glitter glue! So last night when I started working on my very first Our Craft Lounge card with Bubs the Beaver I decided to rummage through my old glitter collection to see what I might have to add some sparkle. I found this rich and yummy cocoa colored glitter and applied it with a Sakura Quickie Glue Pen using the Rule of 3 (OK I wasn’t thinking about that rule at the time, it just worked out that way.) Of course I couldn’t capture the sparkle of the glitter in my photo – so use your imagination!

Bubs the Beaver was stamped on Wausua white cardstock with Brilliance Graphite Black ink and colored with Copic markers, then cut and embossed with a Nestabilities rectangle die in my Cuttlebug. I added some Kaiser Craft flower rhinestones. I didn’t have a color that would work so I colored the clear/silver ones with a Copic marker. Bubs was layered onto a Not Quite Navy mat and then onto a Regal Rose mat cut and embossed with a scallop rectangle nestie. I traced around the scallop embossing with the glue pen and added glitter.
The designer paper is Paper Salon from eP. I cut a small strip of Close to Cocoa cardstock and added a line of glue with the glue pen and a ruler and applied glitter there as well. The wavy ric-rack looking piece is actually a piece of Doodle Bug Paper Frills (it was white but I colored it with a Copic). The sentiment was stamped on dp and punched with my SU large oval punch. I then layered it onto a NQN wide oval, but it was too big so I used my scallop scissiors to trim it down before I added an outline of glitter. The flower brad is SU and started out silver until I colored it with a brown Copic and then added a rhinestone brad to the center. Three brown Kaiser Craft rhinestones are the final touch.
This card cracks me up. When Joy first told me they were going to have a Beaver stamp set I just wasn’t sure what to think, but this little guy is so cute and different and I love the sentiments in this set! OCL has some sets in deeply etched already die cut cling rubber (unmounted, but ready to slap on an acrylic block) and some sets in clear. And I believe they might have a few sets with a choice of either. So if you have a preference be sure to check that out when you order. Bubs is a rubber set. I did get a clear set, but haven’t had a chance to play with it yet. I’m NOT a fan of clear stamps, but I do buy them occassionally. The OCL rubber is very high quality and the sets come on panels similar to (but smaller than) the TE Stamp a Sweet Impression sets.
Again I want to offer a big CONGRATS and WOO HOO to my friends Joy and Cami for their new OCL venture! I love you ladies and wish you all the best!
Thanks for stopping by. I’m off to work. I’ll be back tomorrow with a little SU gifty item.


