TE Release Party Continues
June 30th, 2012

The July Release for Taylored Expressions is in full swing as all the new products are available in the Fresh Out of the Oven Department. I get to play along with the Baker’s Dozen for one more day of inspiration showcasing all the new stamp sets.
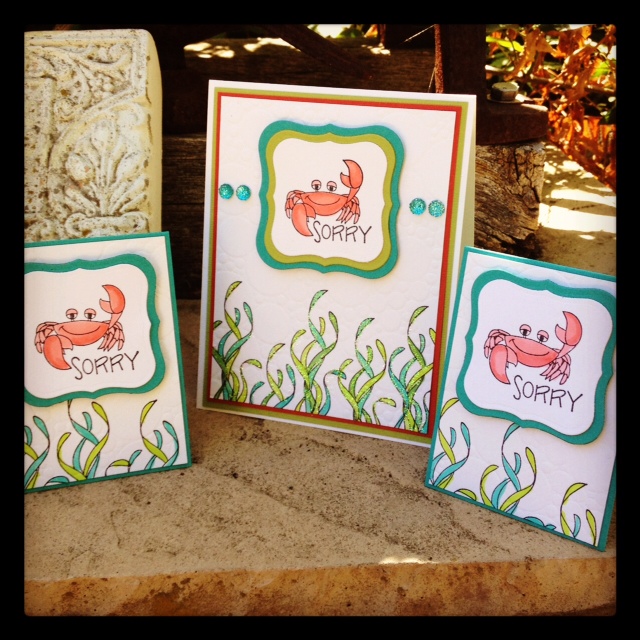
My sample today features Under the Sea, a full-size set illustrated by Nancy McKinney for the Whimsical Wishes collection. If you saw my post a few days ago that described my previous week, you’ll understand why I needed to make these cards for a few people! LOL!

And the inside:

I wanted a mostly white card, so I started by stamping the seaweed image repeatedly on the bottom of a Choice Snow White panel and coloring with Copics. Then I ran it through my Big Shot with the bubbles side of the new Waves/Bubbles Impression Plate before applying Diamond Stickles for plenty of sparkle.
I stamped the crab and colored him with Copics. I used Spellbinders Labels 1 and Labels 1 Small to cut and layer the image as well as for the sentiment inside. I love having both sets for tighter layering.
Once the regular sized card was done, I realized I should make a couple more, so I created tiny little notecard versions. I think I only spend about 15 minutes making the mini pair to go with little candy gifts. I only had a chance to snap a quick Instagram photo before taking these info the office.
You may have noticed that I’m on a real kick of using these fun little sparkly embellishments – Pebbles Crystal Candy Dots and Queen & Co. Goosebumps. At first glance in the store it might be a little hard to tell how they are different, so I made a short little video comparing the two. Both are self-adhesive and sparkly and FUN. I used the Goosebumps on the card above and the Candy Dots on my Coconut Cove that I posted on Thursday (and you’ll see it in the video.) You might find you prefer one over the other or, like me, might find you need them both in several colors! 😉 Check them out!
[youtube]https://www.youtube.com/watch?v=bMb2knilOWI[/youtube]
Now let’s see what the Baker’s Dozen has cooked up today:
Courtney Kelley – Guest Designer
Jami Sibley – DT Coordinator
Thanks for stopping by today. I hope you are having a great weekend! We have the dishwasher repairman coming this afternoon to see if it can be repaired or is we need a new one. It was one of the appliances fried in the power surge last week. Washing dishes by hand takes a lot of time!![]()
Glossy Dream Come True
September 25th, 2008
Just a quick post to share a fun and simple card I made while playing with my new Scor-It Board. You can read my review of the Scor-it on the SCS Product Focus Page (click here).

It was a little hard to photograph since the main panel is glossy white cardstock. When I first started stamping years ago, glossy cardstock was one my favorite things. I don’t use it all that often anymore, but I almost always have fun with it when I do decide to pull it out. This card was inspired by the Michael Strong video on the Scor-It website. I used to always love it when Michael Strong did a demo on the Carol Duvall show, so I was excited to watch his video presentation. He showed scoring a frame on cardstock painted with acrylic paints and it looked very cool. I didn’t have time for paints so I decided to see what the effect would be on glossy cardstock and I think it turned out quite striking.
After scoring 2 lines all around my glossy panel I completely masked the outside edges with Eclipse Masking Tape from eclectic Paperie, and then I brayered the center section with Cotton Candy Spectrum ink (retired SU). Then it was just a matter of stamping the bird and branches from Always and the sentiment from Cute Converse. I added some teensy tiny square pink rhinestones and matted the panel on black and then a Rose Red base. Super duper simple!
Time for me to go to work so I gotta run. Thanks for stopping by!

Copic Matches to SU
September 2nd, 2008
Quite some time ago my friend Leann and I sat down with Stampin’ Up! cardstock, a full chart of colored Copic swatches (thanks to Joy) and a couple of OTT Lites. That night we came up with a list of what we felt were the best matches of Copic markers to SU cardstocks. We used cardstock rather than ink or markers because we felt it was most likely we would color images and want to layer with cardstock or SU dp and not as likely we would actually have something stamped in SU ink that needed to be matched. Ever since we came up with these matches almost a year ago, I’ve wanted to make a chart where I could color in a box and attach a small piece of cardstock. I finally got my chart made and I want to share it with you. You’ll need to print it out on the cardstock you most often use for coloring with your Copics. It’s 5 pages. In the box next to the SU color name you can attach a little piece of that color of cardstock. Then in the next box you can color in with the Copic when you get it. I hope you find it helpful.
copic-matches-to-su-cardstock-by-jami-leann.pdf
If you’d like to share this chart I ask that you please direct people to this post on my blog and not post the chart itself on your blog, in any forum, or anywhere else without my express permission. If you find it helpful please leave me a comment and let me know! 🙂
I just have to share something fun with y’all. Look what came in my 3rd shipment of Nutrisystems food on Friday.
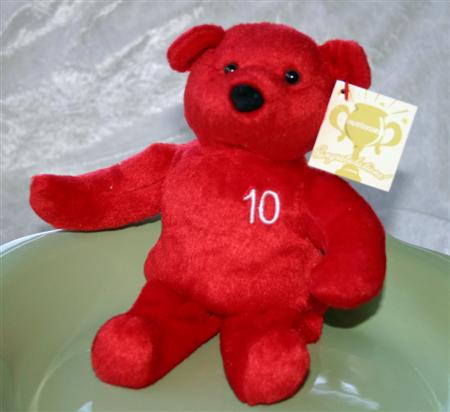
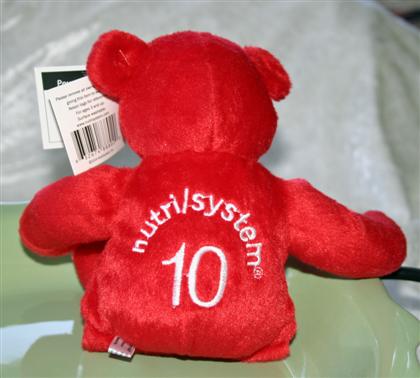
Curt had told me that if I would log my weight loss on the NS website they would send me a bear for every 10 pounds, but I never really looked to see what he was talking about. I kept thinking it would probably be some dumb sticker or picture of a bear, but no…this cute little guy came in my order! I know it’s silly, but I was totally EXCITED!!! His name is Pound!
Thanks for stopping by. Be sure to come by tomorrow for some excitement you don’t want to miss (or at least I don’t want you to miss – LOL)!
In Color Copics
August 25th, 2008
I have some good news to share! Today was my 7 week weigh-in. I’m only weighing in every 2 or 3 weeks and in the past 2 weeks I lost 5.4 pounds! That’s a total of 13.4 pounds off (41.6 still to go)! I am beyond excited. And Curt (who started 2 weeks after me) has lost 11 pounds. Can I hear a WooHoo???!! Our initial plan was to stick with Nutrisystem for 2-3 months and then switch back to Weight Watchers. For now we’re going to play it by ear and see how long we can tolerate the packaged food with Nustrisystem. The dinners are actually pretty good and it’s nice to be able to go in and customize our menus. It’s been great not to have a lot of decisions to make and not worry about proper portion control. I know that WW is a better long term solution, but it also takes more focused effort the first couple of months. We do allow ourselves two meals out per week and boy do we ever look forward to those! Picking a restaurant for dinner never had so much meaning for us. LOL!
Now on to something stamping related. As soon as I got samples of the new SU In-Colors I sat down to determine the best Copic marker matches. I’m sure lots of people have posted their opinions on this (although I haven’t read any), but I thought I’d share mine. Hopefully some of you will find it helpful.
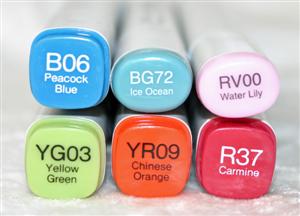 Pacific Point – B06 Peacock Blue
Baja Breeze – BG72 – Ice Ocean
Pink Pirouette – RV00 Water Lily
Kiwi Kiss – YG03 – Yellow Green
Tangerine Tango – YR09 Chinese Orange
Riding Hood Red – R37 Carmine
The only one that’s not a really great match is the Kiwi – Yellow Green. The rest are super close. Click on the chart below to view it full size. You’ll see a scallop circle swatch of the cardstock next to a large swath of marker color and below that you’ll see SU white taffeta ribbon that has been dyed with the marker. 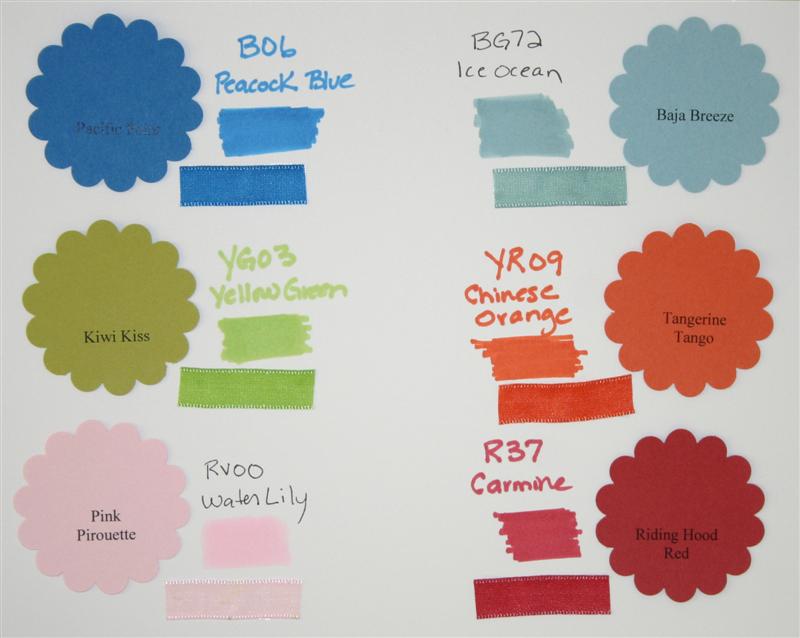
I absolutely LOVE this trick. The taffeta takes the dye amazingly well, dries very quickly, and you can have ribbon in any color. Simply run the ribbon under the broad tip end of the marker held down on some scratch paper. Couldn’t be easier. All of the color matches are actually closer in real life than the scan shows. It’s so hard to get true color on a scan like this. Scroll down to my previous post and see a card with taffeta ribbon dyed orange – it’s a fabulous match to the Tangerine cardstock.
Of course if you’re *serious* about coloring, you’ll also want additional colors for shading, but hopefully this will give you a good starting point. There are lots of sources for Copic markers – I get mine at eclectic Paperie. I prefer the Originals with the fine tip, but not all colors are availabe in Original so I buy Sketch when neccessary – as with the Ice Ocean and Water Lily above.
Thanks for stopping by and happy coloring!
A Dirty Whoo Hoo!!
May 20th, 2008
It’s time for another monthly Dirty Dozen Alumni Gallery Reunion. This month’s focus is OWLS. Whoo Hoo! They seem to be everywhere right now. I’m a bird-lover, as you know, so I am A-OK with that! Each month our little challenge has a required element and a restricted element. This month’s requirement is *texture* and the restriction is no rhinestones, crystals or dew drop type embellishments (you should have heard the groans when everyone heard that one! LOL!)
The only owl image I own is the adorable A Muse Owl Buddies stamp I won at StampMania so that decision was quite simple. I wanted to have a moon behind the owls and I was in the mood to try a shaker card, so here is the result.

I started out by stamping the owl/branch image directly on the acetate with Brilliance Pearlescent Chocolate ink and coloring the back with Sharpies. After the entire shaker was made I decided I didn’t like the way the owls looked so I stamped them again on Ivory shimmer cardstock, colored them with Copics and cut them out and adhered them over the original birds – ahhh much better! (Further proof than anything can be salvaged!) The shaker frame was made by punching capucchino shimmer cardstock first with a Marvy Giga Scallop Circle Punch, then punching out the center with a Marvy Super Jumbo (2″) Circle Punch. The acetate piece was adhered to the back of the frame with Tombow Multi and then I used small pieces of double thick foam tape (cut to half width) to form the shaker box. The backing of the shaker is poison ivory shimmer cardstock as is the card base.
I really like the double thickness (1/8″ as opposed to 1/16″) for shaker cards and you can get it from Tayloredexpressions. That foam tape is super extra sticky so having non-stick scissors is a life saver. I have a small pair just for foam tape and sticky strip. The ones I have are the old discontinued model by Fiskar’s but Taylor has the current model available here. (Oooo – they’re on sale!) I had a picture to show you, but I’m having trouble uploading it so take a look at her site. All my customers LOVE my non-stick scissors in class. It’s a tool I couldn’t be without!
For texture on this card I ran a piece of the capuchino shimmer cardstock through my Cuttlebug with the Floral Fantasy embossing folder (from eclectic Paperie) and then rubbed it with Versamagic Thatched Straw Chalk Ink to highlight the pattern. I also heat embossed the Chocolate Chip cardstock panel with the leaf image from Carte Postale using Chocolate Chip Craft Ink and clear embossing powder. The ribbon is SU Chocolate Chip Tafetta. The finishing touches include Cinnamon Stickles around the shaker frame along with some die cut leaves and a large brad colored brown with a Copic marker. The shaker is filled with clear microbeads.
It’s funny because I really didn’t set out to make such a *brown* card. I actually had some colorful designer paper out as well, but the whole thing was just looking too busy so I nixed the dp and this is where I ended up. I sure had fun working on this – hope you like it. Click here to check out all the Dirty submissions – girls will be uploading all day so be sure to check back.
Oh and be sure to check out Taylor’s blog today – she is releasing her first Taylored Kit and I’m sure it will be an adorable and FUN project!
Thanks for stopping by! Have a great day!
Spiraling Out of Control
June 29th, 2007
I sure hope you all have a new Stampin’ Up! Catty in hand by now and have had plenty of chance to drool all over it! My boxes arrived yesterday and several customers have already been here to pick them up. *grin* Today I got my copy spiral bound. I have been waiting all week to do this and now I am soooo happy! It feels so official now.
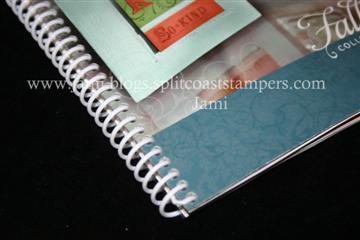
I went to Office Max and said I needed it ASAP – I DO NOT like to leave my catty unless it’s absolutley necessary. At first the guy wanted me to come back in 4 hours and I must have made a really sad face because he went and asked someone and came back and said half an hour. Then while I was deciding on coil color the guy who was going to do it walked up and said he could do it while I waited. I was on pins and needles the whole time (yes I know that’s silly – what can I say?) He did a really good job! Some people like to have their covers laminated, but I prefer to have clear plastic covers front and back (just a matter of personal preference either way). I had clear binder pockets (by Avery) inserted just inside the front and back (I trimmed them down at home first – some places charge per cut). Cost of having this done varies widely across the country. Today I paid $5.48. Even when I paid almost $8.oo one year (Kinko’s) it was still worth every penny!
Now that I have the new catalog I’m finding it a little hard to stamp – all the excitement I guess. But I realized today that it will be 2 weeks or more before I have new rubber so I decided to just go to my stamp room and find something to play with (not like I don’t have plenty of choices!). Looking around I decided to check out my contraband (non-SU) drawer. I pulled out several things and ended up working with this darling cupcake girl from American Art Stamp.

I started out trying to make her into an ATC, but as you can see the ATC got mounted onto a 4.25″ sqaure card. The image was stamped onto Shimmer White cardstock with Noir Palette Hybrid ink and watercolored with SU markers and aquapainter. The background is a Judikins stamp called Bead Curtain. It is very similar to a new SU jumbo wheel called Spotted. Colors for this card are Barely Banana, Black, Gable Green and Tempting Turqoise. Plaid ribbon is from the big Costco pack and polka dot grosgrain from my stash. Liquid Applique was applied, heated and brushed with pastels for the cupcake frosting. I just love the puffy look of LA! Crystal Effects was used on the chocolates and some Stickles were applied for accents. SU brads (lined up using the mat pack) are the final touch. I’m glad I “made myself” do a little stamping tonight. The mojo was a bit elusive, but it felt really good in the end to create something after a busy day.
Enabler Alert! Have you heard about the .99 business cards at Office Depot? Click here to order 250 plain white business cards for .99 with free shipping. I learned about this on SCS and ordered last week. The estimated arrival was July 10th, but the arrived today!!! Very cool. I plan to stamp on them too. At that price think of all the possibilties! Have some printed just to make it easy to give out your e-mail address when needed, use them for coupons or gift certificates, staple them to little bags of candy to give out to promote your business, and on and on! Shoot – maybe I should order more!
Hope you have a fantastic weekend. I’m getting together with some of my best stampin’ buds tomorrow afternoon – it will be so FUN to discuss the new catty, eat and oh yeah…maybe stamp a bit! Thanks for stopping by.
Tools of the Trade
March 8th, 2007
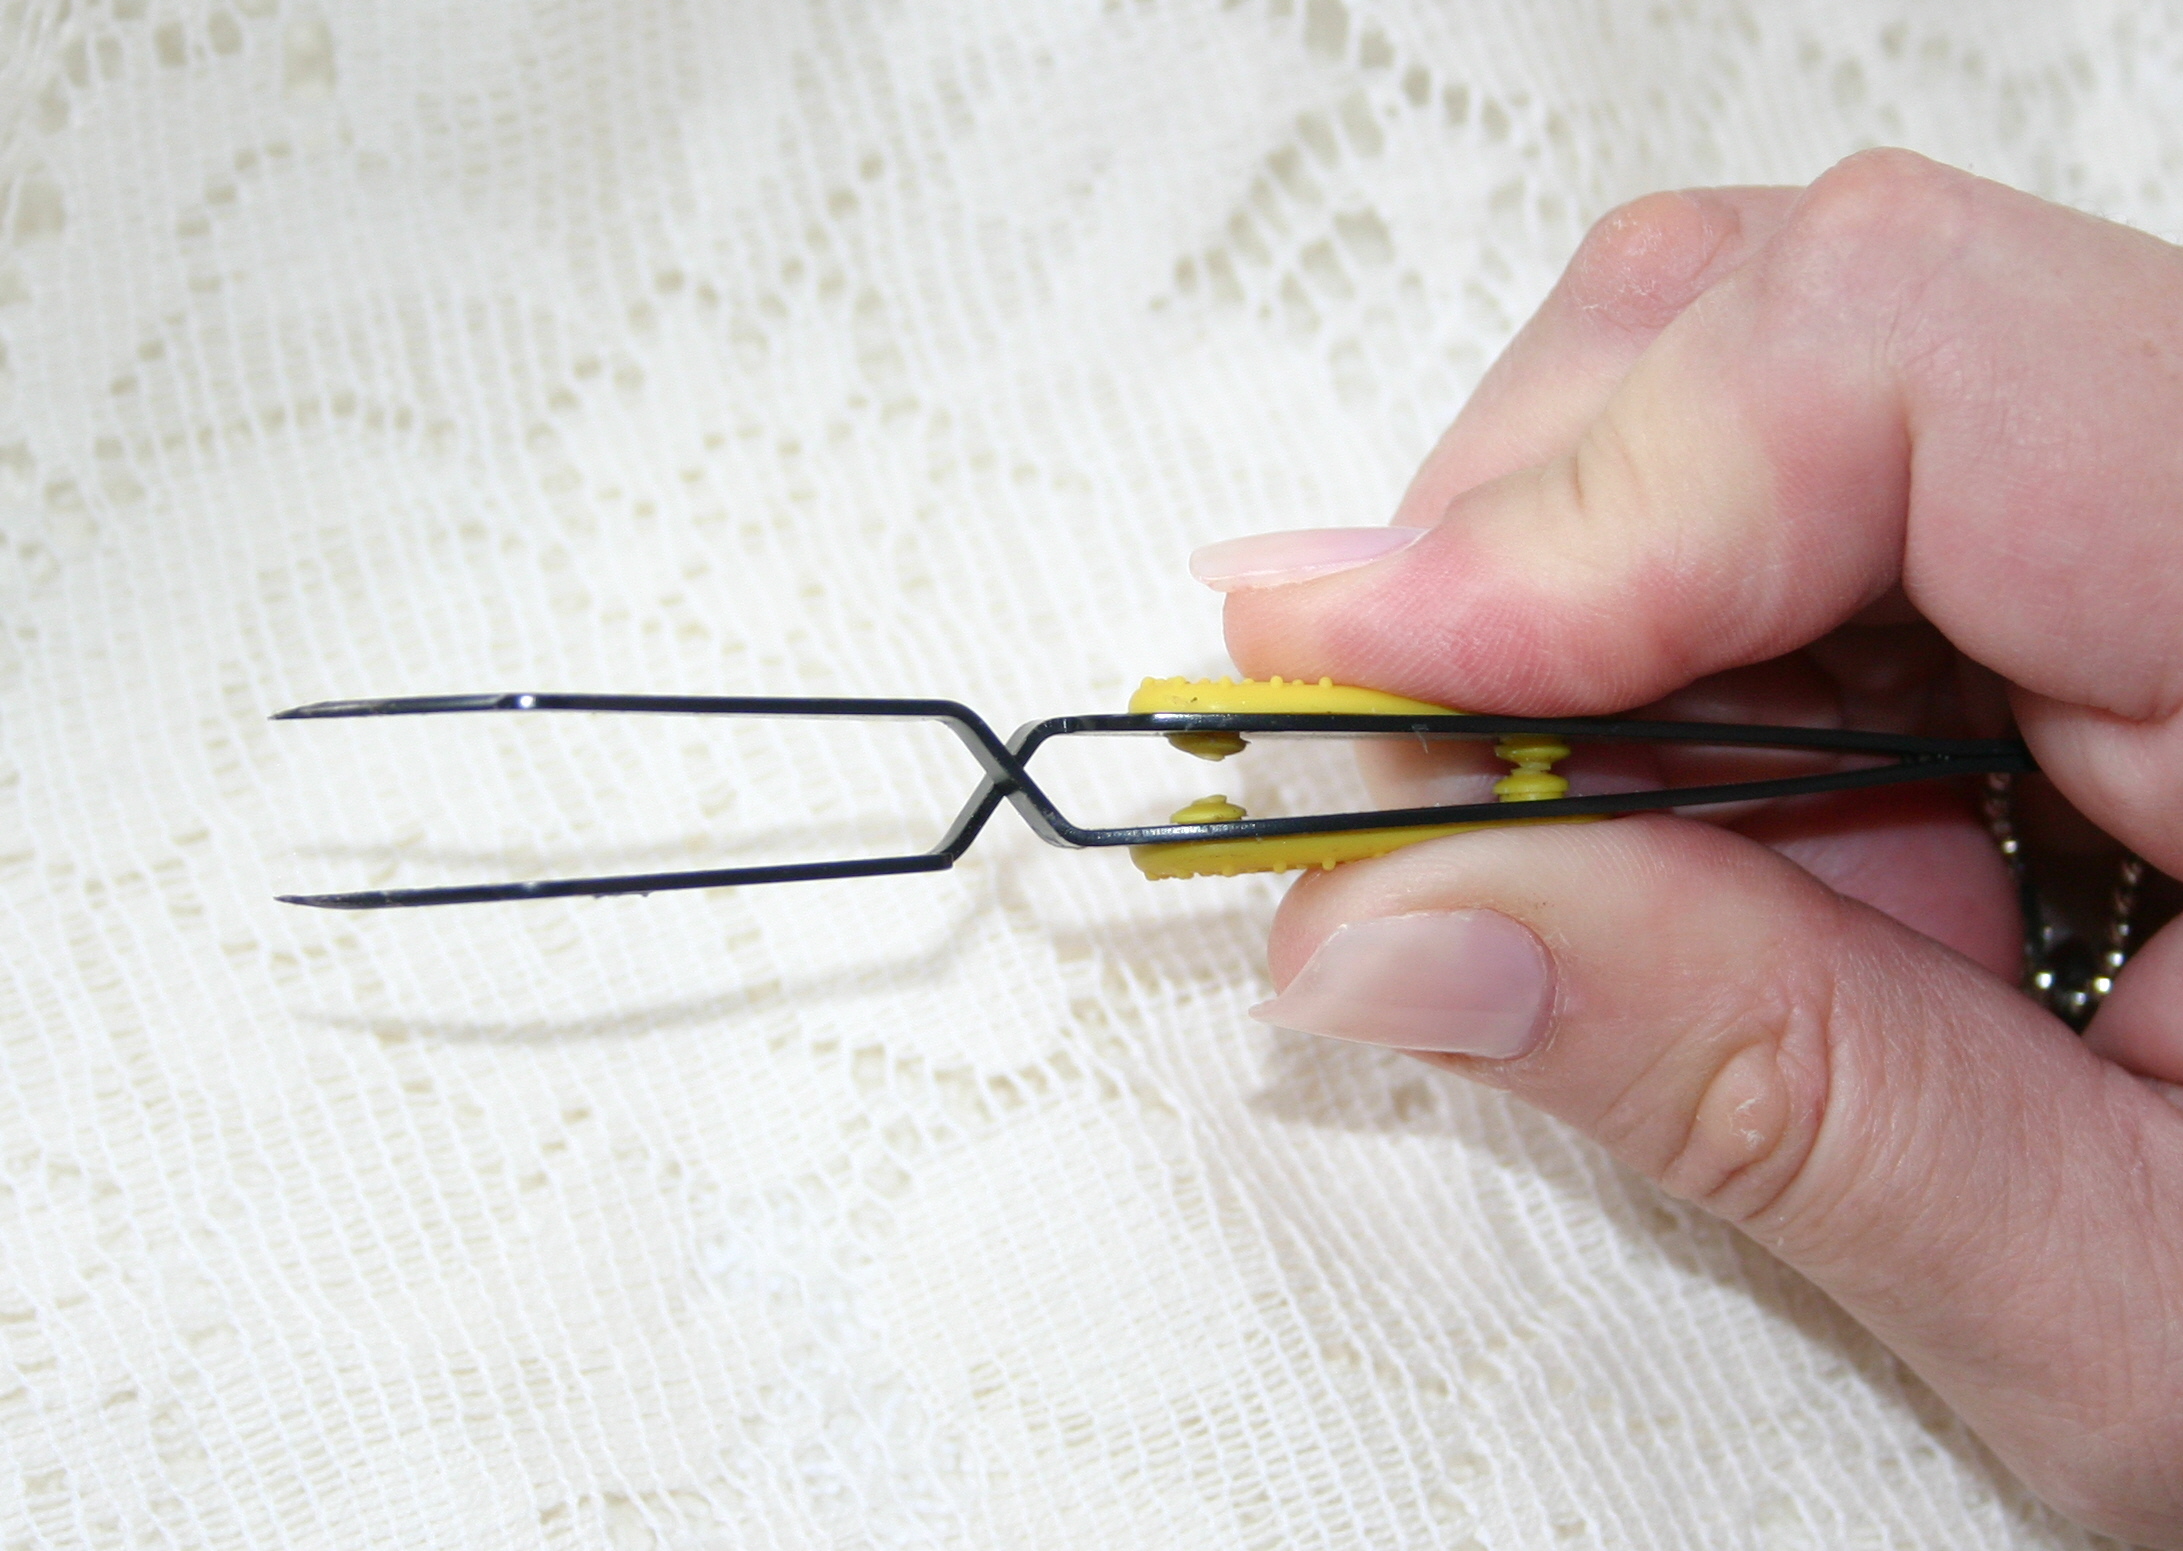
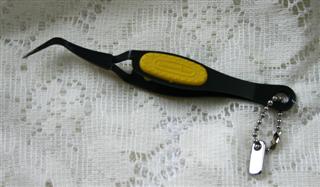
Having the right tools for a job makes everything go so much more smoothly! I have a few tools that I keep within arms reach at all times at my stamp table. I figure anything that makes stamping more fun or easier is worth sharing. As I was working on a couple of projects today it dawned on me how much I use my little Cutter Bee tweezers and how such a little thing can make me so happy! They are reverse grip which means you squeeze them to open them or let go of something and at rest they remain closed. I think I use them almost every time I stamp! Today alone I used them to separate tiny prima flowers and to place on them on a project. I used them to place teensy rhinestones. And I used them to hold an image I while I heat embossed several layers of Glassy Glaze for the cracked glass technique. (I wish I could share the project with you, but it will be revealed next week in the March Fan Club Gallery on SCS. *wink*) The tip has a non-stick coating so sticky embossing powder wipes right off.
Some other things I use them for – dipping buttons in craft ink to change their color, embossing mini brads to change their color, pulling ribbon through small holes, placing embellishments such as buttons when I use hot glue…and I’m sure there are more…like I said I use them pretty much every time I stamp! So what little stamping tool do you love and use all the time?
ETA: I wrote this yesterday and the forgot to “publish” -*roll eyes* – noobie dork! LOL! I’m off to work. Happy Thursday!


