June Class Cards
June 24th, 2013
Happy Monday. I held my monthly stamp class on Friday night and this month we focused on Stampin’ Up! I have two cards to share with you and they are both created with Gingham Garden dsp. I have a SU order going in today and I’m trying to convince myself that I don’t need another pack of this paper. I just adore it so much! I really have to say that this new SU catalog is the best one they’ve produced in several years.
Both of these samples were created while we were camping in Malibu. Before I left I did some searching and printed out some inpsiration photos to work from. The first card was inspired by one I found on Pinterest by Amy O’Neill. I switched the papers around to work with the ribbon I had available. This card is so simple and I love the happy look of it! The stamp set is Label Love.

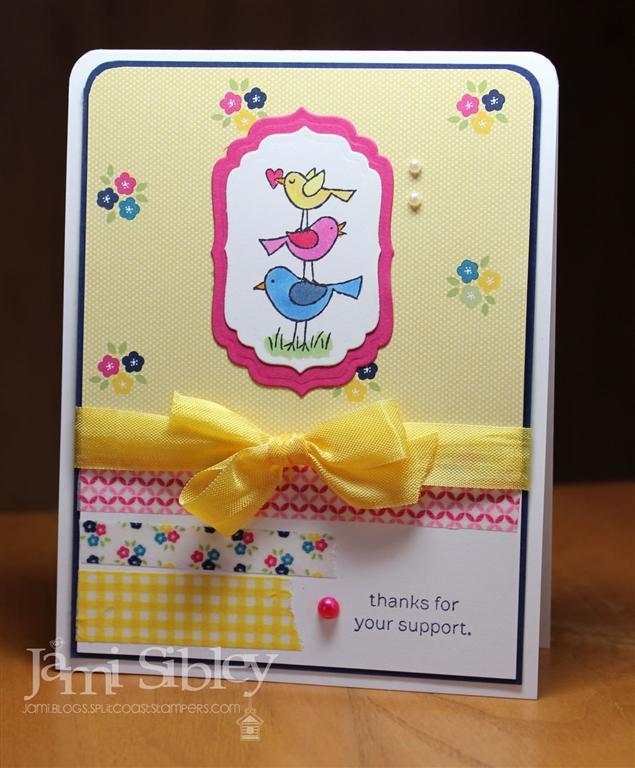
For the second card I wanted to use For the Birds and continue with the Gingham Garden papers. I found a card on SCS created Cindy Hall that was the perfect inspiration. I used some of the matching washi tape and colored a pearl with a Copic marker. Cardstock is Night of Navy and the ribbon is Daffodil seam binding.

Isn’t it sweet? I think the girls had fun making these on Friday. 🙂
I needed to get my Stampin’ Up! order figured out this weekend. I still use mostly SU cardstock, ink and ribbon even with all the TE supplies I create with. Teaching a class once a month means that I need to have plenty of cardstock and ribbon on hand so that when I come up with a class sample, I already have the supplies I need to to prep multiples. With the new SU color resfresh and the fact that I had not reorganized my cardstock drawers in a few years, it was a little bit of a daunting task to take stock. I spent about two hours organizing my cardstock and I even went on ebay and ordered a brand new set of file folder labels for all the SU colors (new and old). Feels so good to be back on the organization path again with all of that. My stamp room has lots more organizing projects to be done, but that was a big one! Now I will have a place to put all that pretty new paper when it arrives!
Thanks for stopping by. I hope you have a wonderful week ahead!
![]()
Bold and Graphic
April 11th, 2012
Happy Hump Day! Today I want to share my favorite card from those we created in my March Class. I was inspired by several cards in the galleries at SCS (especially this one by Mary Brown and this one by Kay Kalthoff) to pair Field Flowers with the Doily Background. I decided to try something a little bit on the bold side. It’s funny when I first stamped the Island Indigo flower over the Lucky Limeade doily, I said “oh no…this is NOT going to work!” But then I looked at for awhile and started playing with layers and added a few Kaiser rhinestones and I ended up loving it. A lesson in not reacting too quickly, I guess.
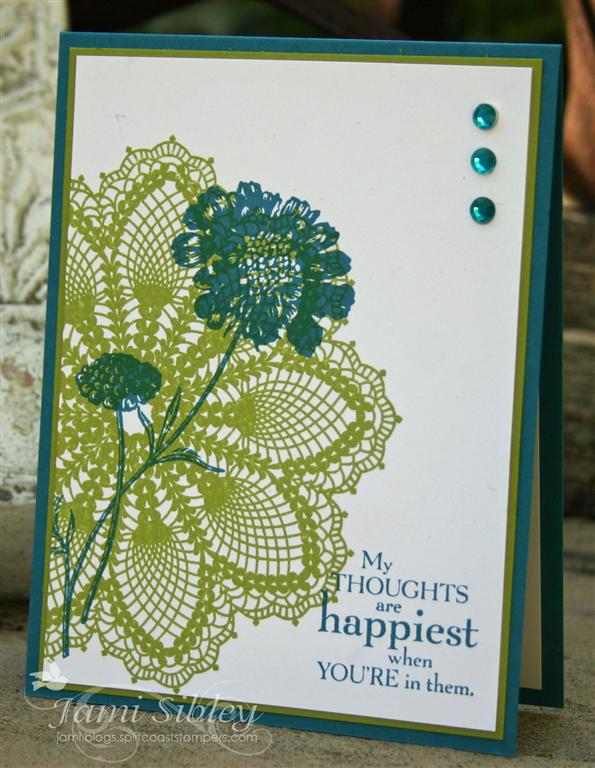
Clean and simple for sure. I love the bold graphic look of this. I’d encourage you to play with colors. Try some things you think won’t work and sit with them for a bit before you throw them out and move on. You might be surprised.
Thanks for stopping by. I’ll be back tomorrow with the monthly TE Calendar Challenge.
![]()
Fresh Vintage Birthday
April 10th, 2012
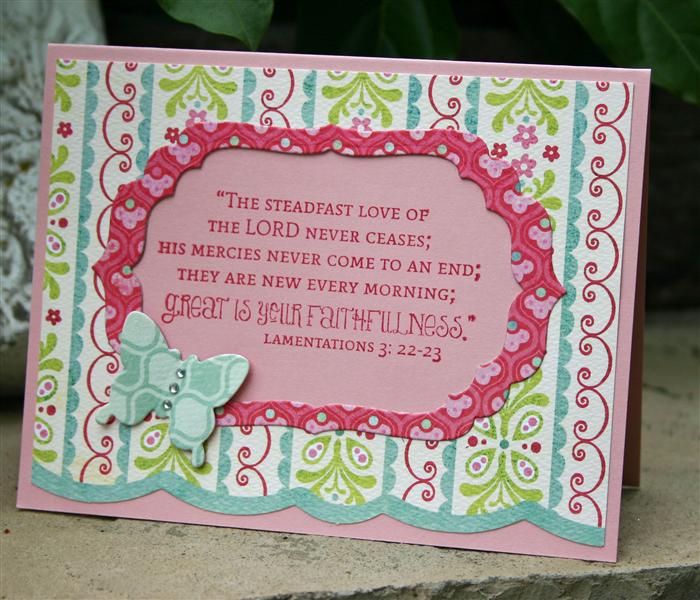
Happy Tuesday. I’m back with a quick post to share another one of the cards we made in my March SU Class. This card was CASEd pretty closely from this beauty by Dawn Olechefske that I have in My Favorites Gallery at SCS. Instead of black and white I went with Crushed Concord along with Shimmery White. And rather than a one layer card, I added a colored base. Other than, it’s pretty much Dawn’s card.

The Fresh Vintage stamp set was my favorite SAB product. There were so many wonderful samples in the gallery at SCS, that I had trouble narrowing down just what I should do for class. I just love how simple, yet impactful this card is. I’m so appreciative of all the people who post their creations and give tips and details. This is the type of sharing that really helped me develop my stamping and still helps me now!
Thanks for stopping by!
![]()
It’s Only Fitting
April 9th, 2012
Happy Monday. I hope you had a beautiful and blessed Easter weekend. I had so many ideas for Easter cards and little treat projects for friends, but just couldn’t get to them. It’s going to take to some time to adjust to my new work schedule and in the meantime, I have to let some things go and cut myself a little slack. We attended a solemn and refelctive Good Friday Service, focused on Jesus’ death on the cross and then yesterday we celebrated His resurrection at a bright and music-filled morning service. He is Risen! My family met up at Outback Steak for a yummy, albeit non-traditional, Easter lunch.
And now a new week begins. My monthly stamp class is coming up this Friday night. My projects will feature TE stamp sets Fruity Friends, Make it Amazing, and Sky’s the Limit. I currently have 2 spots open. Let me know ASAP if you’d like to come!
I thought I better share the projects we did at my class last month. The focus was Stampin’ Up!. This first card was inspired by one I had pinned on Pinterest, then also found on SCS and put in my favorites there. The creataor had been inspired by a card by Nicole Heady. I love it when there is a chain of inspiration like that. If you like my card, perhpas you could continue the chain, by creating your own version and linking back to all three of us!
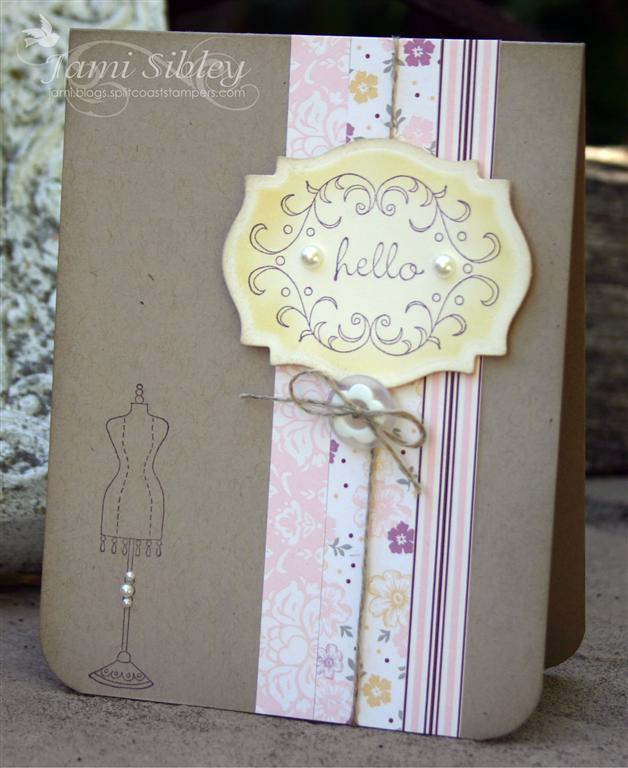
This card features the adorable SU set Chic Boutique. The dsp I used is retired, but the beauty of this card is that it will work with almost any collection of patterned papers. This card is SUO with the exception of the Spellbinders die I used. The new SU Framelits would work here just as well.
Here’s a peek at the inside of the card.

“It seems only fitting to wish you a happy day!”
Thanks for stopping by. I hope you have a great week. I’ll be back to share the rest of my March class projects throughout the week.
![]()
Field Flowers for Lisa
November 9th, 2011
Happy Wednesday! Today is a day to begin trying to catch up on some things before the holidays hit full-force. Note that I said begin “trying”. I’m not sure if it’s even possible to actually be caught up, because I can’t really remember the last time that happened. LOL! This morning I made the time to take Tessa to the park for a walk and I was so happy that my friend Lisa and her pup Molly could join us. It was a great way to start the day! Being with Lisa reminded me that I had not yet shared the birthday card I made for her last month. (click on it to see it larger)

This card features the SU set Field Flowers along with SU book print designer paper and a floral patterned paper that I cannot for the life of me remember which 6×6 pad it’s from. I loved Field Flowers the minute I saw it in the catalog and the samples in the SCS gallery are wonderful. I was heavily influenced by several samples there when creating this card -especially by 2 cards (this one and this one) created by Eileen LeFevre. Since I don’t have the card in front of me, I don’t remember all the exact colors and such, but I must say that I had a blast working on this card. As much I enjoy coloring, I really miss just straight-forward stamping and this set is perfect for that. It also plays to my love of a more vintage look that I don’t play with very often any more.
Thanks for stopping by. I’m off to start working on that daunting to-do list! I hope you have great day!
![]()
Nestie Frame Two Ways
May 26th, 2011
Oh. My. Word. What a week! The Rocket Scientist and I were scheduled to go on a fun RV weekend down to San Diego last week. We had a spot reserved right on the bay. We were excited. Tessa was excited. On Wednesday I shopped for groceries and got the trailer mostly packed so we could finish up and leave Thursday sometime before noon. When TRS arrived home from work Wednesday night, he was feeling a little “off” and we both thought the trip would do him good. But then…Wednesday night/Thursday morning he was struck by a NASTY stomach virus. The worst of it lasted 2 full days and our trip was obviously OFF.
I did quite a bit of stamping, as I considered it still “vacation” of sorts and completely put aside my regular to-do list. By Sunday morning, TRS was feeling up to going to church and I was feeling relieved that I had not succumb to the ugly illness. Uh…yeah…then Sunday afternoon I started feeling nauseous as I struggled to put the finishing touches on a card. YEP…by Sunday evening it was clear that it was my turn. UGH! It’s Thursday and while I am over all the bad stuff, I still just don’t feel 100%.
WHAT. A. WEEK.
I do have 2 cards to share with you today. These are the last 2 cards we created in my class a couple of weeks ago. The first card was used to teach how to make a nested frame with Spellbinders dies and it was the jumping off point for the much fancier version I made for Lori’s birthday. Everyone had a choice of 2 different sentiment combos all from TE stamp sets. We also used the TE butterfly die. Paper is MME Mary Mary. I love how the one sheet has a scalloped edge!
We used 2 sizes of the same Nestie set. First the larger size was centered into the striped dp panel and secured with temporary tape and die cut. This leaves you with the large frame pice you see here and the smaller shaped pice which we used inside the card. Then BOTH dies were centered into the other patterned piece (bright pink) and secured with temporary tape and die cut. That second die cut leaves you with 3 peices – 1. the bright pink frame you see here, 2. the center which we used to die cut the butterfly (you see the opposite side of the paper here), and 3. the large frame piece you will see in the next card. This is an easy way to make a WOW card that is still flat for mailing. And of course you can frame and feature a sentiment or an image.
I had only planned to do 3 cards in class, but when I got done with this card I had this beatiful piece of designer paper left over already cut into a frame. The sage colored side would be wonderful for a masculine card so I decided to see what I could come up with.

I adhered the frame panel to an Early Espresso cardbase. Then I stamped this retired SU lighthouse image with Sage Shadow ink on vanilla cardstock and die cut it with the smaller nestie. I sponged Espresso ink aorund the edges to fill in where the image did’t quite fill the shape. That was adhered to the card and I added some twine and called it done. I think this will make a great Father’s Day card! Isn’t it amazing how two such different cards could come from the same piece of designer paper?
Yesterday all I managed to accomplish was a few loads of laundry. Today I absolutely must get groceries and hope to cross a few more things off my almost-forgotten to-do list. Tomorrow I’ll be back with a fun sample (already done – YEA!) for the new Taylored Expressions Sketch Challenge. I hope you’ll come check it out.
Thanks for stopping by. Have a great day!
![]()
Sweet Summer Thank You
February 21st, 2011

It was a work day here. Not sure why the Rocket Scientist didn’t have the day off, but I kept quite busy all day! Just wanted to stop in and share another card I made with Sweet Summer (SU) last week. This was also inspired by one I found in the SCS Gallery (I told you there were a ton of fantastic cards in there!). The one that inspired me this time was by Fran Sabad. I wasn’t actually looking at it when I made my version, but I was totally inspired by hers!
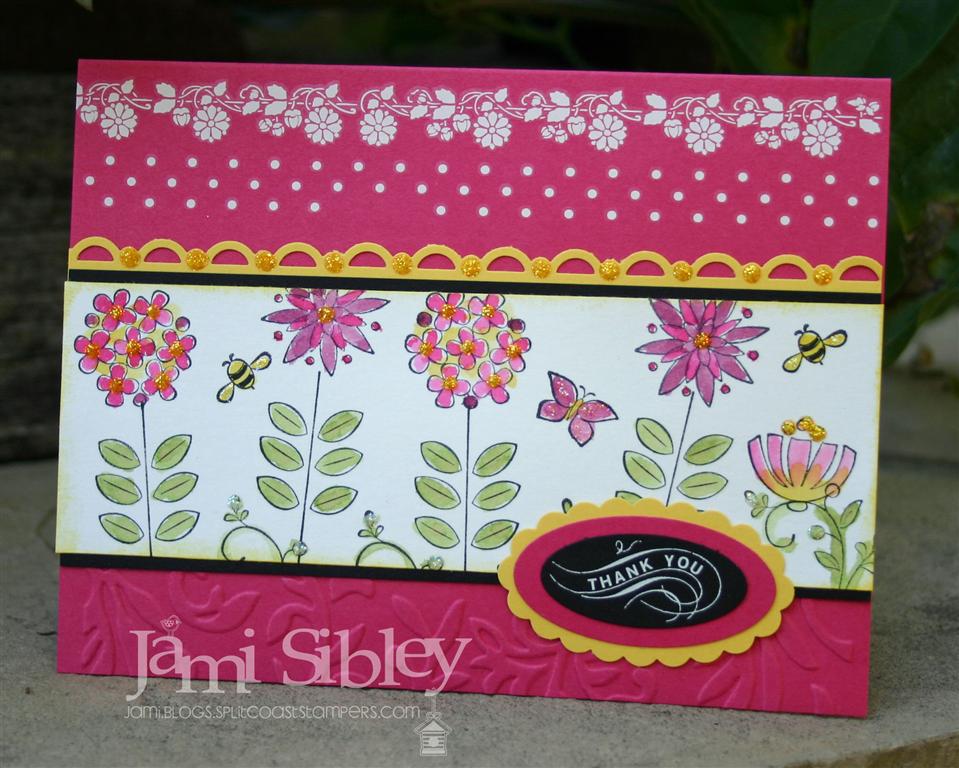
Flowers were watercolored with ink and an aquapainter. The white images at the top and the sentiment are rub-ons from my extensive, rarely-used, but much-loved stash! Cardstock colors are Melon Mambo, Daffodil Delight and Black. Yellow stickles gave just the finishing touch I was looking for. I just love this stamp set and hope I can find some more time to play with it!
Thanks for stopping by!
![]()


