Dad’s Birthday
May 31st, 2013
Happy Friday! My Dad’s birthday was earlier this month and I just realized that I never shared the card I made for him. I had fun playing with some new dies from Taylored Expressions – Birch Tree Cutting Plate, Birch Tree Border, and the Band It Die. I also used the Cloud Border die to create a mask with post-it notes, to sponge the cloudy sky background using shades of blue and purple SU inks.
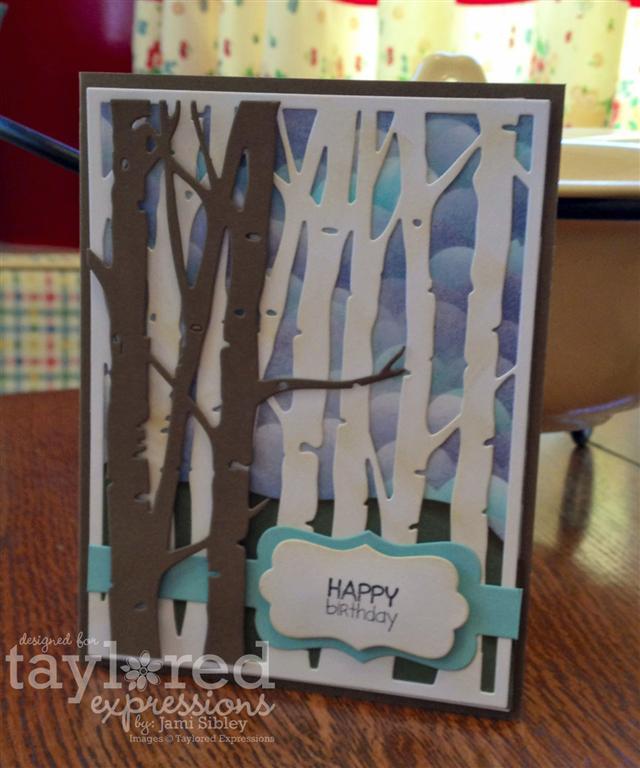
These birch tree dies have been really popular in the store and I can see why. It’s so quick and easy to create great cards with them!
Thanks for stopping by. I hope you have a lovely weekend ahead!
![]()
My May Class
May 30th, 2013
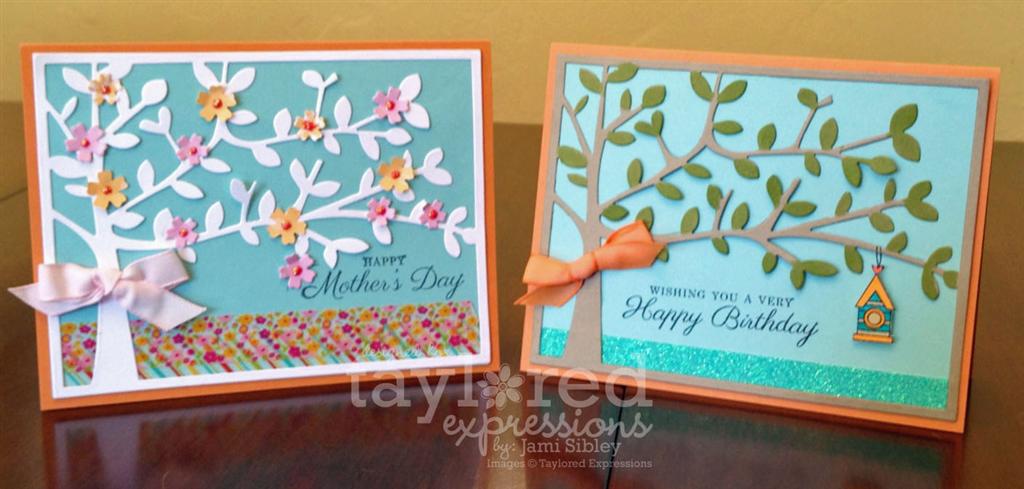
I thought I’d sneak in with some of the cards we created in my May stamp class before the month of May is over. First up is this pair of cards created with the TE SHade Tree Cutting Plate. Each gal chose to either make the white flowering tree or the kraft tree with birdhouse. Of course the sentiments were interchangeable. The white tree has washi tape (inspired by a card made my Broni Holcombe) and the kraft tree has glitter tape. You KNOW I love that shade tree! Seriously cannot get enough of it! You can click the photo to make it larger, This was snapped quickly with my phone and then I gave these cards away before I could get a better photo.
I typed up instruction sheets for my class. Here they are, in case you’re interested:
- Die cut the tree from white cardstock
- Die cut the flowers twice: once from pink paper and once from peach paper
- Choose two patterns of washi tape and adhere to the bottom of your blue panel.
- Lay your tree over the blue panel (but don’t adhere yet) and determine where you want to stamp your sentiment using your stamp-a-majig. Note: You may need to trim off a leaf or low hanging branch to get the placement you want. (You can use either sentiment.)
- Adhere the tree onto the blue panel carefully using SMALL amounts of liquid adhesive.
- Use your stamp-a-majig and stamp the sentiment.
- Adhere blue panel to peach cardbase.
- Curl the flowers with your fingertips and then adhere randomly (10-14 of them.)
- Make bow and adhere with a mini glue dot.
Optional – apply Stickles to flower centers.
-OR-
- Die cut the tree from kraft cardstock
- Color the leaves green with the broad tip end of a copic marker
- Stamp and color a birdhouse.
- Apply a strip of glitter tape to your blue panel.
- Lay your tree over the blue panel (but don’t adhere yet) and determine where you want to stamp your sentiment using your stamp-a-majig. Note: You may need to trim off a leaf or low hanging branch to get the placement you want. (You can use either sentiment.)
- Adhere the tree onto the blue panel carefully using SMALL amounts of liquid adhesive.
- Use your stamp-a-majig and stamp your sentiment.
- Adhere blue panel to peach cardbase.
- Cut out your birdhouse and adhere with a foam dot. Draw in the string so it hangs from the branch.
- Make bow and adhere with a mini glue dot.
This next card was inspired by one that Shelly Mercado created using the TE Arched Window die, Banner Stacklets, and the stamp set A Glimpse Inside. I also used the TE Band It Die.

- Stamp and color the tulips image. Trim with scissors: close on the two sides, but leaving plenty of room at the top and bottom to adhere it to the back of the window die.
- Die cut the window and two pieces of the Band It die on white cardstock. All 3 pieces can be cut in the same pass in the die cut machine.
- There are two sizes of white tag Stacklets to be layered. Emboss the smaller one with an embossing folder in the Cuttlebug. Then adhere the two pieces together.
- Adhere your stamped image behind the window die cut.
- Adhere the window to the layered tags.
- Choose one of the background paper panels and adhere it to your cardbase.
- Adhere the tag panels to your card.
- Center the large piece from the Band It Die on your card so the top of it slightly overlaps the bottom of the window die cut. Adhere to card. Trim off ends of Band It die cut with scissors.
- Take the small inset piece of the Band It die and adhere it to your work surface with temporary tape.
- Choose any sentiment from Labels of Love or Labels of Love II (double check that your choice will fit—most will) and use your stamp-a-majig and stamp the sentiment onto the small piece.
- Adhere your sentiment to your card.
Design Tip:
When creating a with a white on white or other monochromatic look, use texture such as an embossing folder to create interest and depth.
We also created a third card in class, but I forgot to take a photo of it. I’ll try to share that one later. Thanks for stopping by!
![]()
Celebrate Today
May 28th, 2013
Happy Tuesday. It was a very busy 3-day weekend around here with lots of chores, purging, cleaning out and more. I took a little time yesterday to play the Mojo Monday challenge and create a birthday card for a very sweet friend.
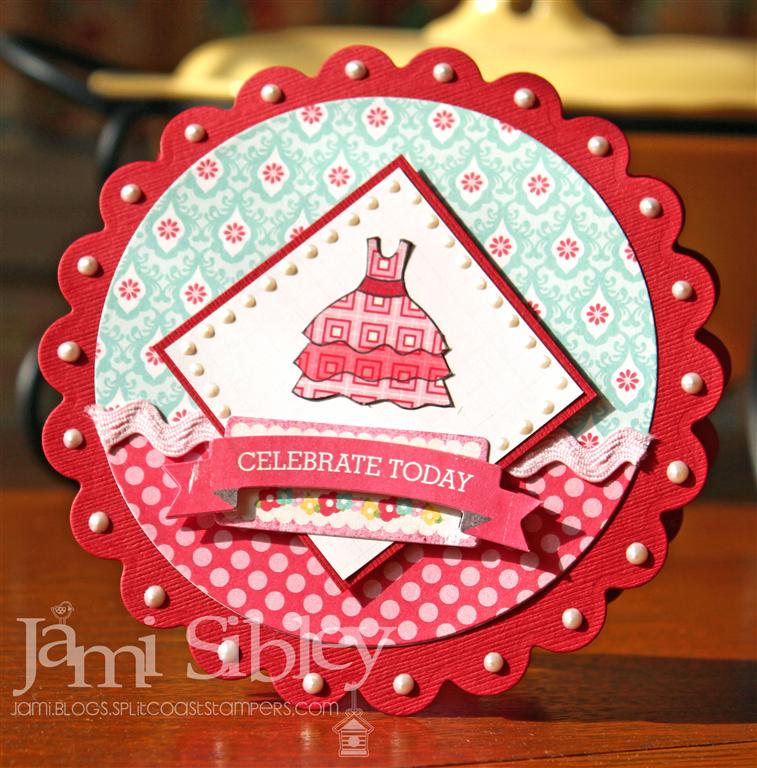
I used my Grand Nestabilities circles and scalloped circles along with the May Key Ingredients Kit (featuring Echo Park Sweet Girl) from Taylored Expressions and also the Stamp of the Month – Cutie Pie from TE. These are both available as part of a monthly subscription program. For the best value, you can combine into a Deluxe Subscription. The little sentiment piece is from a set of Sweet Girl coordinating stickers (seems to be out of stock at TE – sorry.)
I’m home for lunch and need to run. Busy week at work after having Monday off! Thanks so much for stopping by.
![]()
Taylored Expressions Stamp of the Month for May
May 14th, 2013
Hello there! I’m excited to play along with the TE Designers from both the Key Ingredients Team and the Baker’s Dozen to showcase the May Stamp of the Month set, as well as the May Key Ingredients kit. When given the option, I jumped at the chance to play with this darling set – Cutie Pie – and these fabulous Echo Park papers and coordinating elements.
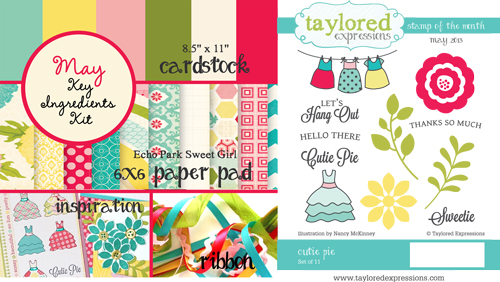
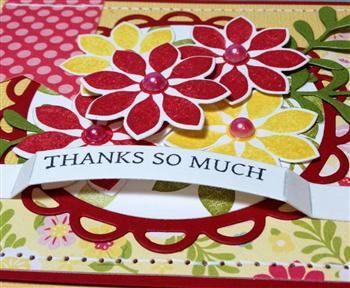
This is currently one of my very favorite color palettes. It just makes me happy. For my card today, I chose to work primarily with the yellow and red along with a touch of olive. I used Karen’s SSSC184 for the layout. The stamp set, coordinating die set, Key Ingredients kit and a few good sketches is really all you need for hours and hours and fun!
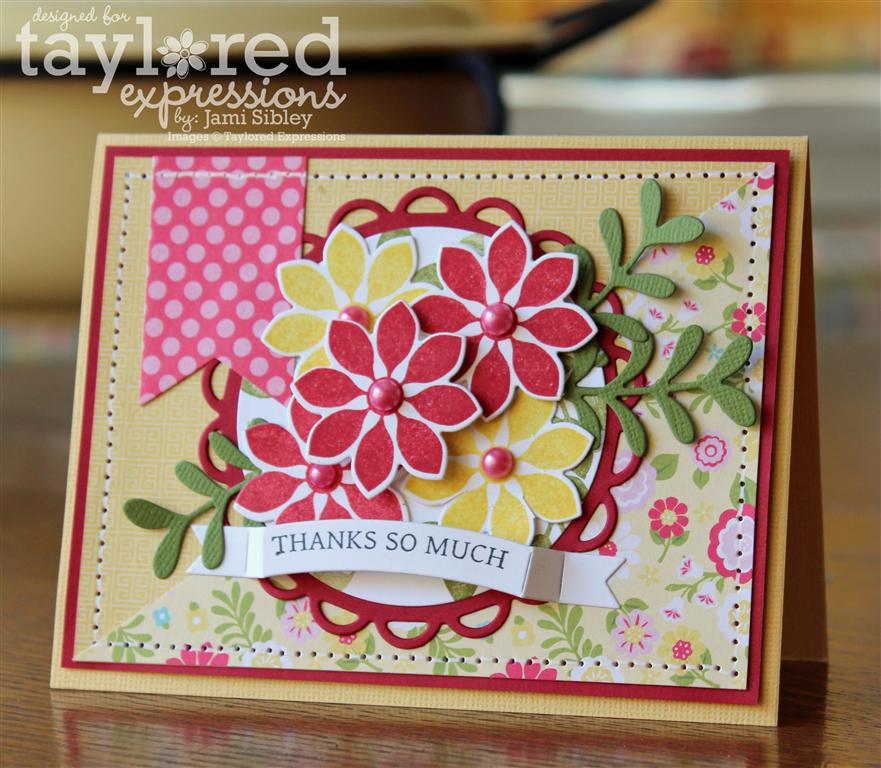
The coordinating die set – Branches, Banners & Blooms includes the flower, branch, and scored banner dies I’ve used here in addition to another branch die. The scored banner is so cool, because it pops up! Supplies I added (not in the KI) were pink Kasiercraft Pearls, TE Banner 1 Stacklet die, Spellbinders cricle and open scallop circles dies, SU ink (Real Red, Daffodil Delight), and foam dots.
I love how this card turned out and I can’t wait to play with this set some more!
Stamp of the Month is a subscription service at TE so that you can have an exclusive new set delivered to your door automatically once a month. Key Ingredients is also a subscription, so you can receive a monthly kit with patterned papers, cardstock, and ribbon. You also have the option to save by combining the two subscriptions into one Deluxe option. The Stamp of the Month set is always designed to coordinate with the Key Ingredients kit. It’s a match made in heaven!
There’s a ton of inspiration out there today. Let’s go check it out!
- Amy Crockett
- Carole Burrage
- Cassie Trask
- Charmaine Ikach
- Debbie Carriere
- Jami Sibley <— you are here!
- Kerri Michaud
- Monika Davis
- Regina Mangum
- Sankari Wegman
- Shelly Mercado
- Stephanie Kraft
- Tammie Edgerton
- Taylor VanBruggen
- Tracy Clemente
- Thanks so much for stopping by. I held my monthly stamp class last Friday and I hope to get pics of those projects up here on the blog later this week. It was a really fun class!


