Taylored Expressions March Sneak Peeks – Day 2
February 28th, 2012
Happy Tuesday! 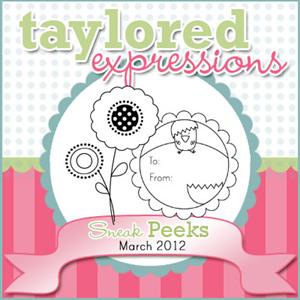 I’m excited to join the Baker’s Dozen in Sneak Peeks today for the TE March Release. I didn’t get a chance to play along yesterday, but did you see all the darling samples? OH MY! Be sure you read the summary points, because you have two easy ways to win some GREAT Taylored Expressions prizes this week!
March Release At a Glance
- We have sneak peeks to share Monday through Wednesday. All of the new products will be available for purchase on Thursday, March 1st at 8 am PST. You’ll find it all in the Fresh out of the Oven Department at the Taylored Expressions Store.
- Join us as a fan on Facebook for an early peek at the stamp sets, as well as a SPECIAL Facebook GIVEAWAY, on Wednesday night beginning at approximately 6 pm PST.
- Mystery Baker’s Dozen Blog Giveaway: Each day, one lucky blog commenter will be chosen by random draw to win a $10 TE Gift Certificate. Winners will be chosen from a different Baker’s Dozen blog each day and will be announced on Taylor’s blog on Release Day! Be sure to hop around to see all the sneak peeks and leave comments on each and every blog for more chances to win. Limit one comment per blog per day, please. Comments for the drawings close Wednesday 2/29 at 7pm PST.
Today we are showcasing four different Petite stamp sets all illustrated by Nancy McKinney. The one I’m featuring is a beautiful and super versatile little set called Spring Tulips. It includes this gorgeous bouquet image along with a single tulip and 4 sentiments. One of the great things about tulips is that they come in so many different colors, so you have lots of choices!

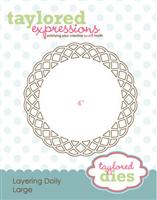
In the last week or so I’ve noticed several cards on blogs and Pinterest that used round windows (like this one by Maile Belles and this 3rd one down by Iwona Palamountain.) I love making window cards, so I decided to jump on the bandwagon. I used a circle nestie to cut a window out of a TE Choice Snow White panel (4″ x 5.25″) and then I embossed that panel with the Houndstooth/Damask Impression Plate. I wanted to create a frame for my image so I die cut a Layering Doily Die – Large from black cardstock. Then I took the same circle Nestie and cut that out of the center of the doily die cut. That created this beautiful frame which I adhered with a glue pen. Taylor’s Tiny Twinkles were added with the help of Embellie Gellie and Glossy Accents.
 The image was stamped directly on the card base and colored with Copics. Then the embossed and framed panel was adhered with foam tape for dimension. Since I got excited and forgot to stamp my sentiment before I embossed the panel, I decided to stamp it on a separate scrap of cardstock and punch it out with an SU small oval punch. Patterned paper is My Mind’s Eye 6×6 Miss Caroline Dolled Up. I actually started with that strip of paper and chose my Copics from there.
I think I’ll be using this wonderful little set quite a lot! It’s easy to color and can be used for so many things!!
Taylored Die and Impression Plate I used:

Now let’s see what the Baker’s Dozen has cooked up for us today:
- Charmaine Ikach
- Jami Sibley (DT Coordinator) <— you are here
- Jen Shults
- Jodi Collins
- Karen Giron
- Melissa Sauls
- Melody Rupple
- Nancy McKinney (Illustrator)
- Regina Mangum
- Sankari Wegman
- Taylor VanBruggen
- Tori Wild
- Wanda Guess
Don’t forget to leave some love along the way so you can be entered into the daily drawings! Thanks for stopping by. Have a great day!
![]()
TESC153 Sweet Stuff
February 24th, 2012
Happy Friday! 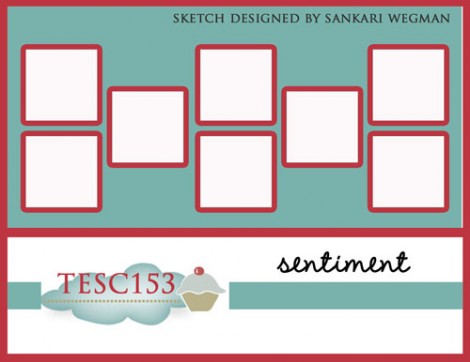 It’s time for a new Taylored Expressions Sketch Challenge. The sketch was designed by the talented Sankari Wegman from the Baker’s Dozen. I won’t lie…it’s kind of a doozy! But once Taylor encouraged me to “think outside the box”, I got going and had some fun with it!
I just looked through stamp sets until something inspired me and I landed on Build a Treat with a sentiment from Sprinkled With Love. I used a stamp-a-majig to place and build my images and I kept the card super simple. A little Copic coloring, a little paper-piecing, some glitter, liquid pearls and glossy accents along with some wide polka red ribbon. Easy-peasy and pretty quick too.

I hope you’ll play along with us. You have 2 weeks to enter and TE stamps are not required. There are a couple of chances to win prizes, so be sure to check out all the details on Taylor’s blog. Now let’s see what the rest of the Sketch Crew has created:
Thanks so much for stopping by. I hope you have a great weekend!
![]()
Happy Valentine’s Day!
February 14th, 2012
Not only is it Valentine’s Day, but today is my first day of training for my new job as Administrative Assistant to the Senior Pastor (Office Manager for short *wink*) at our church. I couldn’t go in today empty handed, so I made up some fun little treats. 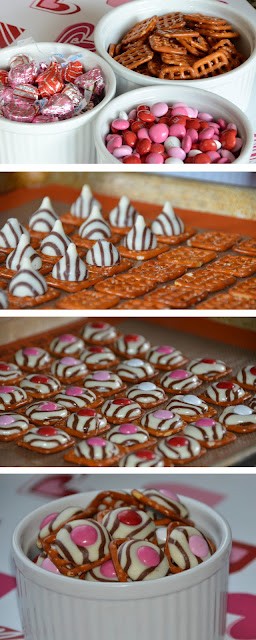 I had pinned this photo on Pinterest of Pretzel Buttons from g*rated. (Click the link for detailed instructions.) They seemed simple enough, so I made up a batch of them on Sunday and packaged them yesterday.
I used the Peanutbutter M&M’s because my gorcery store didn’t have regular M&M’s in Valentime colors. OH.MY.WORD! Have you tried the Peanutbutter M&M’s? I could eat a whole bag of them. I will not be able to buy them again. I have absolutley no will power over them!
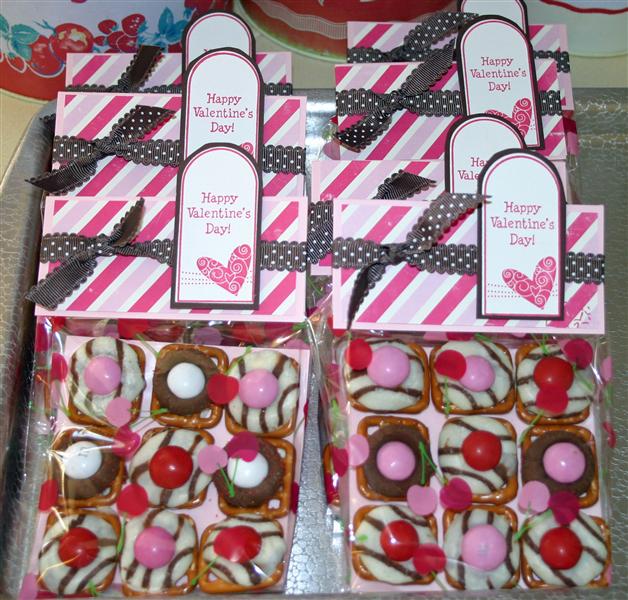
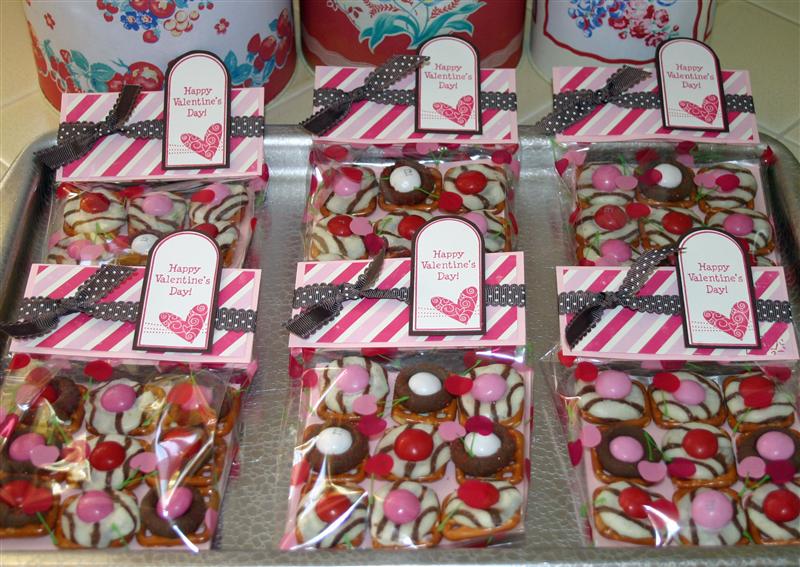
I had some printed cello bags on hand that had cute little pink and red cherries on them – perfect for Valentine’s Day! For the toppers I used Echo Park Be Mine papers (I have lots left from my birthday stuff) along with SU Chocolate Chip polka dot ribbon and TE stamps and dies – Totally Tags Valentine. I slipped a 4″ square of pink cardstock in the bag. I didn’t want the pretzels to tumble down into a pile and I thought that if I were using wrapped candy I would be able to glue it to the cardstock square. I decided to try a little trick and it worked out great!
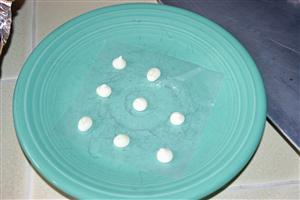
After all my pretzels were done and competely set up, I cut 4″ squares of wax paper and placed white chocolate chips where each pretzel would sit. I put the wax paper and chips into the microwave on 50% power for about 45 seconds. Then I just smooshed the pretzels on topof the softened chips and let them set. This has the effect of “gluing” the pretzels in place. I just slid the cardstock square under the wax paper and transfered the whole thing to a cookie sheet to fully set.

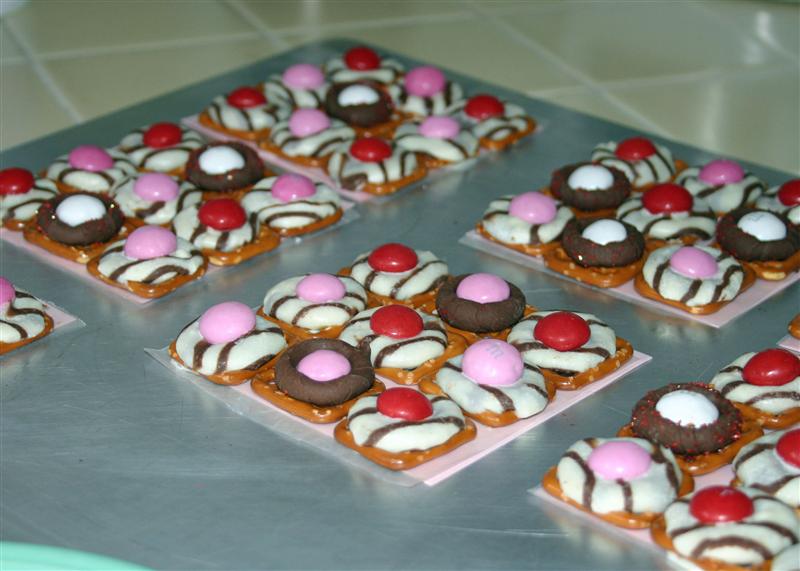
I used mostly Hugs as the original recipe called for, but I also had some regular Kisses on hand and wnated to try some of those as well.

I made up one for each of the Pastors and current office staff. Might as well start off on the right foot, right?
Happy Valentine’s Day! Thanks for stopping by! I’m off to begin my new adventure.
![]()
Who Knew 50 Could Be So Fabulous??
February 11th, 2012
 One week ago today was my 50th birthday and we celebrated with a BIG wonderful party! I have a bunch of photos and will be getting more from several friends over the next few days, so I thought I’d share a few of them with you today.
Last week was quite a week! The excitement started on Saturday the 28th as I headed out to Anaheim to meet up with Taylor, Melody, Regina, and Wanda for CHA. Both Sunday and Monday were spent on the convention floor, with dinners with very special women each evening. Tuesday I was home to get back on track with all the final party details – and boy was there a lot to do! Fortunately I had a ton of help from both local friends and from two very dear friends from out of state. We worked all week long to insure a good time would be had by all!
Oh and just to make things even a little more interesting, the Rocket Scientist had lithotripsy on Thursday to have 2 GIANT kidney stones blasted. Poor guy had to have a stent put in and the recovery has not been nearly as easy as he had been led to believe. There was some doubt if he would even make it to the party, but fortunatley he did make it and did well most of the evening. He had to be taken home just a little while before things ended.
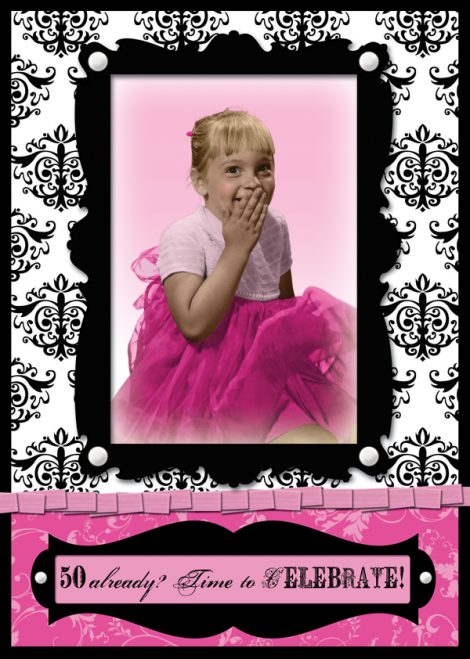
The theme of the party was “Life is Sweet” and the colors were black and white, fucshia and pink. Guests were invited to enjoy decadent desserts and live music. Here are the favors that were set at each place.
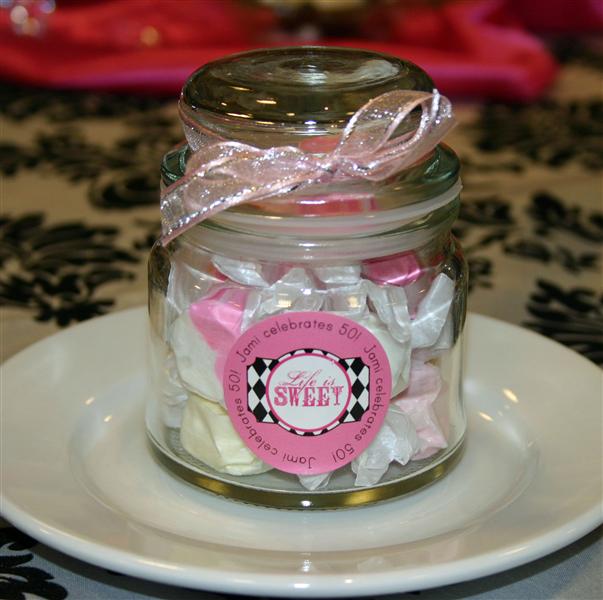
Thes cute little jars (from Specialty Bottle) were filled with pink and white taffy and I had custom stickers printed with my party logo for a personal touch. As guests walked in they were greeted by my sweet friends Lisa and Lori and they could find their table assignment on this poster. (Papers are Echo Park Be Mine Collection and that was the jumping off point for all the party decor.)

Tables were indicated by a number as well as different photos of me throughout my life. Some people expressed surprised at having table assignments, but when I host a party I’m all about doing everything possible to make sure guests have fun. I think part of that is making sure people will get to sit with people they know or people they will be likely to enjoy. (No one who knows me is surprised that I’m a bit of a control freak! LOL!) Here’s what the tables looked like.

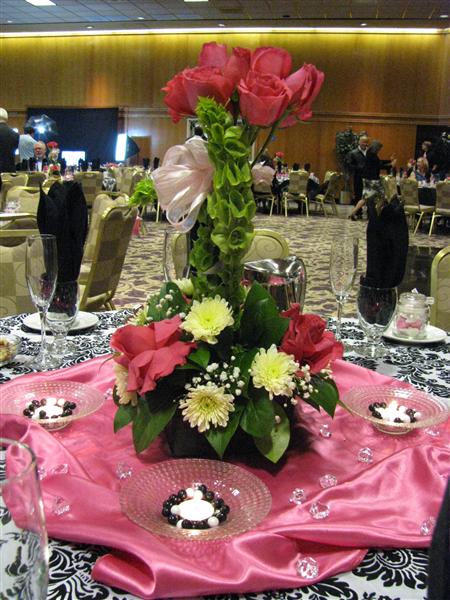
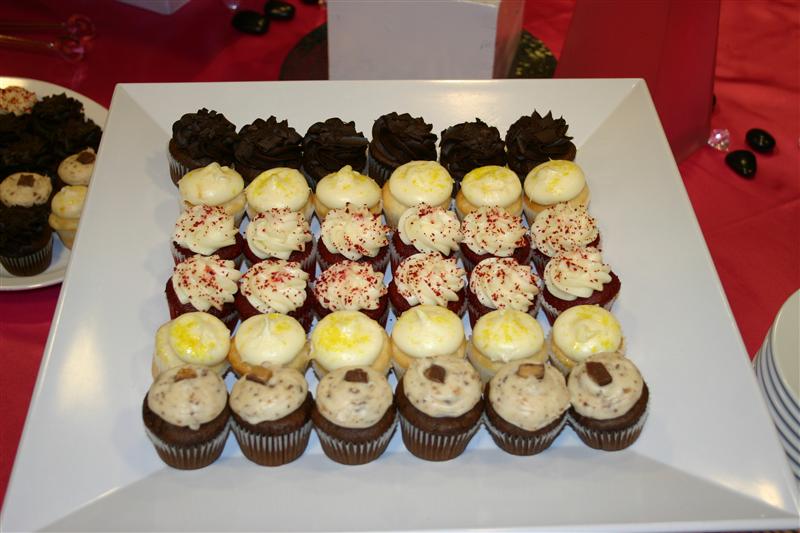
I couldn’t have been more thrilled with how everything looked. It was really stunning! We had two dessert stations serving crepes and ice cream sundaes over warm cookies or brownies, plus there were mini cupcakes. My one party regret is that I never got even one cupcake! I heard they were yummy though!

We had a photo booth set up where people could get their pictures taken for my guest book. They could go serious or silly or both. It was a HUGE hit!


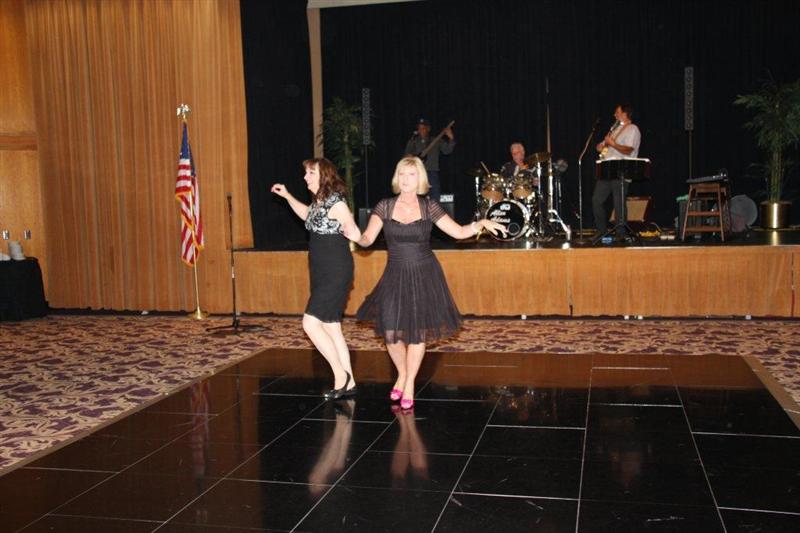
There was a live band called The Balcony Boys and they were awesome! Everyone loved them! Curt and I found them playing out on an apartment balcony in Seal Beach last Summer. I hadn’t origianlly planned to have a dance floor, but decided a week before the party to add one and I’m so glad I did. More people got up and danced than I had expected. You know, I managed the Long Beach Arthur Murray Studio in my 20’s and have been missing dancing quite a bit. My BFF, Ruth, worked there with me as well and we got up and danced a few songs together at the party. What a blast, despite the fact that we both had trouble remebering the man’s part to lead. LOL!
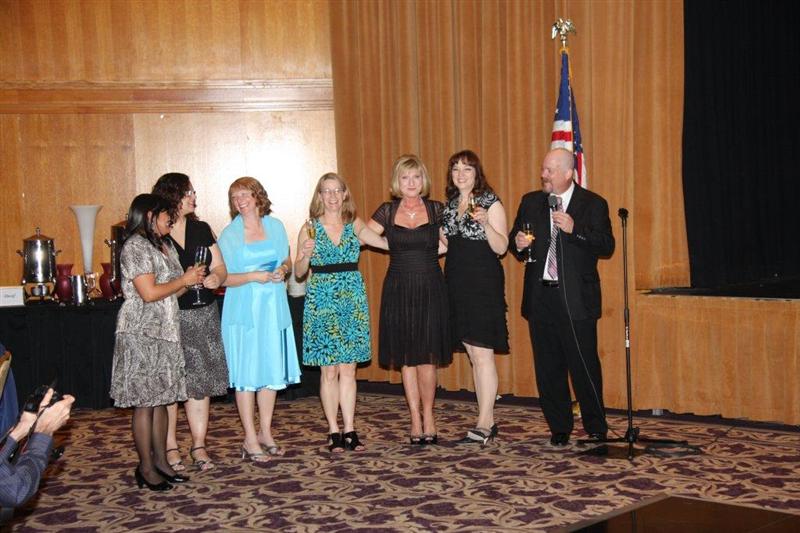
We called up everyone at the party that will turn 50 this year and had a special toast. I’ve known some of these girls since elementary school or Jr. High.
Here I am with my nieces Kira and Britta and their mom Lill.
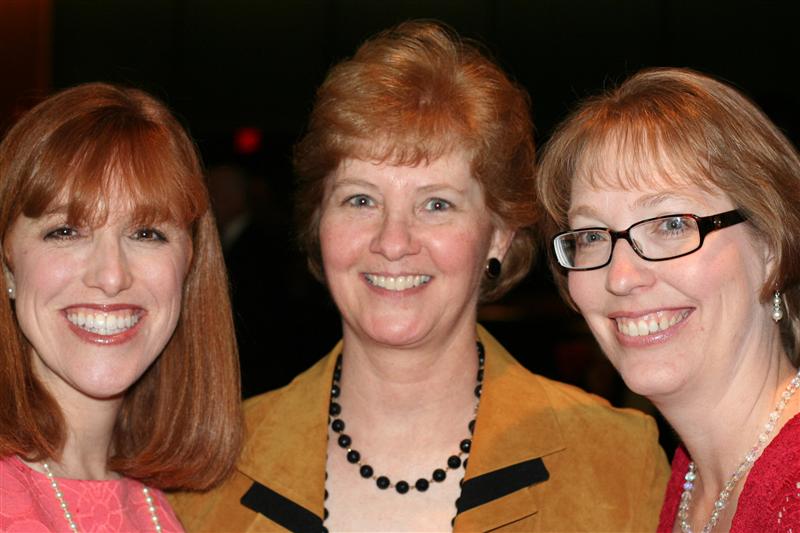
Here are some very special friends Lisa, Stephanie and Darla.
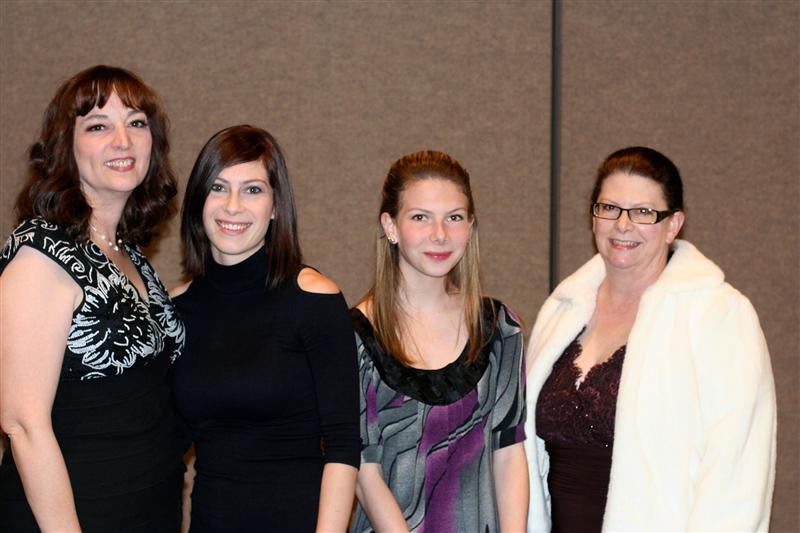
And sweet friends Lori Craig and Taylor VanBruggen who I’m sure all of my blog readers know well! What a blessing to have them here from Missouri and Iowa. Taylor gave me an incredible gift that I didn’t get to open till the next day. It included handmade cards from over 25 different “internet friends”. It was so amazing to open each one of them. I haven’t had a chance to thank each person, but please know that if you sent a card, I love it and appreciate it and am so grateful!

My BFF since high school came down from Vancouver, WA. She and her hubby stayed in SoCal for almost a week and it was wonderful to spend time with them.
All in all we had about 90 guests come from every realm of my life to help me celebrate the BEST BIRTHDAY EVER! There are lots more photos and maybe I’ll share some more next week. (I’m hoping someone has a good one of Curt and I together.) From everyone at the party, to everyone who sent cards, to everyone who left me birthday wishes on Facebook – THANK YOU! And a huge thank you to my Uncle Bernie and my Mom and Dad for hosting this big shindig and to the friends on my “Party Planning Committee” who worked tirelessly and kept me sane! It’s been a week and I’m almost recovered. I feel so loved and so special and so happy and so BLESSED!!!! Really really so BLESSED! Who knew 50 could be so fabulous???
![]()
TE Key Ingredients and Vintage Dreamer Hop
February 10th, 2012

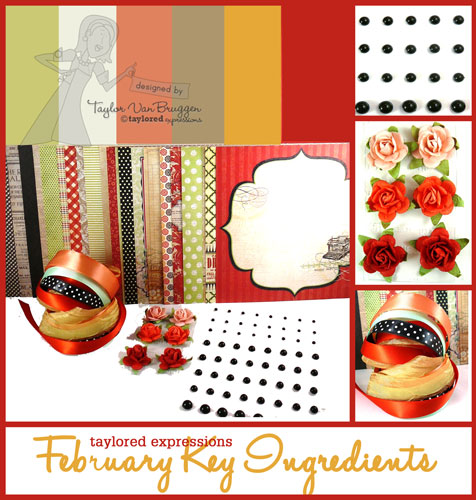
- Key Ingredients Info and Inspiration – February 10-15 – learn all about this fantastic kit club and see samples from the Key Ingredients Design Team and the Baker’s Dozen! Click here for all the info and start at Taylor’s blog each day for all the inspiration.
- February Key Ingredients featuring My Mind’s Eye Lost & Found – Rosy begins shipping February 15th. Enroll now!
- Exclusive Vintage Dreamer Stamp Set – find out how you can get your crafty little hands on this stylish new set at 50% off for a limited time!
- Win a Key Ingredients Kit – you can win the March Kit to try out, or have a month added on to your current subscription. See Taylor’s blog for all the details and to enter to win! It’s easy!
I’m excited to be playing along with the Baker’s Dozen and the Key Ingredients Team to showcase both the new Vintage Dreamer stamp set and the Key Ingredients kit club from Taylored Expressions.
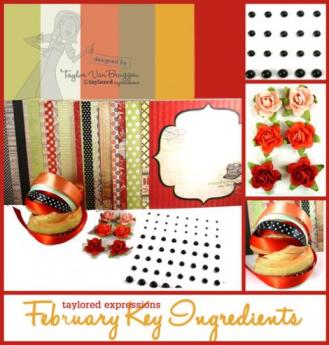
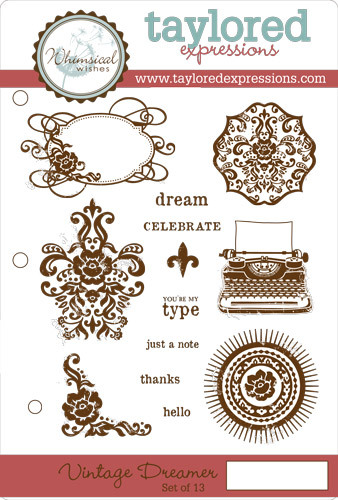
Isn’t that stamp set gorgeous? It is EXCLUSIVE to Key Ingredients Subscribers and you can read all the details on Taylor’s blog. If you are not currently a KI Subscriber, now is the perfect time to jump on board. Not only is this month’s kit (seen above) beautiful, but I’m drooling over the kits to come as I had the privilege of being with Taylor at CHA as she picked out out the papers for upcoming months. You will NOT be disappointed! It is so GREAT to have patterned paper along with the coordinating cardstock and ribbon as well as embellishments – all together right at your fingertips. Whether you are a beginning stamper trying to build up your arsenal of supplies, or a seasoned paper crafter trying to streamline the process, you will LOVE having these kits delivered to your doorstep every month!
Here’s my sample using elements from the Februrary Key Ingredients Kit along with the new Vintage Dreamer stamp set.
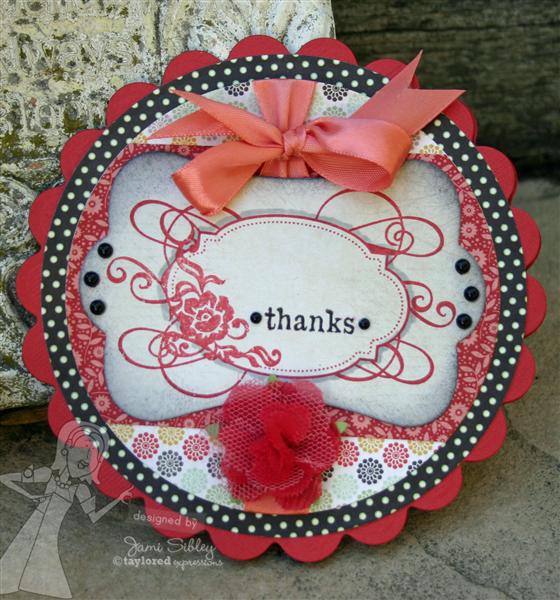
I created a 5.25″ round card using Nestabilities Grands Dies (Circles and Scallop Circles.) I’ve been dying to play with the large round cards I’ve been seeing everywhere and I finally took the plunge on the Grands and used them with my Grand Caliber Die Cutting Machine – lots of fun! Here’s a photo of the inside of my card.

I used SU Ruby Red ink which coordinated perfectly with the reds in this kit. I colored around the label image with a gray Copic for a little dimensional shading. The image was die cut with the Frame It Up 1 Taylored Die and I sponged around that with SU Basic Gray ink.
Now let’s see what everyone else created!
- Debbie Carriere
- Jessica Diedrich
- Jessie Rone
- Lea Lawson
- Monika Davis
- Charmaine Ikach
- Jami Sibley <—– you are here
- Jen Shults
- Jodi Collins
- Karen Giron
- Melissa Sauls
- Melody Rupple
- Regina Mangum
- Sankari Wegman
- Taylor VanBruggen <—- special offer details and a PRIZE up for grabs here!!!
- Tori Wild
- Wanda Guess
Thanks so much for stopping by today! I hope you have a wonderful weekend. I plan to be back here tomorrow to share some fun personal stuff. 🙂 I hope you’ll come by!
![]()


