Shining Light
March 8th, 2011
Happy Tuesday! I need to get out the door to the office, but before I go, I wanted to share a couple of things. First I am so excited to show you the new mini chandelier in my stamp room. I have needed lighting over my cutting station forever and even more so as my close-up eye sight has gotten worse throughout my 40’s. UGH! So the Rocket Scientist got me this beautiful chandelier for Christmas!
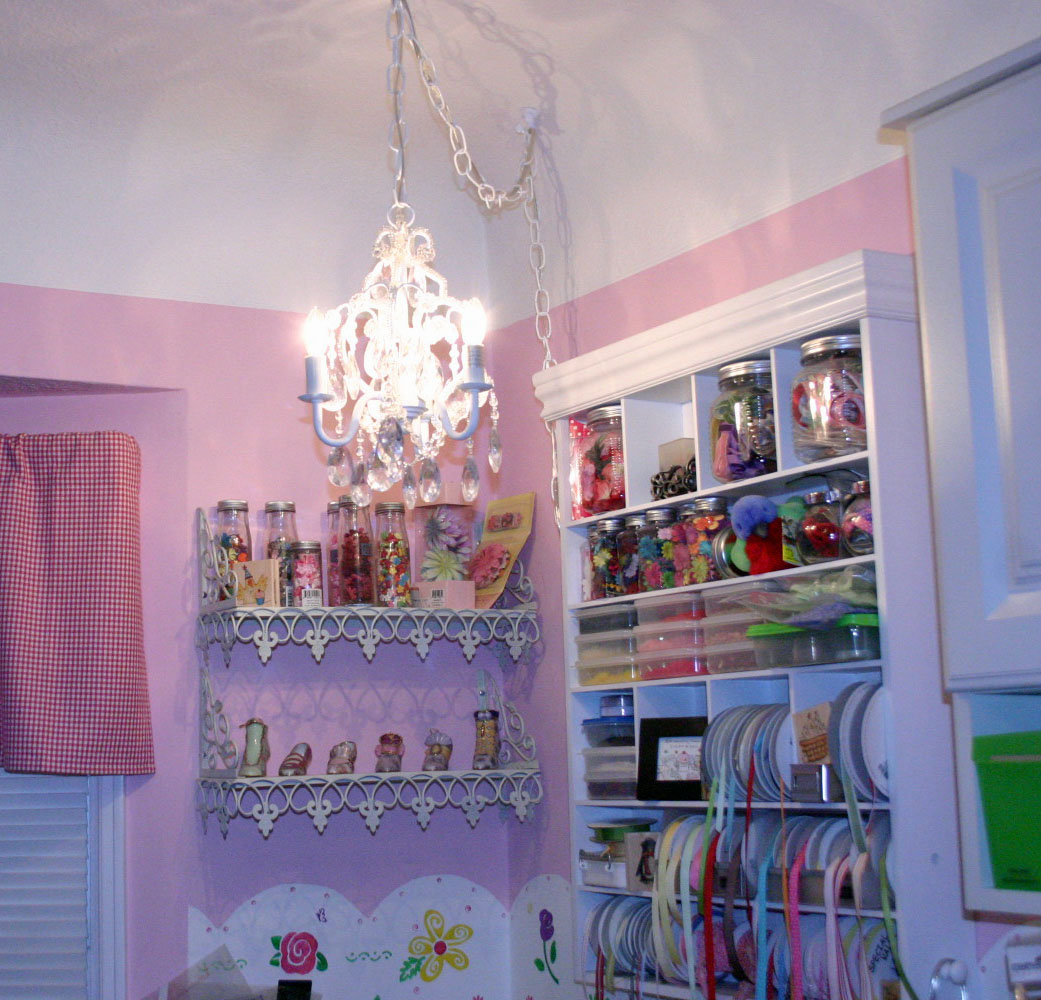
We had intended to get it up much sooner, but he has been pretty consumed with getting the new storage area ready for the 5th wheel…much bigger job than we originally anticpated. It was worth the wait, don’t you think?
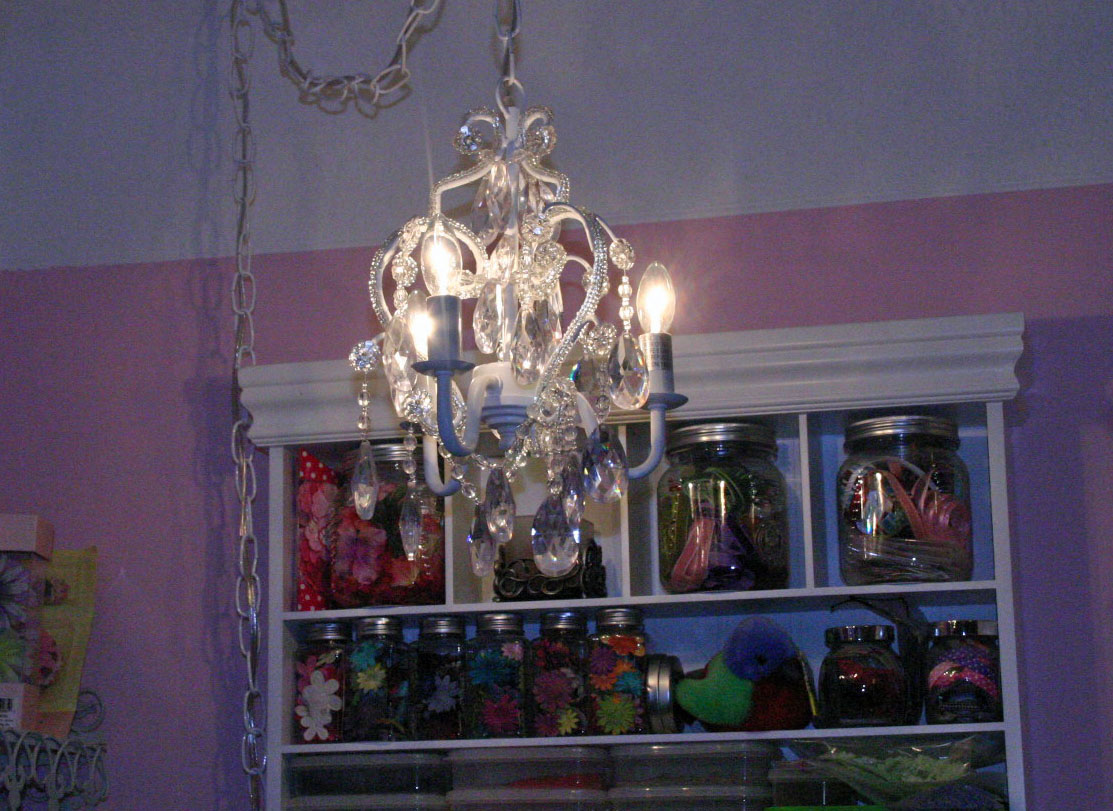
Pretty AND functional! I love it! The second thing I wanted to share is one of the cards we’ll be making in my class this Thursday evening. I totally CASEd this card from Lea Lawson who was the Guest Designer at Taylored Expressions for the last 2 months. The minute I saw it, I knew we had to make it in class at some point. I used SU patterns papers (from SAB) and ribbon. The stamps and dies are Taylored Expressions.
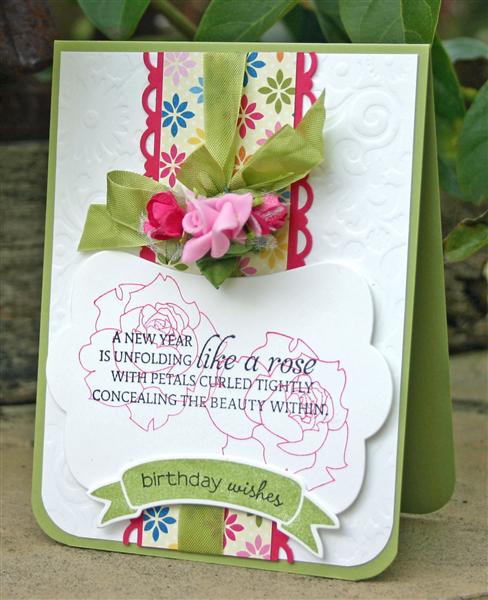
I have a couple of spots left in class. Registration is $15 (open through Wednedsay afternoon only) and we’ll be creating three cards. Let me know if you’d like to join us! I need to dash. Have a great day!
![]()
Baby Card and more…
January 24th, 2011
Happy Monday! Our weekend was so incredibly jam-packed busy that I really need a day of rest! But that’s not going to happen since CHA starts on Saturday and I have a ton of things to do before heading out to L.A. for 3 days. CHA is the Craft and Hobby Assocation Trade Show and I get to go with Taylored Expressions and walk the show looking for the newest and most awesome papercrafting products to stock in the TE Store, plus hook up with stamping friends from across the country! (If you’re going to be there, please let me know!) One of those sweet friends is coming into town on Thursday and I’m excited to spend some time with her before the craziness of the show starts.
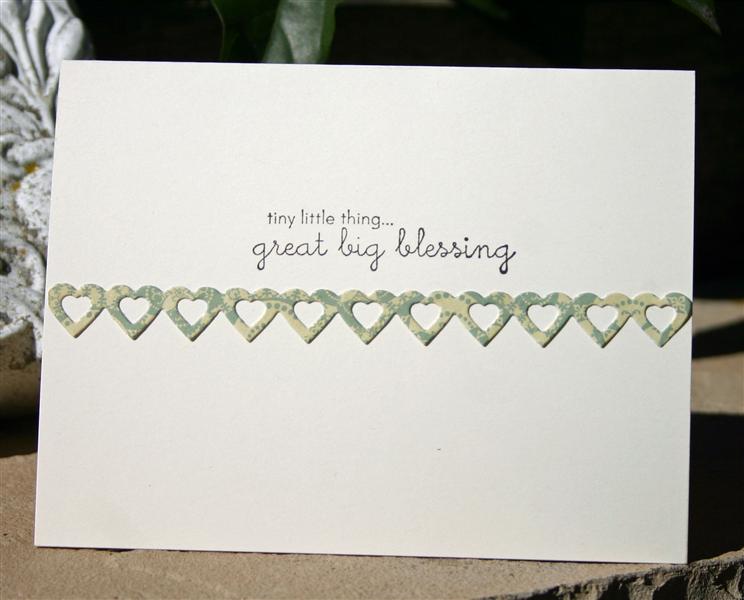
Today I want to share a sweet baby card I made for a friend who is just about 3 weeks away from her due date to deliver her 3rd little boy! I’ve never had a lot of baby stamps and my current go-to set isn’t totally a baby set – Hangin’ Out from Taylored Expressions. I do love the possibilities with this set for baby and lots of other things as well. (Click on photos to see them larger.)
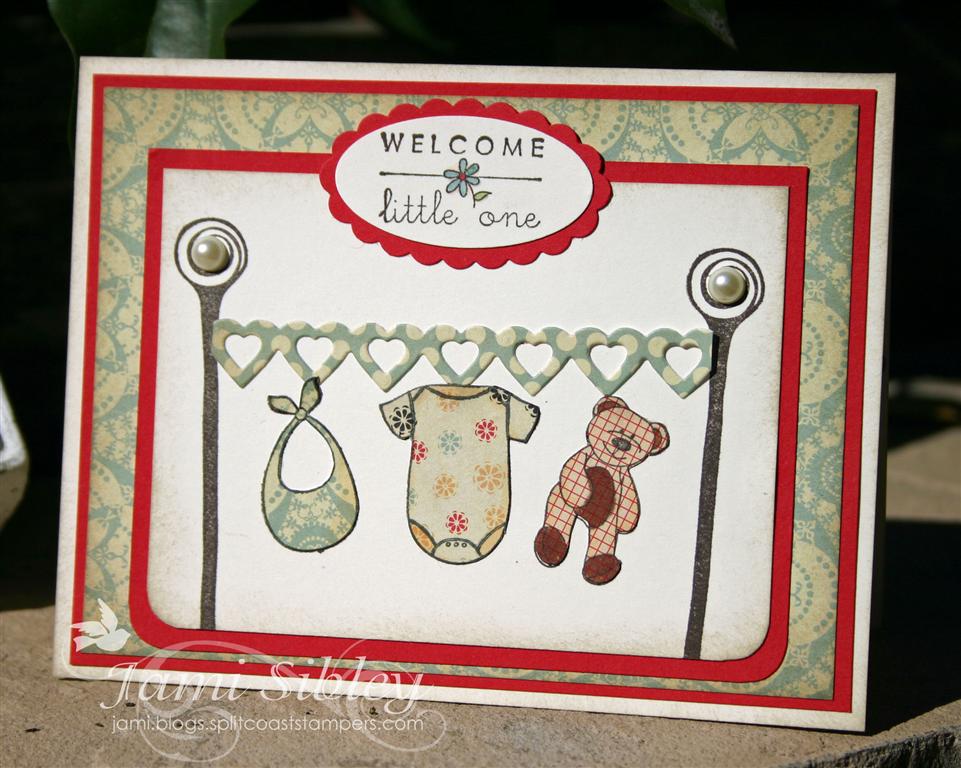
I was excited when I had the idea to use the Heart Border Die from TE as the clothesline! Cute, huh? I used the Cosmo Cricket Circa 1935 Mini Deck for a vintage-y feel and kept the card really simple – just paper-pieced the elements and added a litle copic shading.
One of our big activites this weekend was getting my parents’ 38-foot 5th wheel trailer out of storage and bringing it to our house to live. Curt is still working on building gates and a gravel pad for it to sit on at the side of our house, but it’s on our front lawn for now. We’ll be getting rid of our motorhome soon. I love our motorhome and will be really sad to see it go, but this trailer is much newer and much bigger and it’s a win-win for us to be able to use it and for my parents to not have to pay storage fees. It has 3 slide-outs and when they are all popped out, it’s REALLY BIG! Here are a few photos we took yesterday afternoon after getting the interior cleaned (it’s amazing how dirty stuff gets just sitting in storage!)

This is a view of the back half of the coach with both slide-outs popped out.

Here’s the kitchen. Sofa is in one of the slide-outs.

Dining table is across from the kitchen. Photo taken from the sofa.

Full-sized stand up shower. The bathroom is quite large and there is a separate small water closet. This is quite different from our motorhome! I didn’t get any bedroom pictures yet because I still need to get the bed made up. We’re just really excited that you can walk around the bed and not be snugged up against a wall, so Curt won’t have to climb over me to get out! We need to start planning a little trip soon to figure out how everything works! Anyone in SoCal have any suggestions as to where we should go first? Here’s my criteria for the first trip: within a few hours drive, full hook-ups of course, dog-friendly, pretty area. Let me know if you have ideas!
Well, I’ve got to run and get busy before my to-do list chokes me! Thanks for stopping by! Have a great day!
![]()
New Crafter’s Workshop at Taylored Expressions
April 20th, 2010
Happy Tuesday! Taylored Expressions is hosting a blog hop today to showcase the new Crafter’s Workshop stencils now available. You’ll have a chance to see a few of the many opportunities for creativity in using these fun stencils by checking out several different blogs today. There are so many ways you can go with these stencils I can hardly wait to see what each person came up with.
I chose to work with the Daisy Doodad Template as I had an idea for it as soon as I saw it. If you’ve been reading my blog for any length of time you know that we’ve been doing lots of redecorating in our house over the past year. One of the things I’m still trying to complete is getting art hung on the walls. Back in January I went to Home Goods with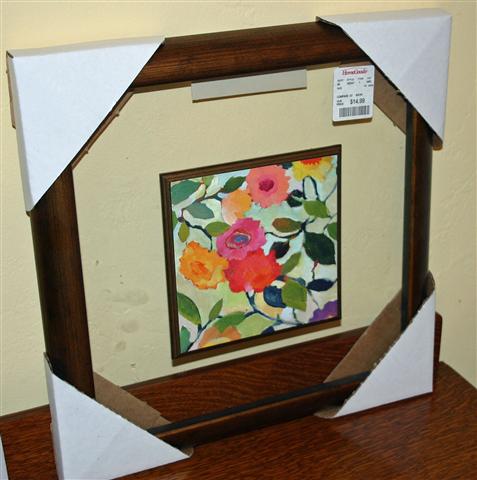 my very talented friend Kim and picked up a number of home decor items. Included in those items was some art that I planned to alter. I bought two of these pieces at $14.98 each. It might be a little hard to see in the photo, but the art work is mounted on a wood piece that floats on a sheet of glass framed by a bronze tone wood frame. I didn’t care much for the actual art and planned to replace that when I bought it. The art piece is 6″x6″ and the frame is 13″x13″.
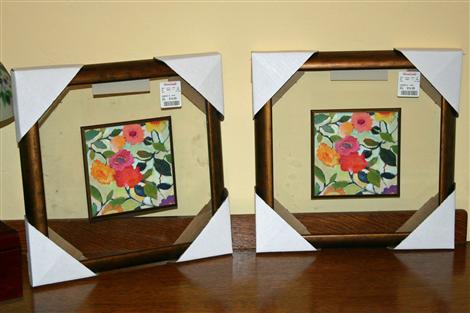
Here’s a photo of the pair.
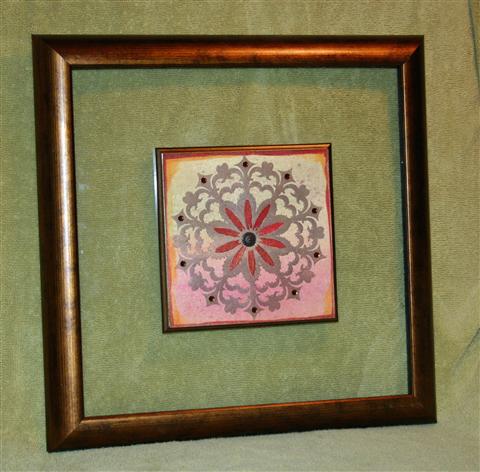
And here it is finished. I did finish both pieces, but unfortunately one of the frames broke as I was taking off the cardboard corners which were apparently stapled on by gorillas. Curt says he can fix it, but I couldn’t handle the piece to photograph it – so just know that there is a pair.
The really fun thing about this project was that I had no idea what exactly I was going to do. In fact my first attempt didn’t work out AT ALL. I really just played over a couple of days and ended up with this. So here’s the basic process I went through.
- I started with some paper from a big watercolor pad I purchased quite awhile ago. It’s quite heavy and I knew it would withstand a lot of *working*.
- First I scribbled watercolor crayons to cover my 6×6 piece of watercolor paper. I used Burgundy, Rose Red, Ruby Red, Saffron, Artichoke and Moss to coordinate with my decor.
- Then I washed all of that with my aquapainter, added a little more crayon and brushed more water.
- The whole piece was then covered with Gold Maya Mist
- Then I moved on to some Twinkling H2O’s. I splattered some of that on with a toothbrush and I painted the edges with 2 colors.
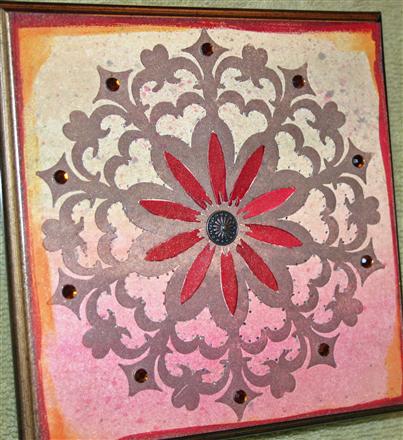
- Finally I get to my stencil! I covered my stencil with Brilliance Pearlescent Chocolate ink by simply taking the dew drop and patting it all over the stencil.
- I placed my painted background piece (still just slightly damp) face up on the platform for my Big Shot and then laid the inked stencil face down on top of it. I covered that with a piece of scrap cardstock before running it through the Big Shot. This acted as a letterpress and the stencil was embossed into the paper and a beautifully inked impression was achieved at the same time.(The ink washed off the stencil easily with running water in the sink.)
- I painted the petals with Twinkling H20’s ad added a decorative brad to the center. It’s hard to see in the photo, but I added piercing around much of the design. The piece was finished off with some KaiserCraft rhinestones around the edge of the design.
The combination of Twinkling H20’s, Maya Mist and Brilliance Pearlescent ink makes this piece very shimmery IRL!
I’m so excited that I got to play along today!!! Now I’m dying to see what everyone else did. How ’bout you….you coming?
- Alex Maldonado
- Carolina Buchting
- Charmaine Ikach
- Jackie Pedro
- Jeanie Witmer
- Jodi Collins
- Karen Giron
- Karen Motz
- Melissa Sauls
- Sankari Wegman
- Taylor VanBruggen
At only $3.99 each these stencils are a steal and I’m pretty sure you’ll need more than one! *wink* Thanks for stopping by! I’m on my way to the office soon. Hope you have a wonderful day!

Kitchen Curtains and a Thank You
April 5th, 2010
Finally! I have photos of my awesome new kitchen curtains to share with you. These were a long time coming considering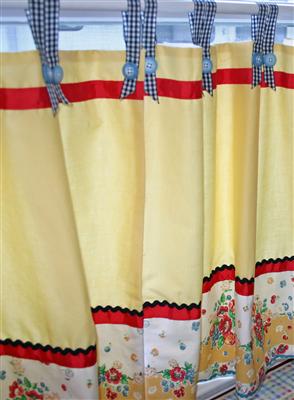 we painted the kitchen red last Summer! (Original post here and more here.) It took me a looooooong time to find the repro vintage fabric I wanted and then even longer to get all the fabrics and trims and design together. Now that they are done and up I am LOVING them! Exactly what I envisioned. My 17 year old seamstress did a fantastic job and now that she’s done I can actually recommend her to anyone else in the SoCal area! I was keeping her all to myself until now. LOL!
I found the repro vintage dishtowel fabric at Hart’s online thanks to the referral of a blog reader! They were really great to deal with. First I ordered several things to see what would really work and then I ordered all the yardage I needed of this particular pattern. It’s 16″ wide with finished edges so you can just cut to length and hem as dishtowels. I decided to cut it in half for the 8″ border at the bottom of my curtain panels. The solid yellow is from Joann’s. (I have a bunch left over so if anyone needs some I’ll sell it for less than I paid.) All the ribbon, ric rac and black pom pom trim are from Fabric Barn in Long Beach. Getting the buttons (72 of them) almost killed me. I should have just ordered them, but didn’t want to wait 3 weeks, so trekked to 5 different Joann stores.
More pics…

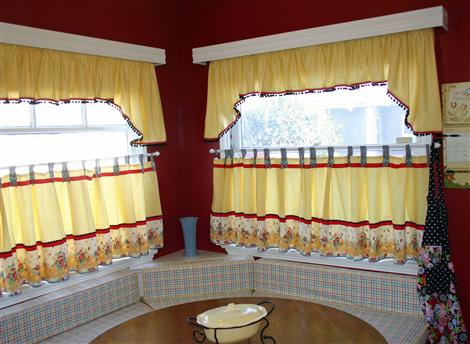
2 views of the banquette.
Above is the window that looks out to the front yard and street.
Below is the smaller window that faces the driveway.
I plan to re-cover the banquette cushions, but don’t have fabric yet.
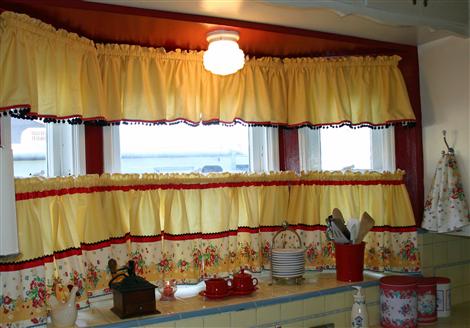
Bay window over the sink –
The ribbon and button loops –
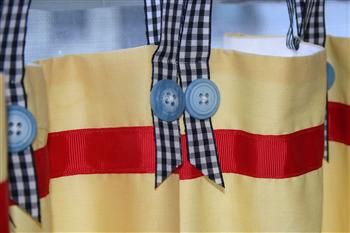
and my favorite little detail is the black pom pom trim! 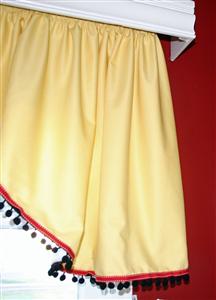
If you’ve ever considered having a red kitchen, I’s say DO IT! I absolutley adore mine!
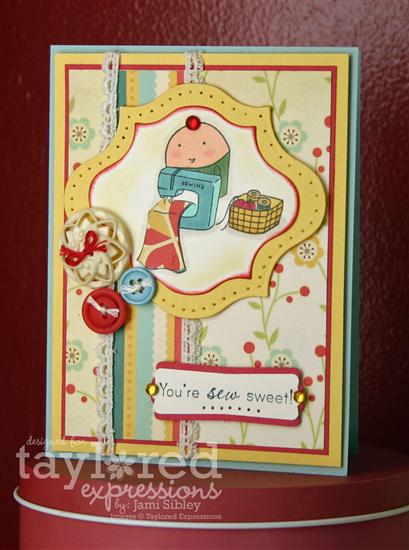
I wanted to make a thank you card for Deanna, my seamstress. I know she worked really hard on this project and I was excited to have just the perfect stamp set – Crafty Cuppie! My card was inspired by the colors of my kitchen as I used elements from the TE Early Bird Key Ingredients from last year. I believe Taylor has another kit coming soon featuring this paper line and I’m really glad because I sure do love it!
Cuppie was die cut with Spellbinders Labels 13. I was a little on the fence about getting this particular set of nesties, but I’m so glad I did! The fabric in the scene was paper-pieced with dp. The cherry on Cuppie is from the Bright Smooth Bling pack…I ADORE that stuff…if you haven’t tried it, you NEED to! The largest cream button is a Jenni Bowlin. The trim I used was from TE, but I don’t see it in the store now. I tend to hoard stuff for awhile before I use it. LOL!
Thanks for stopping by. I’ll be back tomorrow morning to play with the Baker’s Dozen in the Sneak Peeks for the upcoming Taylored Expressions release. Soooooo much FUN stuff – please stop back!
Out of the Vault and into my Kitchen
August 17th, 2009
Every once in awhile I like to go back and find a project I created when I was in the SCS Dirty Dozen three years ago (crimeny! has it really been 3 years?) and share it here on my blog since we’re allowed to share those exclusive projects after a year. This time I not only pulled a project *out of the vault* to share here, but I actually framed it and hung it in my kitchen! Here’s the card I made in September of ’06.
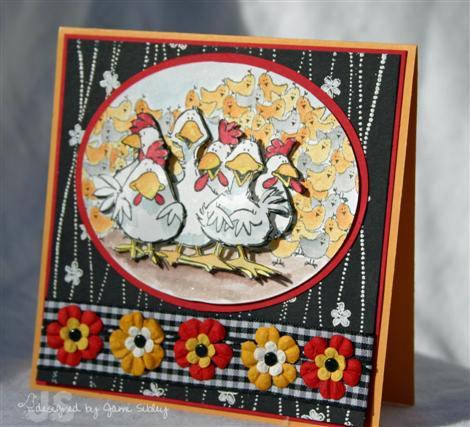
This is one my all-time favorite cards. I can’t believe I don’t even own this stamp. I had stamped this chicken and duck image several times at one of our SoCal girls get-togethers (I miss those!) and had it in my file. I think it’s a Penny Black image. The chicks in the background are from a Stampin’ Up! set. I love doing paper tole and that’s what I’ve done with these ducks and chickens – stamped them several times, colored them, cut them out and layered them with foam tape.
I saved this card hoping that some day I would actually paint my kitchen red and be able to frame this card and hang it on the wall. A year or two ago I found a black shadow box frame at IKEA and put it away with this card. Well my kitchen is finally red and it was time to mat and frame this fun card!
Here it is matted with some Real Red and Shimmer White cardstock along with some black ric rac.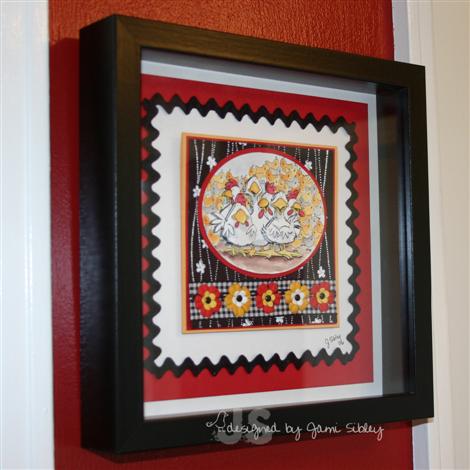
And here’s another view – you can click on it to see it larger. 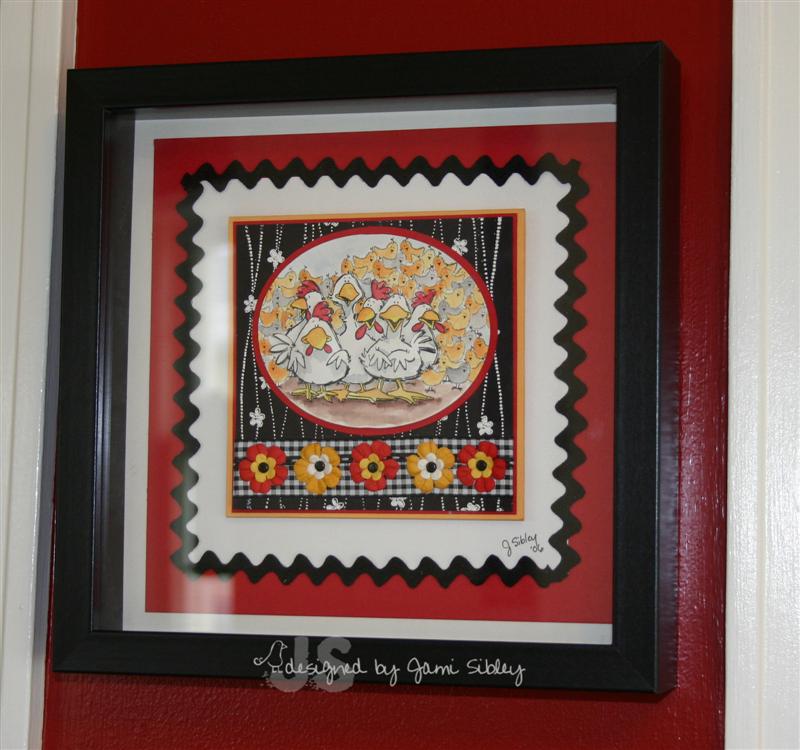
It’s hanging on the wall right between the two doorways to the hall and the dining room/office. It just makes me grin every time I walk by it. Here’s a wider view so you can see where it is in the kitchen. It cracked me up that on the wall to the left are two trivet/plaques of more realistic *artistic* roosters. For some reason I just find the contrast funny.
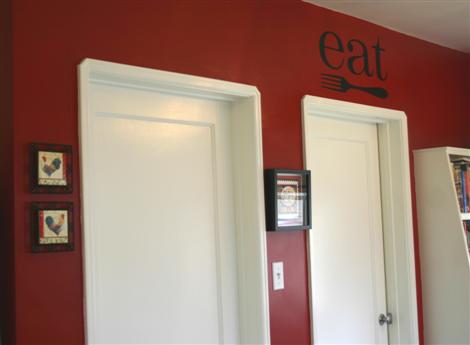
Oh and you can see that I got the big Decor Elements *eat* up over the doorway as well! This is available from Stampin’ Up! (through me of course! *wink*) When I first saw the DE stuff I didn’t think I’d be able to find a use for them in my very traditional house, but I have this one plus the *laundry* in Real Red in my laundry room.
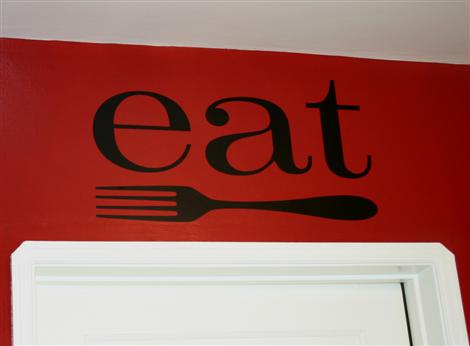
They are pretty easy to put up and I’m loving them. I keep looking through the DE catalog now to see where else I could use some. I have to say that I bought a DCWV sentiment for our bedroom and it is almost falling off the wall. I am not happy with that, but I love the sentiment so I plan to buy another one in hopes that the one I got is just defective. Unfortunately I bought it at Linens ‘n’ Things when they were going out of business so I can’t return it. The SU! ones seem to be so much better quality – at least in my limited experience.
I’ve ordered some fabric samples that I have high hopes for to be able to be worked into kitchen curtains. I can hardly wait for it to arrive. I was referred to the fabric source by a blog reader. How cool is that? I’ll show it to you when it gets here. Thanks for stopping by.

Home Improvement Update
July 28th, 2009
It’s Tuesday and I’m getting ready to go into the office to work while many many of my friends are in Florida or on their way there to attend CHA this week. I can’t complain because it was my choice not to go and I promised myself I wouldn’t pout all week, but I am feeling just a twinge of *out of the loop sadness*. So to get my mind off all that I thought I’d share some photos of some of what we’ve been doing around here for the past month and you can see why I haven’t had much time to stamp!
Besides painting the kitchen red – which I LOVE btw – we had professional painters come in and paint the living room, dining room/office, hallway, bathroom, kitchen ceiling and trim, back entry way. Except for the bathroom and kitchen everything was painted Warm Cocoon with one accent wall in a darker color called Sahara Shade. The trim and ceiling is a creamy almost-white called Eggshell Cream. The entire house started out Navajo and I could live my whole life and never see that color again! We took up the carpet in the office and washed the existing hardwood floors with Murphy’s Oil Soap (that stuff ROCKS!) and this weekend we purchased a rug. We got new plush mossy green carpet for the rest of the house. Here are a couple of overview pictures – click on them to see them larger.

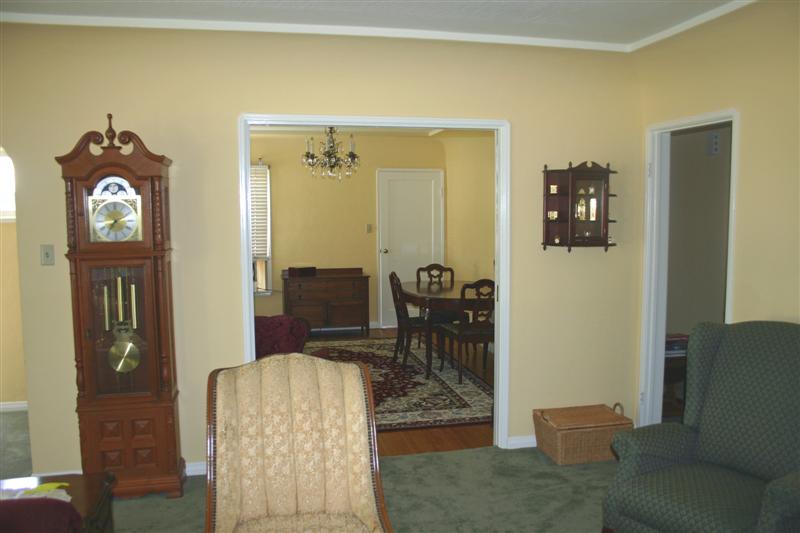
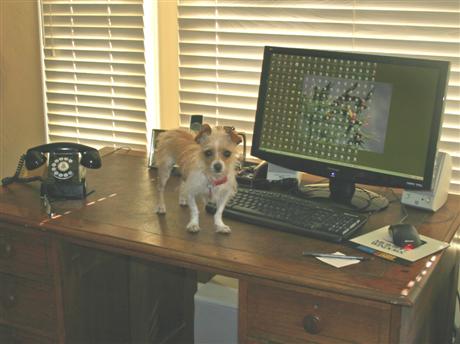
The first photo is standing in the office looking through the pocket doors into the living room. On the right is Curt’s desk (where I am sitting now at the computer.) If you look carefully you can see R.B., our Greenwinged Macaw sitting on his play tree in the living room. The second photo is the opposite view taken from a position in front of the mantle.
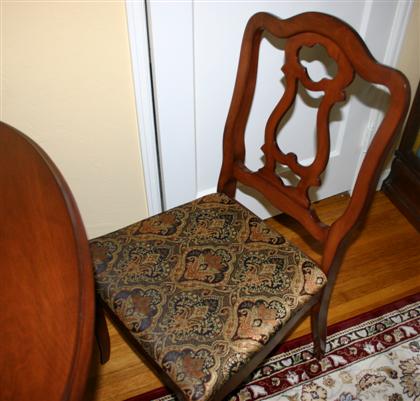
There was never supposed to be a dining table in Curt’s office, but since I teach a stamping class once a month and this is the only room to do it in, a table ended up here by default. This dining table is part of an entire house full of furniture that my great-grandmother bought 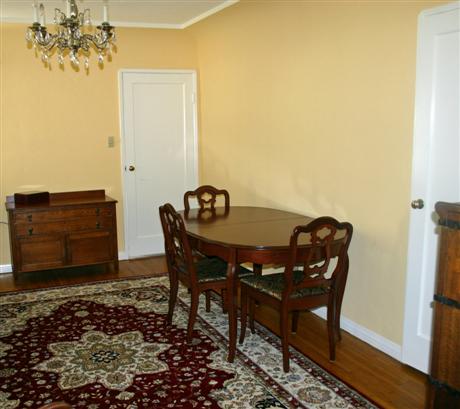 in the early 60’s and it is one of the last pieces that remained in it’s aged once-creamy french provincial finish. We are amazed at how good it looks refinished! It’s oval (which is one of the things I love about it) and it has 3 leaves so it can be made as big as needed when I teach. I plan to get a runner to go in the middle of it along with some sort of decorative centerpiece. We also re-covered the chair seats which is an easy-peasy DIY project with a staple gun!
Our living room has a mantel for a fake fireplace. It has a fitting for a gas ceramic heater so there was never a real firebox. We have candles set up in it. Above the mantle was a huge frameless beveled mirror. When we took the mirror down there was wiring for two sconce lights and an electrical outlet – perhaps for a mantle clock or something? We were excited to get new sconces lights and finally use that weird switch that previously seemed to go nowhere!
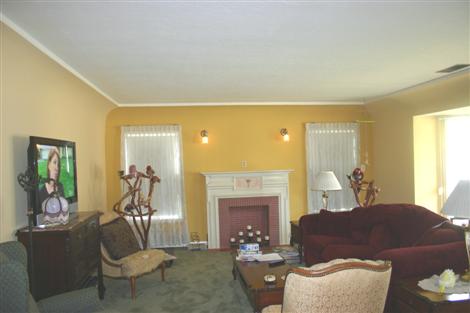
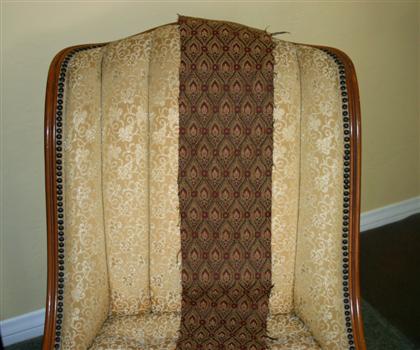
In the photo above you can see Beaker (our Red Fronted Macaw) on the left and R.B on the right.  I’m expecting my drapes back from the cleaners tomorrow (who knew it could take 3 weeks???) and the room will look very different when they are re-installed. I’ll try to remember to share another photo after they are back. Oh and we’ve ordered an oval frameless mirror for over the mantle and hope to have it up this weekend. The next project on the list is to have the gold antique chairs re-upholstered. After bringing home tons of swatches, I found fabric last week but it was on hold by a designer so I wasn’t sure I’d be able to get it. I was so excited when the store called yesterday to say it had been released and I could come and get it! These chairs were given to us by a friend several years ago as he was going to get rid of them. They were tattered when we took them with the idea that we would *try them* in our house and if we liked them we would get them re-covered. For the past 7 or 8 years I’ve felt the need to explain this to anyone visiting our home for the first time. Sheesh! It sure will be nice to have them finally done!
There’s still so much to do. There are big things like finding fabric and having kitchen curtains made and a ton of little things like bringing in all of our *stuff* from the garage and motorhome to sort through and find places for whatever we are keeping. I’d like to find some new artwork to hang on the walls and I have a bunch of photos to frame and hang in the hallway. It’s going to take some time, but it’s all worth it. I’m missing stamping, but if you saw the shape my stamp room is in you’d know why it’s hard to go in there and just spend a little time to make a card! I do need to carve out some time this week though to get in there and create! Thanks for hanging in there with me and thank you so much for all of your kind and encouraging comments on our home improvement projects. This has been a very exciting, albeit exhausting, time for us.
Before I go I just have to share this silly photo I took of Tessa. She doesn’t normally get up on Curt’s desk, but I couldn’t resist!
I’m off to work. I hope you have a fantastic day!
What a Deal!
July 21st, 2009
 Oh my goodness! Have you seen the Stampin’ Up! Deal of the Week this week? It’s the Styled Vanilla Hodgepodge Hardware at over 30% off the regular price! You can order it though Sunday July 26th for only $18.99 by clicking here to go my SU Business website. Once you are there, click on Shop Now in the upper right hand corner.
Be sure to also check my SU site next Monday for the last Deal of the Week.
So sorry that I do not have any stamped creations to share today. I can hardly catch my breath from all that’s been going on around here. Our carpet was installed on Friday and we spent most of the weekend begining to pull the house back together. It’s going to be a slow process since we want to evaluate almost every item of furniture and accessories before putting it back where it was. We will decide if it’s something we really love or something that needs to be passed along to someone else who might appreciate it more. Have you ever watched Clean Sweep or Clean House? Those shows have helped to transform my thinking about *stuff*. I want less of it for a more peaceful life, especially since our house isn’t all that big and we’re short on storage space. It feels good to have a fresh start! I promise to share some pictures soon. I’m waiting for my drapes to come back from the cleaners.
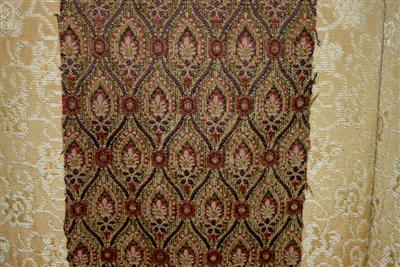
One of the next projects in line will be finding fabric and having kitchen curtains made. I did order some swatches online – can’t believe I forgot to share them here – they came almost 2 weeks ago. Click on this thumbnail to see it larger. 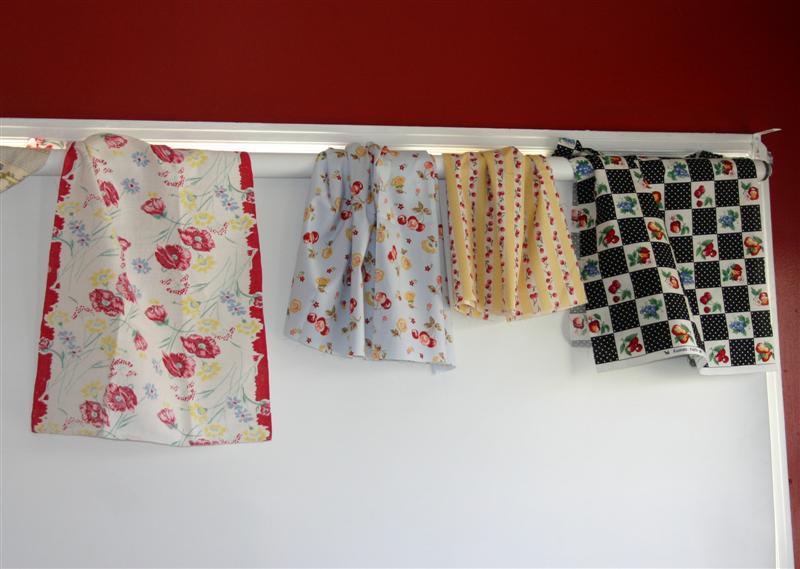 The fabric on the far left is a vintage t-towel I picked up awhile back at an antique store. That is ultimately the type of fabric I’d really like to find – reproduction though – picks up the yellow and blue in our tile work as well as the red walls. I could go for a floral or fruit pattern. So far no luck. My favorite of the other three is the black, but it’s just too strong to use for all the curtains. Our front window is quite large. I might use it as a band across a solid or small patterned fabric – or maybe to cover the banquette cushions. I have a habit of making up products in my head and then not being satisfied with anything else I might find. *sigh*
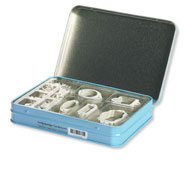
I just order these canisters from Gooseberry Patch. They epitomize the look I’m going for in my kitchen and I can hardly wait for them to arrive! 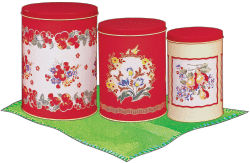 Do you get the Gooseberry Catalog? It’s always so fun to look through. If you haven’t seen one before, don’t look through their products on-line, just go ahead and request a catalog. It’s one of those little joys in life!
A couple of quick informational notes –
Taylored Expressions released the July 20th Key Ingredients Kit yesterday and it’s my very favorite one so far! It features Cosmo Cricket Early Bird papers and it’s yummy! Hope over to Taylor’s blog to follow links to samples from half of the Baker’s Dozen.
Dare to Get Dirty is coming up on SCS. Thursday July 23 through Saturday July 25 all SCS Fan Club Members are invited to play along with Dirty Girls past and present in a ton of fun challenges. Click here to get all the info. If you are not yet an SCS Fan Club Member, now is the perfect time to join! It’s only $24.95 for a year or $14.95 for six months. Click here for all the details.
I’m off to work. Thanks for stopping by.


