O Christmas Tree!
November 30th, 2009
For the past few years the month of December has seemed to overtake us and we have struggled to keep up, much less get ahead of the game. As much as I adore Christmas trees (real live ones!), I have even uttered the suggestion that we skip getting one altogether *gasp* a couple of times in moments of exasperation. Fortunately my husband knows me well and has never let that actually happen. This year I was determined to get a tree and get it early, so we went to our very favorite tree lot yesterday and picked out a beautiful flocked tree a bit larger than we normally get. Since we will have it for a full month it seemed worth it to splurge a bit. It’s not even December and we have a Christmas tree! I realize this is normal expected practice in many households, but this has NEVER happened before at our house! We have a super busy week ahead so we don’t plan to get the tree decorated until next weekend, but it’s in our living room and I am truly thrilled!

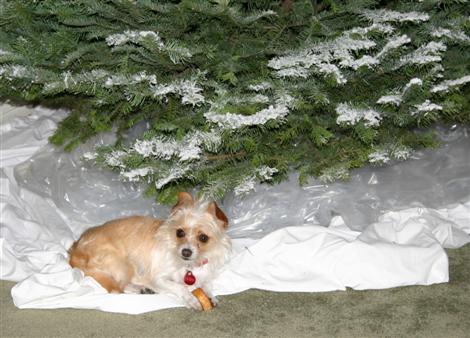
Before we brought the tree in yesterday we were playing with Tessa and I commented to Curt that I really don’t need anything for Christmas this year because I got my perfect puppy! I still maintain that she was a gift from God dropped into our lap by angels and we both feel so blessed to have her in our family! So it just melted my heart when I looked up from the computer last night to see Tessa plopped down under the Christmas tree with her bone. She’s laying on the white sheet I always put down under the tree before I add the tree skirt. And you can get a little glimpse of Beaker on his play tree in the background.
Both birds love the Christmas tree when it’s all lit up. I can hardly wait to get the lights strung on this gorgeous tree. And I’m anxious to see how Tessa will do with ornaments and presents…another new adventure for us. LOL!
Now Christmas shopping is another story – I’m feeling pretty behind in that department. And of course I still need to finish stamping cards…uh..I better sign off before I start to hyperventilate again! Before I go….
Today Curt and I are celebrating our
18th Wedding Anniversary!

I’ve always said that I married my husband because he makes me laugh and that still holds true. No one can make me laugh like he can! Thanks for being with me through good times and plenty of bad times. I’m so glad you married me! I love you honey!
Happy Anniversary!

__________________

TE Black Friday Blog Hop
November 27th, 2009
Happy Black Friday! 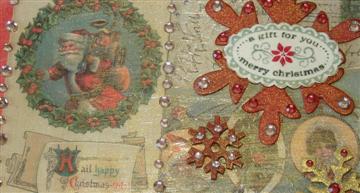 Are you heading early for all the crazy sales?
We drove by Best Buy at noon on Thanksgiving and there were already several tents set up out front. That’s just insane! Not being a morning person and hating crazy crowds I’ll be skipping all that excitement, but more power to you if you’ve got the fortitude! LOL! I’m thrilled to participate today in the Taylored Expressions Black Friday Blog Hop. Taylor challenged us to decorate one of her awesome Perfect Package Card Boxes for a Christmas gift. I truly LOVE these boxes and jumped at the chance to play with them again.
In the past I’ve used them for sets of hand made cards and I’ve always gone the quick and easy route for decorating the box. These boxes are super easy to decorate with a little patterned paper and ribbon. This time I wanted to just PLAY! Do you ever want to just get supplies out and play with them, not worrying about how a project will turn out? Well that’s what I did here. I knew I had another box as a back up that I could simply cover with patterned paper if my project went horribly wrong. LOL!
I definitely ran into some hiccups along the way, but I just kept going and it all worked out in the end. In fact I’m thrilled with how it turned out – probably because I had so much fun in the process.
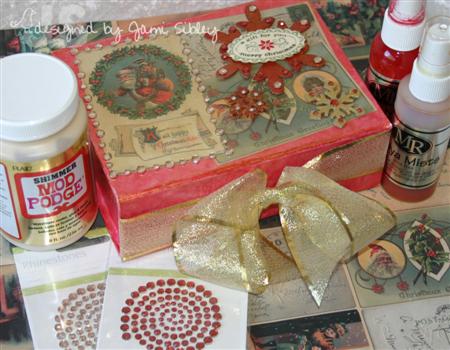
I started by laying the box out flat (I LOVE the way these boxes store flat so I can keep several on hand without taking up a ton of room!) and spraying it with Cherry Maya Mist. I wasn’t sure if the finish of the box would take the Maya Mist and it sort of didn’t. Guess I should have used gesso first, but I didn’t have any and honestly I’ve never used it before. No worries, I just patted it down with a paper towel to remove the pooled up Mist. Hmmmm…that started to create a cool textured look. I let that dry for awhile and then came back with Gold Metallic Maya Mist and repeated the paper towel blotting. I added a little more Cherry mist and more blotting. I felt like a kid making mud pies. Eventually I decided that the Mist might NEVER completely dry on the box, but again no worries. I pulled out my Shimmer Mod Podge which had been purchased sometime back on a whim and never opened. I figured Mod Podge could seal just about anything, so I went to work with it on the Perfect Package. Once the box was dry I had a reddish/pinkish/goldish/marbled shimmery finish. Very fun, but I had NO IDEA where I was going to go from there. I went searching through my Christmas patterned paper and came up with 2 sheets of this vintage postcard paper by Flair that I picked up 2 or 3 years ago. Now I had a direction!
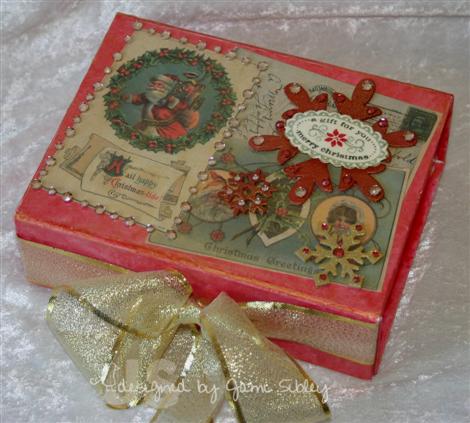
I cut apart some of the postcard images and decopauged them on with the Shimmer Mod Podge that I so conveniently had already out. Then I went to work with a package of Champagne Kaiser Craft Rhinestones – y’all know by now that KCRhinestones are just about my favorite things EVER! I was debating about whether to leave it there or go forward with the snowflakes and sentiment. I showed the box to Curt and said “Is this ok? Can it be done here?” To which he said “You really need something to balance out all of those rhinestones and you KNOW More is More!” LOL! He was so right and so I proceeded!
The chipboard snowflakes were sprayed with the two colors of Maya Mist and allowed to dry. (Tip: Use the metallic colors as a base coat under the solids. I know it sounds weird, but that’s what the directions suggest and I have tried it both ways and it does look better that way.) The snowflakes were then attached to the box with a combination of glue dots and mini glue dots and then I added KC Rhinestones in Champagne and Lippy Red (love Lippy Red – kind of a pinkish/faded red tone.) The SU tag sentiment was inked with 3 colors of SU markers and stamped onto Poison Ivory shimmer cardstock and punched out. Then I covered it with Versamark and heat embossed with Halogram ep before attaching it to the large snowflake with a glue dot. The finishing touch was some gold ribbon from a roll in my Christmas wrapping stuff.
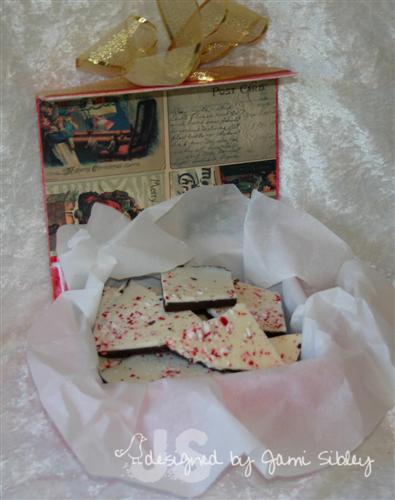
I plan to make some homemade goodies for the holidays, but in the meantime I thought this peppermint bark from Costco would do nicely. Heck maybe I don’t need to make goodies. This stuff looks pretty darned good and I did spend plenty of time on the box! 😉 I plan to put a little note in the bottom of the box to let the recipient know that the box will fold flat for storage by simply pulling on the ribbon tab. If you’re not yet familiar with these boxes you should know that the flap has a magnetic closure which is super nice!
***
Taylor has an incredible line up of talented ladies playing in this Blog Hop today. I can hardly wait to see what everyone has done! Let’s go check it out!
Alex Maldonado: https://fairyblossoms.typepad.com/
Amy Rohl: https://inkaboutme.blogspot.com/
Beate Johns: https://beate.splitcoaststampers.com/
Bev Gerard: https://savorthejourney.splitcoaststampers.com/
Charmaine Ikach: https://oodabugalley.blogspot.com/
Cindy Haffner: https://cindyhaffnerscorner.blogspot.com/
Debbie Olson: https://debbiedesigns.typepad.com/
Donna Baker: https://www.serenityinstamping.com/
Jen del Muro: https://iheart2stamp.com/
Jen Tapler: https://jentapler.blogspot.com/
Jenn Balcer: https://jbalcer.splitcoaststampers.com/
Jennifer Buck: https://thebuckstampshere.blogspot.com/
Jessica Diedrich: https://thewhimsicalbutterfly.blogspot.com/
Joan Ervin: https://stampingwithapassion.blogspot.com/
Joanne Basile: https://www.stampedbyhand.blogspot.com/
Linda Duke: https://www.lindaduke.typepad.com/
Lori Craig: https://loricraig.splitcoaststampers.com/
Rose Anne Reynolds: https://paperdelightz.blogspot.com/
Sankari Wegman: https://sunnysankari.blogspot.com/
Sharon Harnist: https://paperfections.typepad.com/
Sherry Cheever: https://sherrycheever.splitcoaststampers.com/
Taylor VanBruggen: https://www.tayloredexpressions.blogspot.com/
****Enabler Alert****

***Sale at Taylored Expressions
Now through Monday 11/30***
In honor of Black Friday and Cyber Monday (the two biggest shopping days of the year!), Taylored Expressions is offering 15% off everything in the store! Just use the promotional code TEBlackFriday upon checkout to receive the discount. You don’t want to miss up to 50% off all JustRite products, Buy 2 Get 1 Free on Tiny Twinkles, and the new TE Shirts & Aprons! Click here to go to Taylored Expressions to shop!
Thanks for stopping by. I hope you have a wonderful holiday weekend and happy shopping!
TESC92 Thankful
November 20th, 2009
 Happy Friday! Thank you for all the sweet comments on my very first video. I hope to do a tutorial type video very soon. I already have a couple of them in mind, it’s just a matter of having the time to play!
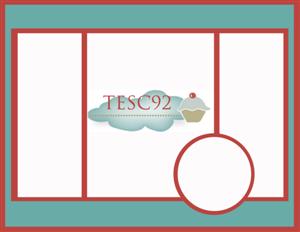
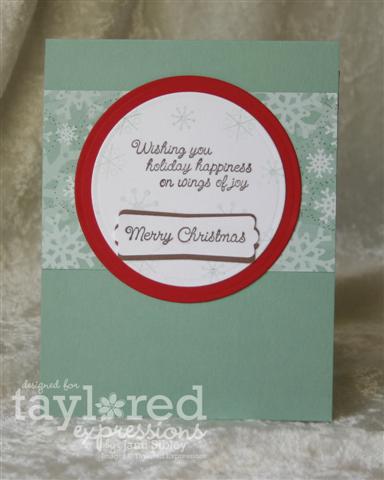
It’s time for another fun Taylored Expressions Sketch Challenge (TESC92). I realize that many of you have never played a sketch challenge of any kind before and I really hope you’ll give it a try. Just use the sketch as your jumping off point. It really makes stamping so much easier and sketches are always fun to play with! If you upload your creation to your blog or SCS gallery, you can link it to Taylor’s sketch post anytime during the week. Click here to go to Taylor’s blog for all the info. You might even get chosen to be featured in her Top Crops.
For my card today I wanted to use the TE November 20th Key Ingredients being released today. This KI features some rich and beautiful Basic Grey papers and I’ve been dying to use them with Celebrate Life (released at TE earlier this month.)
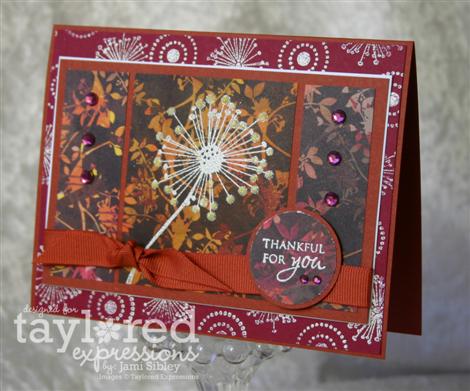
All the paper, cardstock, ribbon, rhinestones are from the November 20th KI. The image was stamped in white craft ink and embossed with white powder. I added some Frosted Lace Stickles for sparkle and dimension.
So let’s see what the rest of the Sketch Crew has cooked up today:
Thanks for stopping by. I hope you have a fantastic weekend ahead!
Center of Attention Product Spotlight – Mini Binder Box
November 16th, 2009
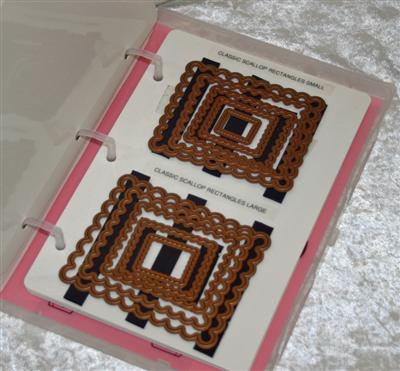
 Today I have the opportunity to participate with half of the Baker’s Dozen in a Taylored Expressions Center of Attention Product Spotlight. When I say I *have the opportunity* I should say that I almost begged to be included since the product is something I absolutely LOVE! We’re focusing our attention today on the Mini Binder Boxes from the TE Store.
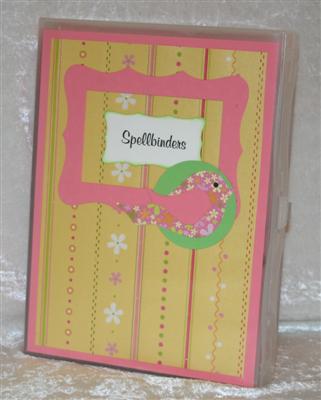
Before these boxes came along I was struggling with various methods of storing unmounted stamps – both clear and rubber. I just wasn’t completely happy with any of the methods I had tried. For me, the Mini Binder Box was the BEST universal solution for my unmounted stamps. Of course the TE stamps come on a full color panel ready to just slip into the box, but I was so happy that Taylor also has the plain panels available for purchase so I could easily store my other unmounted rubber AND my clear sets. I find that I can get 4 panels in a box storing rubber on thick EZ foam and 6 panels in a box storing clear stamps.
BUT WAIT – THERE’S MORE! The Mini Binder Box and plain storage panels are perfect for storing all shapes and sizes of Spellbinder’s dies! Above you see my MBB customized for my Spellbinders and below you can see a close up of one of the panels with strips of adhesive magnets (available in rolls at Michael’s) to hold the dies.. I know how difficult it is to get the full concept of these boxes just through photos, so my hubby helped me make my very first video. *GRIN* I hope you find it helpful. Please leave me a comment and let me know what you think about the video and feel free to ask any questions you might have about the Mini Binder Boxes.
[youtube]https://www.youtube.com/watch?v=8HVUxrJfhmk[/youtube]
ETA: And in honor of our Center of Attention product spotlight, the Mini Binder Box is an additional 15% off today and tomorrow (November 16-17) so don’t delay and pick yours up for just $8.46 each!
And now let’s check out what the rest of the girls have to say about the Mini Binder Box today:
And I want to wish a very Happy Birthday to Nancy McKinney! Huge HUGS to you, my UBER talented friend!!!
And Happy Monday to everyone! Thanks for stopping by!
TESC91 Our House to Yours
November 13th, 2009
Happy Friday! Time for another Taylored Expressions Sketch Challenge – TESC91. I have to say that I think Wings of Joy is my current favorite stamp set. I seem to want to pick it up almost every chance I get! And I’m loving the color combo of sage, coco and real red…it’s just so yummy!
Today’s card actually came after a project I designed for my classes this week. I haven’t had a chance to photgraph it yet, but it’s a gift card holder and my sample today coordinates with it. I came across this retired SU sage dp in my stash and it was my jumping off point.
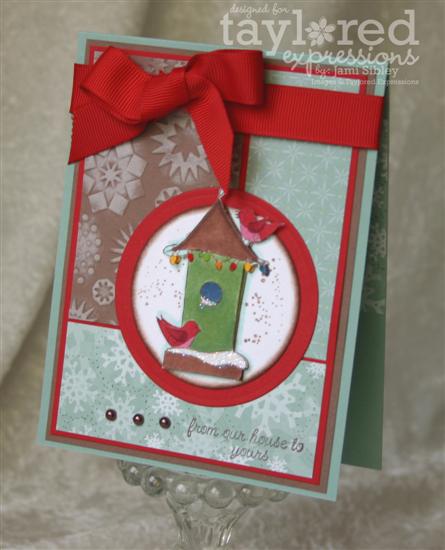
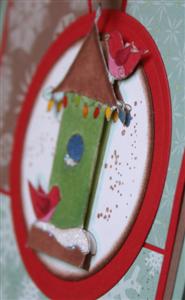
The cocoa panel was run through my Cuttlebug with the snowflake embossing folder and then sponged with white craft ink. The birdhouse was stamped and colored twice with copics. The 2nd image was cut out and popped up on foam tape. The snow was covered with Dazzling Diamonds glitter adhered with my trusty Sakura Quickie Glue pen. I used circle nesties and the white circle was sponged with cocoa ink. The sentiment “from our house to yours” was stamped in Brilliance Chocolate ink for a little shimmer and the card was finished off with some KaierCraft chocolate pearls and a big red grosgrain bow.
I continued the decoration to the inside a la Denise/peanutbee. I’m addicted to finishing off the insides of cards now and I’m sad when I run out of time before I get that part done!
Now it’s time to check out what the rest of the Sketch Crew has cooked up today:
My class yesterday afternoon was sooooo much fun! I’m really looking forward to the second session tonight! I just love to see people learning about stamping and having those little *aha moments* as they explore their creative side! Thanks for stopping by!
November Class Preview #2
November 10th, 2009
I need to get going to the office, so just a quick post to share a peek at another project we’ll be making in my classes on Thursday and Friday this week.
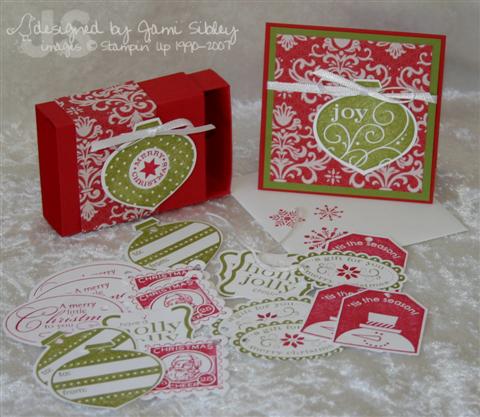
Here’s a set of cute and simple Christmas tags in a box made with the Big Shot matchbox die. To go along with the tag set we’ll also make a little 3×3 card with envelope. Fun, huh? That matchbox is seriously tiny which is oh-so-fun! This is my first time using it – so many possibilities. 🙂
I still have a couple of spots open for Friday night – if you want to come I need to know by tomorrow (Wednesday) morning. I’d love to have you!
I really have to run, thanks for stopping by. Have a great day!
November 09 Class Preview
November 9th, 2009

My November Stampin’ Classes are this week, so I wanted to give you a little preview of one of the three projects we’ll be creating. I’ve been wanting to do skinny notepads for a really long time. I’ve always loved the ones Michelle Wooderson creates and I finally got motivated for this class. I have two versions and since I’m holding two sessions of class, we’ll do one at each session.
Aren’t they cute? They would make a great little party favor or gift for co-workers, neighbors, etc…or just for yourself to keep in your car or purse during the busy holiday season.

I was tempted to order the new notepads from PTI, but honestly just didn’t get around to it. I went to Staples and bought a 12 pack of Jr. Legal pads and had their copy department cut the whole stack in half. When all was said and done including tax and the cutting fee, the skinny pads cost me about .44 each for a total of 24 and they are double the thickness of the ones PTI sells…so I’m happy.
In class we’ll be making 3 projects and I’ll share another one of them tomorrow.
Registration for class is just $12.
Thursday November 12 at 12:30 in the afternoon – this class is sold out, but let me know if you want in as I might have one spot open up this afternoon.
-OR-
Friday evening November 13 at 7:00 pm – I have a few spots still open for this session and will take registration through Wednesday morning at 10 am when I will begin cutting and prepping.
Please call or e-mail me if you’d like to come. I’d love to have you!


