Taylored Expressions November Release Day
November 4th, 2010
Taylored Expressions Store! It’s time to DIG IN!!! Be sure to check out the Fresh Out of the Oven Department for all the stamp sets and dies plus tons of other new products. I’m joining the Baker’s Dozen today in presenting even more shopping inspiration for you. *wink*
It’s Release Day at Taylored Expressions. Everything we’ve been showing you over the past several days in now available for purchase at the
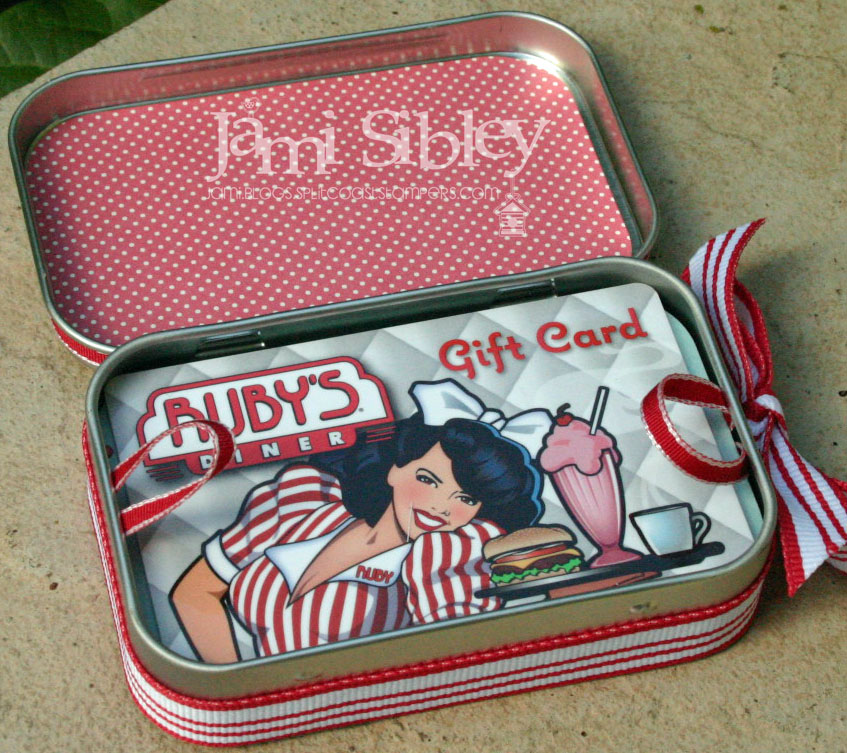
Today I have 2 gift card holders made with the new stamp set Enjoy!, the Gift Card Frame Die, and a couple of small hindged tins (or altoids tins). The frame image and die were designed to fit perfectly on or in these tins.

This first tin was made to coordinate with the card I showed you on Monday as part of a little thank you gift. I stamped the place setting image on Buttercream cardstock and colored it with Copics. Then I punched it out with a 1 3/4″ Circle Punch and trimmed it out with Taylor’s Tiny Twinkles. You can see the polka dot frame was cute with the Gift Card Frame Die and fits perfectly on top of this tin.

I trimmed the edges with ribbon adhered with Zip Dry. Inside is a gift card for Ruby’s Diner. YUMMMMM! Did you know that they have these gift cards at Costco here in SoCal? Only $40 for two $25 gift cards! Like I said…yum!
My second tin was created to hold a Starbuck’s card – still a super popular gift for all sorts of occasions!

This time I used dp from the Snow Day Project Pantry and put the frame image on the inside of the tin. This tin is super simple and it would be really quick to whip up several of these to have on hand. You could even leave off the image until you’re sure what type of gift card will go inside. Although this is Christmas paper, it will really work year-round.
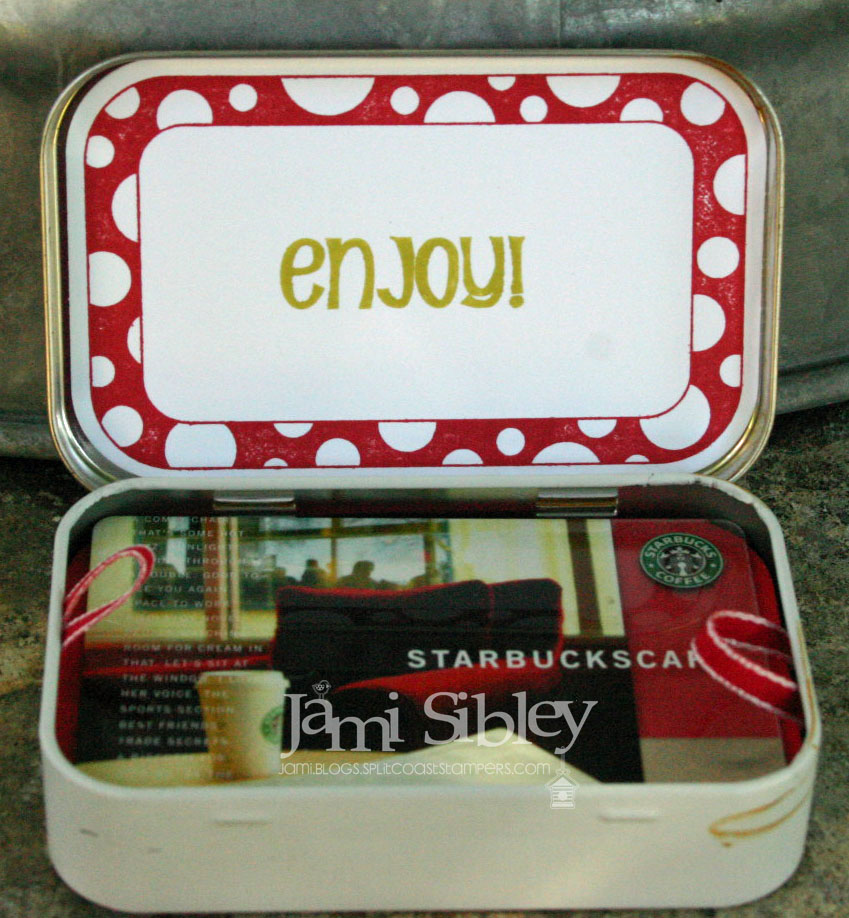
You might notice that my cards are raised up on a platform in my tins and that I included little ribbon loops. I simply use a piece of 3×3 cardstock scored and 1/2″ on each side to create the platform. I’ve put together a video to share a few tips about creating these gift card tins. If you have a few minutes, take a look and let me know what you think. I’m going to ask you to please cut me a little slack as this is the first time I’ve made an over-the-shoulder video. There are several times when I thought I was holding something up to the camera for you to see close up, only to find that I was actually holding it out-of-frame! LOL! I promise to get better! I’d love to make more video tutorials!
[youtube]https://www.youtube.com/watch?v=ufhd1uP-7H8[/youtube]
Thanks so much for spending some time with me today. Let’s check out what the Baker’s Dozen has cooked up with all the new goodies…they will have samples of all the new sets…
- Charmaine Ikach
- Danielle Lounds
- Donna Baker
- Jackie Pedro
- Jodi Collins
- Karen Giron
- Karen Motz
- Melissa Sauls
- Mona Pendleton – Guest Designer
- Regina Mangum
- Sankari Wegman
- Taylor VanBruggen
- Tori Wild
Happy Hopping and Happy Shopping! Have a great weekend!
![]()
Bridal Shower Gift Set
September 13th, 2010
Happy Monday! I’m pretty happy about it because I’ve lost 13.1 pounds in these last 9 weeks and I *just might* fit into the dress 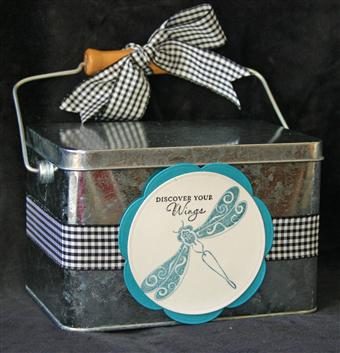 I’m hoping to wear to our niece’s wedding in a little less than a month PLUS I’m over 25% of the way to my overall weight loss goal! Curt has lost 18 pounds and he’s back to bike riding again after being totally sidelined with his illness. I’m super proud of both of us!
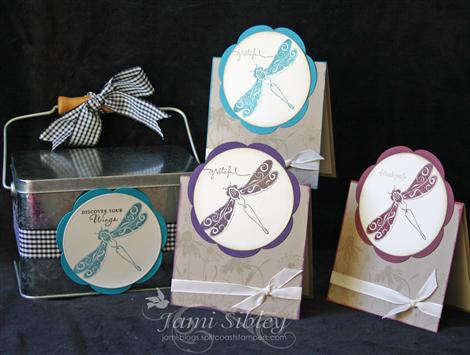
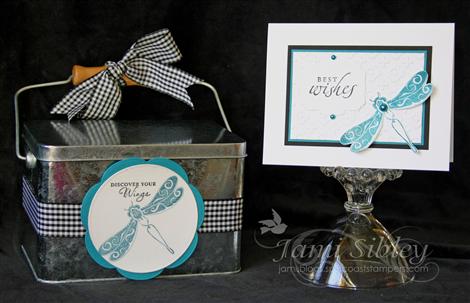
Speaking of the wedding…I attended a bridal shower for Kira on Saturday. I was totally bummed that the gift I ordered from her registry didn’t arrive in time (it’s out for delivery with Mr. Brown TODAY, wouldn’t you know it!), but I had a little extra gift planned so I did have something to take with me. For many years now I’ve made it a practice to include a set of handmade thank you notes with any bridal or baby shower gift I give. After a shower there are always lots of thank you notes to write, so I know it is a gift that will be used and appreciated. Kira loves dragonflies so I knew I wanted to use the TE set Discover Your Wings for her card set. I found this adorable tin at Tuesday Morning for just $3.99. Isn’t that wood handle sooooo cute? It’s not quite the right height for standard sized cards, but I was able to fit a set of 12 with envelopes by having them lean back slightly. I might go back this week and see if they have any more because I think this would make a wonderful recipe tin!
Here’s a photo of 3 of the 12 the tent topper cards that are inside the tin. I made 4 of each color – Taken with Teal, Burgundy, Elegant Eggplant.
Cardbase is 4.25″ square made of kraft cardstock. I stamped the floral silhouette image from the set in SU Crumb Cake ink (why 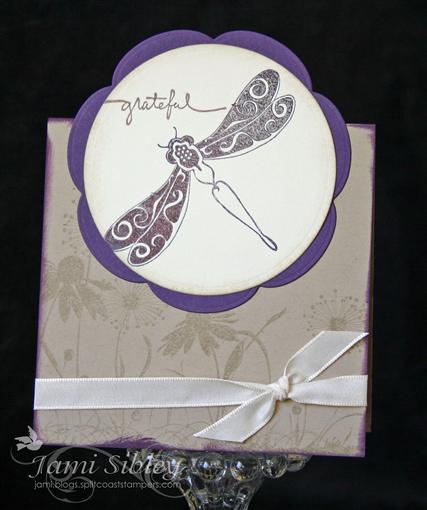 oh why did they feel the need to change the name of kraft???) along the bottom of each cardbase. Then I used craft ink (eggplant, burgundy, teal) to ink the edges of the cardbase. The dragonflies were stamped in the same craft ink on TE Choice Buttercream cardstock and heat embossed with clear ep. The images were cut with a circle nestie, edges were sponged with Crumb Cake, and then matted on a Blossom nestie. (Curt used my Big Shot to cut out the blossoms for me because I wasn’t feeling well when I made these and I was running out of time. Isn’t that so sweet??? )
Sentiments (“grateful” and “thank you”) are from SU sets and were stamped in Brilliance chocolate ink. Some vanilla taffeta ribbon finishes these off. {Tip: When putting ribbon toward the bottom of a card like this use a small piece of TE Sticky Tape under the ribbon on the inside of the card, so the ribbon doesn’t slip off.)
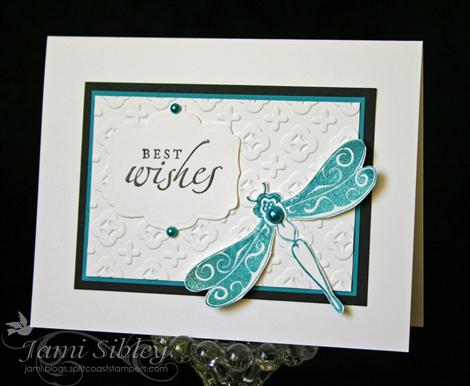
Here’s a photo of the card I made to coordinate with the tin. I wanted to do something CAS with lots of white space. I love this style, but it’s not particularly easy for me. I was super happy with how this turned out!
Thanks for stopping by. I hope you have a great week! I’m looking forward to what I hope will be a very productive week – not a lot of commitments, so hopefully some time to catch up on some things I’ve been wanting/needing to accomplish for awhile that I just never seem to have time for.

Stamping Serendipity
July 17th, 2010
Happy Saturday! Yesterday I experienced a little bit of stamping serendipity and I wanted to share. I was catching up on my Google Reader and saw this post by Laurie Schmidlin (LOVE everything she does!) I took special note of how to used nesties to make tag shapes. I thought it was brilliant and and knew I wanted to try it sometime soon. 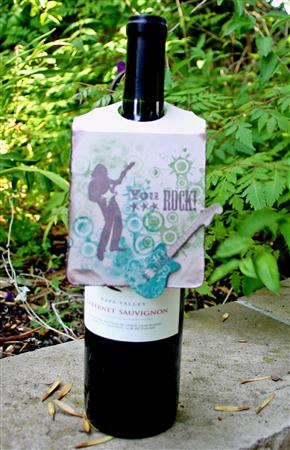 About 10 minutes later, the Rocket Scientist told me that he planned to leave a little early for his guitar lesson so he could stop and pick up a bottle of wine as gift for his guitar teacher. I asked why he didn’t tell me sooner so I could make a card to go with it…or at least a tag or something…afterall that’s what I do! He said he could run get the wine and come back if I really wanted to make something – I would have about 45 minutes. AND IT HIT ME…this was the perfect opportunity to make a tag using Laurie’s tip! And not only that, but I have the perfect stamp set for a thank you to a guitar teacher – You’re my Hero by TE! So I took the challenge and went to work!
I used Wild Wasabi and Bermuda Bay ink along with Brilliance Pealescent Chocolate ink on Kraft cardstock. I had been given the directive to not go overboard since this was a *guy to guy no-big-deal* thank you gift, so I tried to keep it really simple. The bottom corners were rounded with my Corner Chomper and I distressed all the edges with a distressing tool and some of the chocolate ink. The guitar was stamped on Kraft, cut out and popped up on foam tape.
Here’s a closer view.
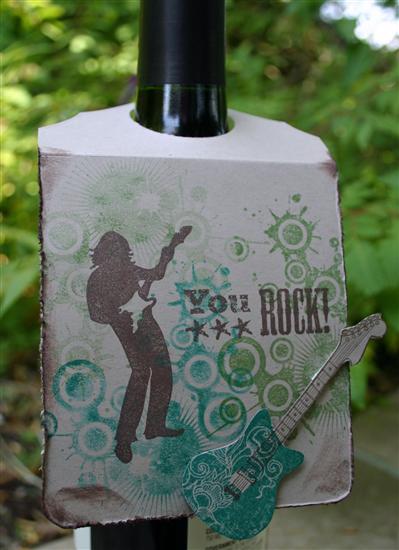
You can’t really tell in the photo, but the pearlescent chocolate ink gives just a little special touch of shimmer.
And here’s how I created the top shape following Laurie’s tip.
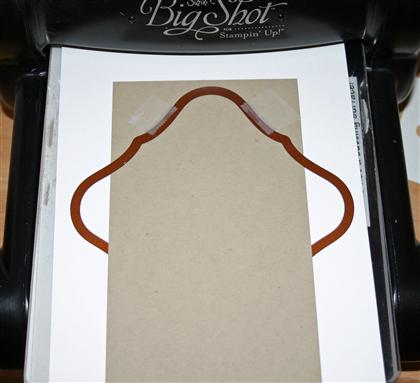
I looked through all my Nesties and chose to use Labels One. I slipped my cardstock through the top and taped it down with Scotch removable tape before running it through my Big Shot. I did end up with a faint embossed impression of the bottom of the die on my tag, so in the future I think I would insert a scrap of cardstock there to avoid that.
*
*
*
*
*
*
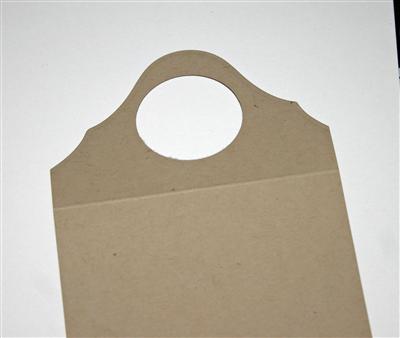 Here’s how it looked after being die cut. I used a circle punch to create an opening for the neck of the bottle and I scored a fold with my Scor-Pal. Then I stamped before cutting to the length that worked well with my images. Super simple and super quick.
I’m so happy to pass on this tip! I hope it helps one of you as much as it helped me. Thanks Laurie for sharing the easy how-to! I look forward to making more tags in the future!
Dare to Get Dirty got started this morning over at SCS. If you’re a Fan Club member you’ll have 4 or 5 challenges to choose from each day for a week. If you choose to do them ALL you’ll be in a drawing for a prize package. It’s not quite as hard as it sounds since you can combine challenges as much as you’d like. Check out the DTGD Challenge Forum here. I’ll be back tomorrow with a sample for one of the challenges.
I’m off to finish up the ice cream pies I’m putting together for a BBQ we’re going to tonight. I had intended to bake a dessert, but it’s just too darned HOT to bake! Thanks for stopping by.
New Crafter’s Workshop at Taylored Expressions
April 20th, 2010
Happy Tuesday! Taylored Expressions is hosting a blog hop today to showcase the new Crafter’s Workshop stencils now available. You’ll have a chance to see a few of the many opportunities for creativity in using these fun stencils by checking out several different blogs today. There are so many ways you can go with these stencils I can hardly wait to see what each person came up with.
I chose to work with the Daisy Doodad Template as I had an idea for it as soon as I saw it. If you’ve been reading my blog for any length of time you know that we’ve been doing lots of redecorating in our house over the past year. One of the things I’m still trying to complete is getting art hung on the walls. Back in January I went to Home Goods with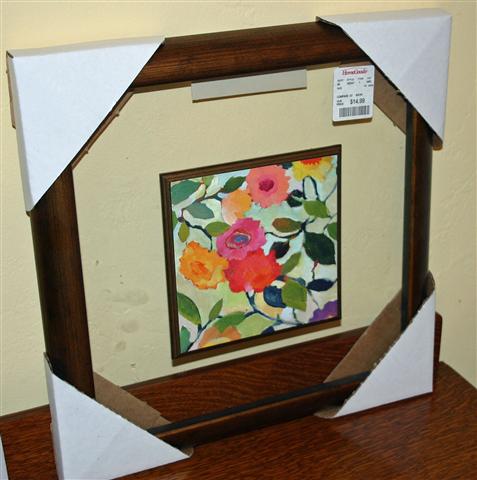 my very talented friend Kim and picked up a number of home decor items. Included in those items was some art that I planned to alter. I bought two of these pieces at $14.98 each. It might be a little hard to see in the photo, but the art work is mounted on a wood piece that floats on a sheet of glass framed by a bronze tone wood frame. I didn’t care much for the actual art and planned to replace that when I bought it. The art piece is 6″x6″ and the frame is 13″x13″.
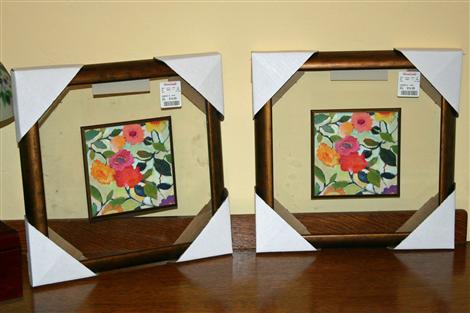
Here’s a photo of the pair.
And here it is finished. I did finish both pieces, but unfortunately one of the frames broke as I was taking off the cardboard corners which were apparently stapled on by gorillas. Curt says he can fix it, but I couldn’t handle the piece to photograph it – so just know that there is a pair.
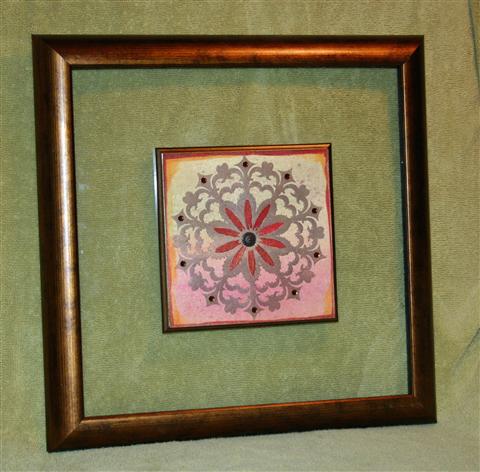
The really fun thing about this project was that I had no idea what exactly I was going to do. In fact my first attempt didn’t work out AT ALL. I really just played over a couple of days and ended up with this. So here’s the basic process I went through.
- I started with some paper from a big watercolor pad I purchased quite awhile ago. It’s quite heavy and I knew it would withstand a lot of *working*.
- First I scribbled watercolor crayons to cover my 6×6 piece of watercolor paper. I used Burgundy, Rose Red, Ruby Red, Saffron, Artichoke and Moss to coordinate with my decor.
- Then I washed all of that with my aquapainter, added a little more crayon and brushed more water.
- The whole piece was then covered with Gold Maya Mist
- Then I moved on to some Twinkling H2O’s. I splattered some of that on with a toothbrush and I painted the edges with 2 colors.
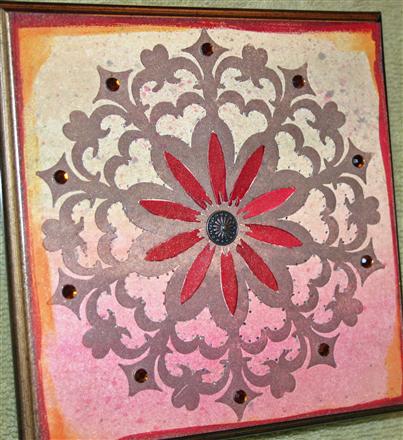
- Finally I get to my stencil! I covered my stencil with Brilliance Pearlescent Chocolate ink by simply taking the dew drop and patting it all over the stencil.
- I placed my painted background piece (still just slightly damp) face up on the platform for my Big Shot and then laid the inked stencil face down on top of it. I covered that with a piece of scrap cardstock before running it through the Big Shot. This acted as a letterpress and the stencil was embossed into the paper and a beautifully inked impression was achieved at the same time.(The ink washed off the stencil easily with running water in the sink.)
- I painted the petals with Twinkling H20’s ad added a decorative brad to the center. It’s hard to see in the photo, but I added piercing around much of the design. The piece was finished off with some KaiserCraft rhinestones around the edge of the design.
The combination of Twinkling H20’s, Maya Mist and Brilliance Pearlescent ink makes this piece very shimmery IRL!
I’m so excited that I got to play along today!!! Now I’m dying to see what everyone else did. How ’bout you….you coming?
- Alex Maldonado
- Carolina Buchting
- Charmaine Ikach
- Jackie Pedro
- Jeanie Witmer
- Jodi Collins
- Karen Giron
- Karen Motz
- Melissa Sauls
- Sankari Wegman
- Taylor VanBruggen
At only $3.99 each these stencils are a steal and I’m pretty sure you’ll need more than one! *wink* Thanks for stopping by! I’m on my way to the office soon. Hope you have a wonderful day!
Taylored Expressions April Release – Coffee Day!
April 8th, 2010
It’s Release Day at Taylored Expressions! WooHoo! So much new stuff including one coffee-themed Apple Doodle Ink set (being showcased today by the Baker’s Dozen and I’m playing along), one tea-themed Whimsical Wishes stamp set with another coordinating WW set of small background images, a full teacher-themed set with a coordinating mini set of sentiments, three A la Carte Cuppies, AND three new Taylored Card Kits. Plus a whole slew of stuff in the Fresh Out of the Oven Department! OH MY!!! You REALLY have to go take a look!
Before you run off to shop, I have a fun little sample to share featuring Let’s Do Coffee. As I was preparing to go visit Taylor in Iowa last month, I remembered that she and Jon do not drink coffee. (I know…crazy…right?) I wasn’t sure they even owned a coffee pot (they don’t!) so I pondered what I would do about morning coffee (can’t live without it). 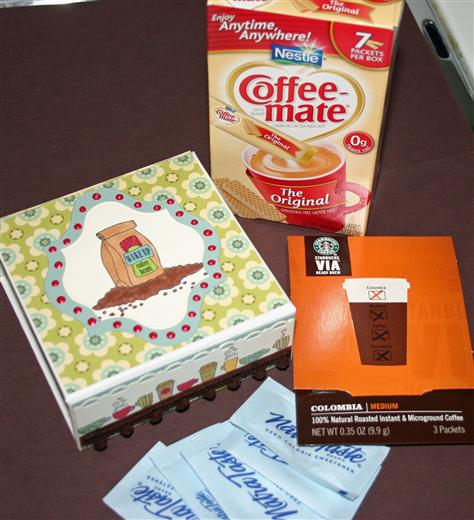 My mom told me about the new Starbuck’s instant coffees that come in little single serving packets (think Crystal Lite tubes), so I decided to try some. What a life saver! Next I began to wonder what would be the best way to package and take some Coffee Mate Creamer with me without airport security thinking I was smuggling some sort of drugs. Lo and behold I came across little individual tubes of Coffee Mate as well! Hallelujah! I threw those in a ziploc with some blue sweetner packets and I was ready to go. But of course I was thinking how much nicer it would be to have a really cute little coffee kit, so that’s what I’ve created to show you today. I think this would make a nice little gift or emergency caffeine kit.
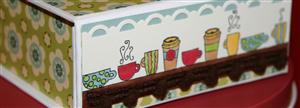
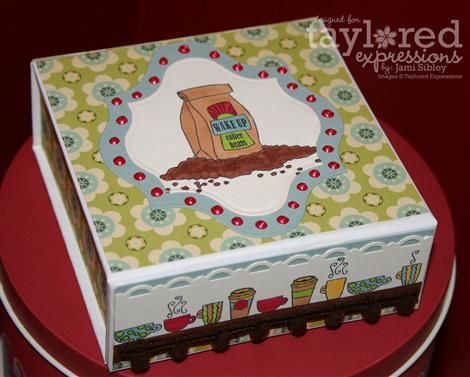
I started with a Small Perfect Package which is approximately 4″ square and some paper from the new Early Bird Card Kit. This was seriously such a quick project! It took longer for the Liquid Pearls to dry than it did for me to make it. LOL! I covered the top, all 4 sides and inside the lid with patterned paper using Zip Dry. I’ve been a little on the fence about this adhesive (I have many friends who rave about it) but it sure did work wonderfully on this project and now I see their point! I was even able to use it to attach the little row of chocolate pom pom trim!
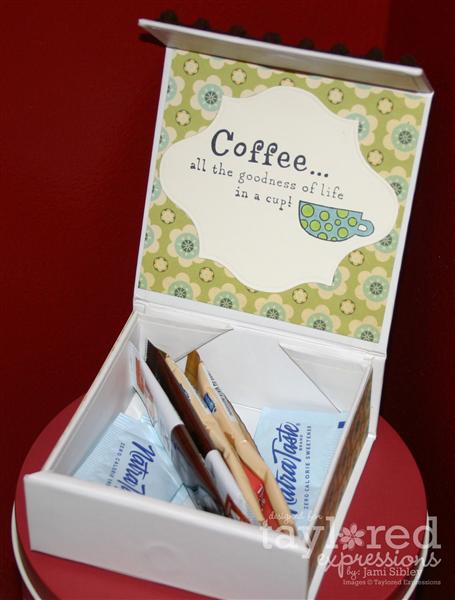
I stamped a couple of images from the set and colored them with Copic Markers. I also stamped this sentiment which totally reminded me of Pastor Jeff. Only he could inject coffee into a rockin’ Easter sermon and have it make perfect sense! I used Spellbinders Label 13 dies and a SU border punch and finished off the project with some red liquid pearls. (Can anyone tell me why I insist on using stickles or liquid pearls when I’m in a time crunch to get a project photographed? D’oh!)
This project would also work nicely with one of the new Tea Tins available now in the TE Store, but I don’t have any…YET! I do know that the coffee and creamer packets will fit easily in those tins.
Oh I cannot wait to see what the rest of the girls have come up with for today! Shall we do a little hoppin’?
Thanks for stopping by and happy shopping!
TE Black Friday Blog Hop
November 27th, 2009
Happy Black Friday! 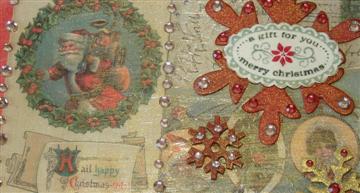 Are you heading early for all the crazy sales?
We drove by Best Buy at noon on Thanksgiving and there were already several tents set up out front. That’s just insane! Not being a morning person and hating crazy crowds I’ll be skipping all that excitement, but more power to you if you’ve got the fortitude! LOL! I’m thrilled to participate today in the Taylored Expressions Black Friday Blog Hop. Taylor challenged us to decorate one of her awesome Perfect Package Card Boxes for a Christmas gift. I truly LOVE these boxes and jumped at the chance to play with them again.
In the past I’ve used them for sets of hand made cards and I’ve always gone the quick and easy route for decorating the box. These boxes are super easy to decorate with a little patterned paper and ribbon. This time I wanted to just PLAY! Do you ever want to just get supplies out and play with them, not worrying about how a project will turn out? Well that’s what I did here. I knew I had another box as a back up that I could simply cover with patterned paper if my project went horribly wrong. LOL!
I definitely ran into some hiccups along the way, but I just kept going and it all worked out in the end. In fact I’m thrilled with how it turned out – probably because I had so much fun in the process.
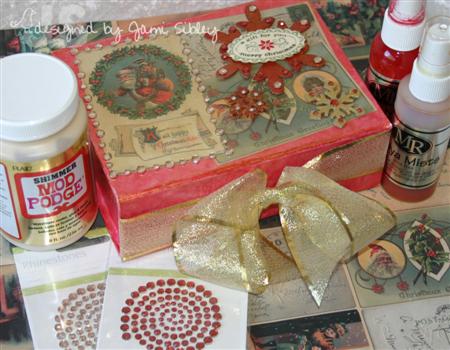
I started by laying the box out flat (I LOVE the way these boxes store flat so I can keep several on hand without taking up a ton of room!) and spraying it with Cherry Maya Mist. I wasn’t sure if the finish of the box would take the Maya Mist and it sort of didn’t. Guess I should have used gesso first, but I didn’t have any and honestly I’ve never used it before. No worries, I just patted it down with a paper towel to remove the pooled up Mist. Hmmmm…that started to create a cool textured look. I let that dry for awhile and then came back with Gold Metallic Maya Mist and repeated the paper towel blotting. I added a little more Cherry mist and more blotting. I felt like a kid making mud pies. Eventually I decided that the Mist might NEVER completely dry on the box, but again no worries. I pulled out my Shimmer Mod Podge which had been purchased sometime back on a whim and never opened. I figured Mod Podge could seal just about anything, so I went to work with it on the Perfect Package. Once the box was dry I had a reddish/pinkish/goldish/marbled shimmery finish. Very fun, but I had NO IDEA where I was going to go from there. I went searching through my Christmas patterned paper and came up with 2 sheets of this vintage postcard paper by Flair that I picked up 2 or 3 years ago. Now I had a direction!
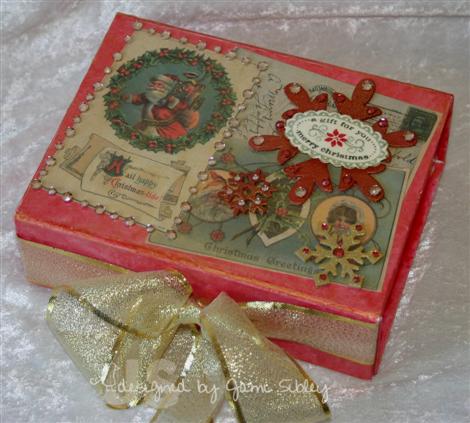
I cut apart some of the postcard images and decopauged them on with the Shimmer Mod Podge that I so conveniently had already out. Then I went to work with a package of Champagne Kaiser Craft Rhinestones – y’all know by now that KCRhinestones are just about my favorite things EVER! I was debating about whether to leave it there or go forward with the snowflakes and sentiment. I showed the box to Curt and said “Is this ok? Can it be done here?” To which he said “You really need something to balance out all of those rhinestones and you KNOW More is More!” LOL! He was so right and so I proceeded!
The chipboard snowflakes were sprayed with the two colors of Maya Mist and allowed to dry. (Tip: Use the metallic colors as a base coat under the solids. I know it sounds weird, but that’s what the directions suggest and I have tried it both ways and it does look better that way.) The snowflakes were then attached to the box with a combination of glue dots and mini glue dots and then I added KC Rhinestones in Champagne and Lippy Red (love Lippy Red – kind of a pinkish/faded red tone.) The SU tag sentiment was inked with 3 colors of SU markers and stamped onto Poison Ivory shimmer cardstock and punched out. Then I covered it with Versamark and heat embossed with Halogram ep before attaching it to the large snowflake with a glue dot. The finishing touch was some gold ribbon from a roll in my Christmas wrapping stuff.
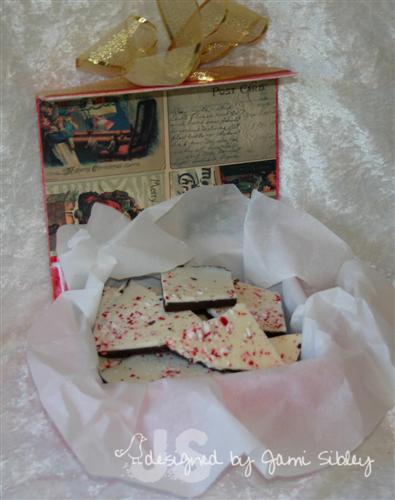
I plan to make some homemade goodies for the holidays, but in the meantime I thought this peppermint bark from Costco would do nicely. Heck maybe I don’t need to make goodies. This stuff looks pretty darned good and I did spend plenty of time on the box! 😉 I plan to put a little note in the bottom of the box to let the recipient know that the box will fold flat for storage by simply pulling on the ribbon tab. If you’re not yet familiar with these boxes you should know that the flap has a magnetic closure which is super nice!
***
Taylor has an incredible line up of talented ladies playing in this Blog Hop today. I can hardly wait to see what everyone has done! Let’s go check it out!
Alex Maldonado: https://fairyblossoms.typepad.com/
Amy Rohl: https://inkaboutme.blogspot.com/
Beate Johns: https://beate.splitcoaststampers.com/
Bev Gerard: https://savorthejourney.splitcoaststampers.com/
Charmaine Ikach: https://oodabugalley.blogspot.com/
Cindy Haffner: https://cindyhaffnerscorner.blogspot.com/
Debbie Olson: https://debbiedesigns.typepad.com/
Donna Baker: https://www.serenityinstamping.com/
Jen del Muro: https://iheart2stamp.com/
Jen Tapler: https://jentapler.blogspot.com/
Jenn Balcer: https://jbalcer.splitcoaststampers.com/
Jennifer Buck: https://thebuckstampshere.blogspot.com/
Jessica Diedrich: https://thewhimsicalbutterfly.blogspot.com/
Joan Ervin: https://stampingwithapassion.blogspot.com/
Joanne Basile: https://www.stampedbyhand.blogspot.com/
Linda Duke: https://www.lindaduke.typepad.com/
Lori Craig: https://loricraig.splitcoaststampers.com/
Rose Anne Reynolds: https://paperdelightz.blogspot.com/
Sankari Wegman: https://sunnysankari.blogspot.com/
Sharon Harnist: https://paperfections.typepad.com/
Sherry Cheever: https://sherrycheever.splitcoaststampers.com/
Taylor VanBruggen: https://www.tayloredexpressions.blogspot.com/
****Enabler Alert****

***Sale at Taylored Expressions
Now through Monday 11/30***
In honor of Black Friday and Cyber Monday (the two biggest shopping days of the year!), Taylored Expressions is offering 15% off everything in the store! Just use the promotional code TEBlackFriday upon checkout to receive the discount. You don’t want to miss up to 50% off all JustRite products, Buy 2 Get 1 Free on Tiny Twinkles, and the new TE Shirts & Aprons! Click here to go to Taylored Expressions to shop!
Thanks for stopping by. I hope you have a wonderful holiday weekend and happy shopping!

November Class Preview #2
November 10th, 2009
I need to get going to the office, so just a quick post to share a peek at another project we’ll be making in my classes on Thursday and Friday this week.
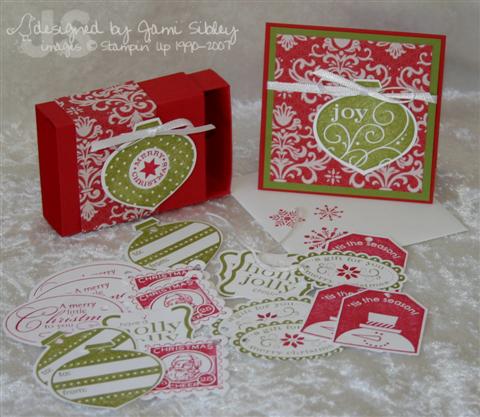
Here’s a set of cute and simple Christmas tags in a box made with the Big Shot matchbox die. To go along with the tag set we’ll also make a little 3×3 card with envelope. Fun, huh? That matchbox is seriously tiny which is oh-so-fun! This is my first time using it – so many possibilities. 🙂
I still have a couple of spots open for Friday night – if you want to come I need to know by tomorrow (Wednesday) morning. I’d love to have you!
I really have to run, thanks for stopping by. Have a great day!


