Gift of Blooms
October 31st, 2017
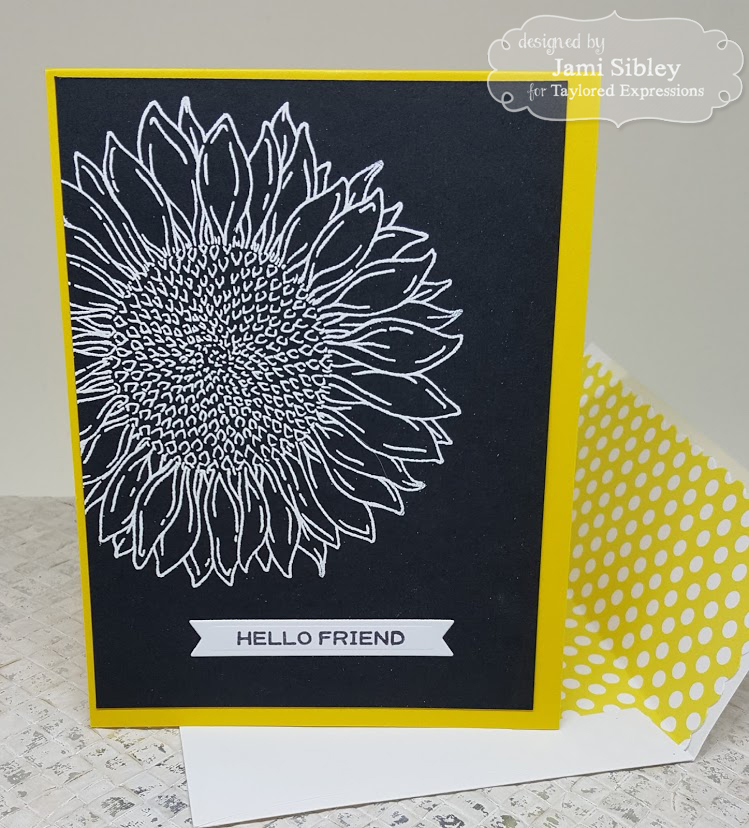
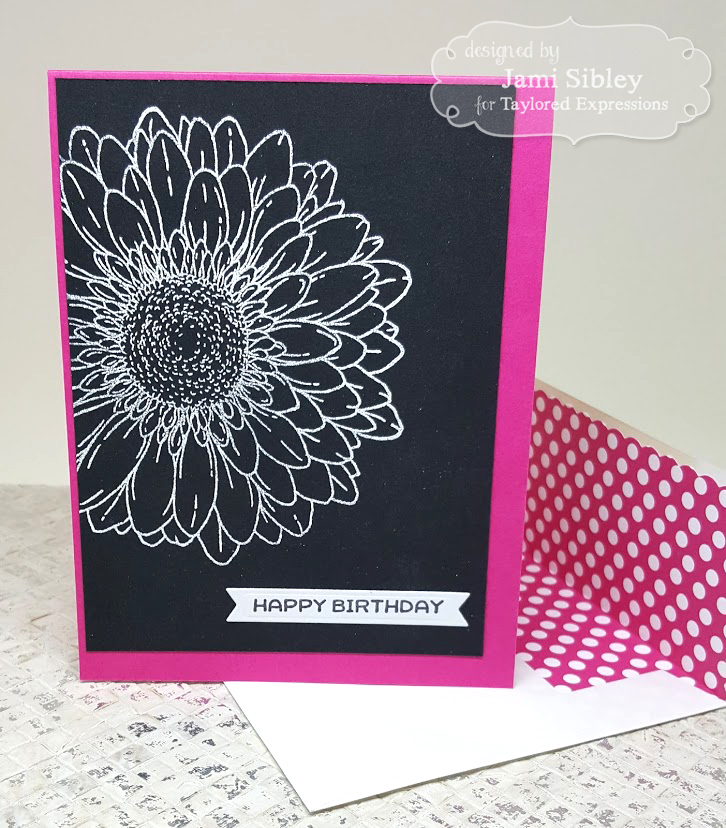
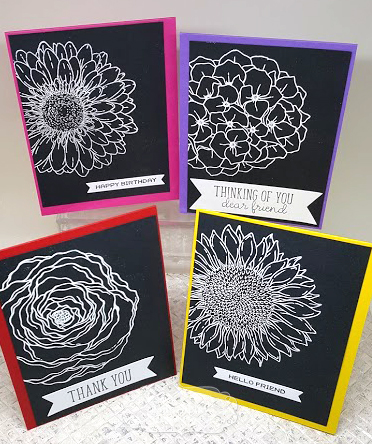
Happy Tuesday! I’m here today to share a project for the Taylored Expressions November Sneak Peeks. All new products will be available for purchase Thursday morning, November 2nd. This release focuses on gift items you can create for holiday giving – especially calendars and notecard sets. Anyone who has followed me for any length of time knows that I love to create sets of cards. I’m not sure why, but I find it so satisfying. For today’s project, I combined four different Big Bloom stamp images – the new Hydrangea and Cabbage Rose, and the previously released Daisy and Sunflower) along with the new sentiment set Friendly Phrases and two new dies – the Scallop Envelope Liner and the Double Ended Flag Stacklets. I also used the new TE 6×6 paper pack Playful Patterns Bold. Wanna see?
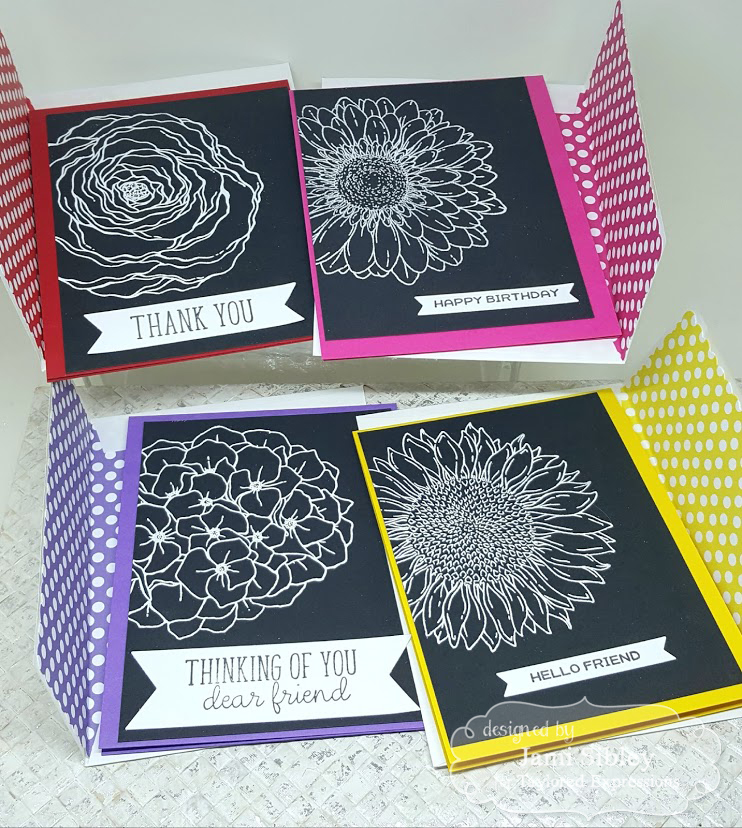
Taylor and I are actually showing very similar sets today. When we are working on developing products, we often discuss ideas of how the products might be used, as we try to think of how they will work together and try to be sure we are not missing any elements we would want for projects. One of the things we discussed as we were planning this release was these sets of notecards. I had such a clear picture in my mind, that it was the first thing I needed to do when my box arrived! My set features the Bold colors with black and hers uses the Savory colors with kraft.
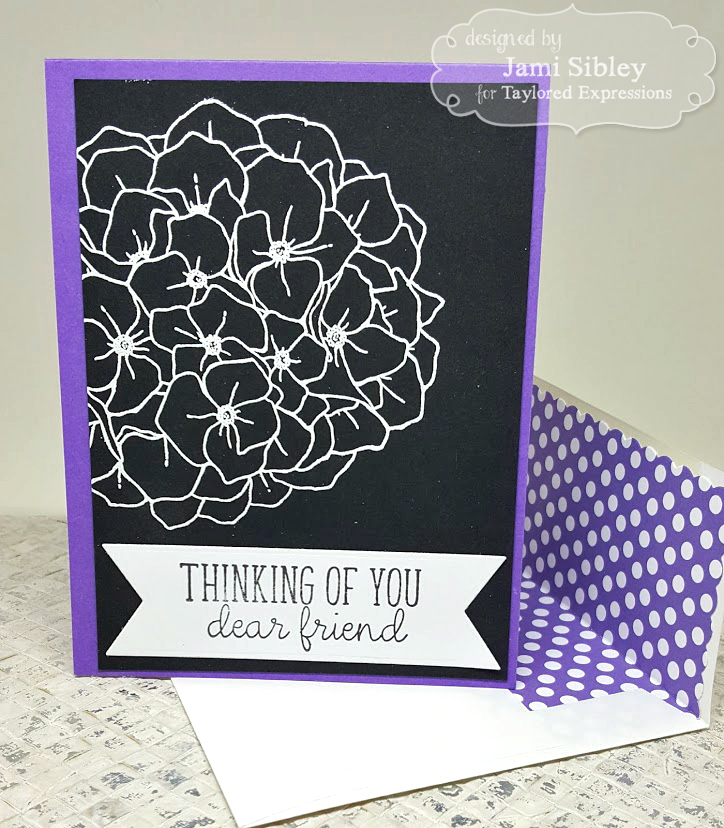
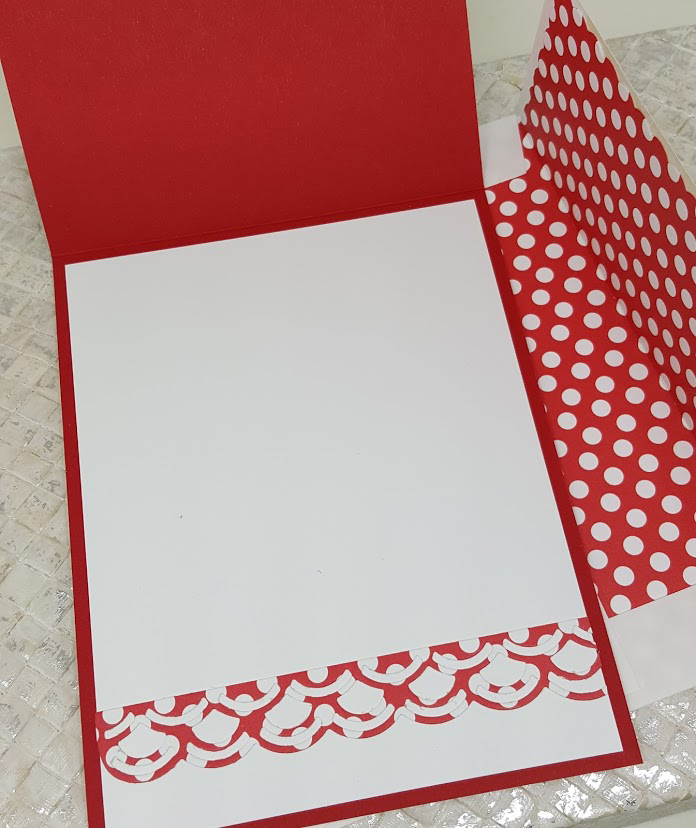
These cards really couldn’t be more simple – just heat embossed with white ink and white powder on Oreo cardstock and then attached to cardbases made from TE Bold cardstock assorted pack (chosen to match the the envelope liners cut from the Playful Patterns – Bold 6×6 papers.) Various sentiments from Friendly Phrases were stamped and die cut with the new Double Ended Flag Stacklets dies. This is so simple, that I actually created these while on a recent RV vacation!
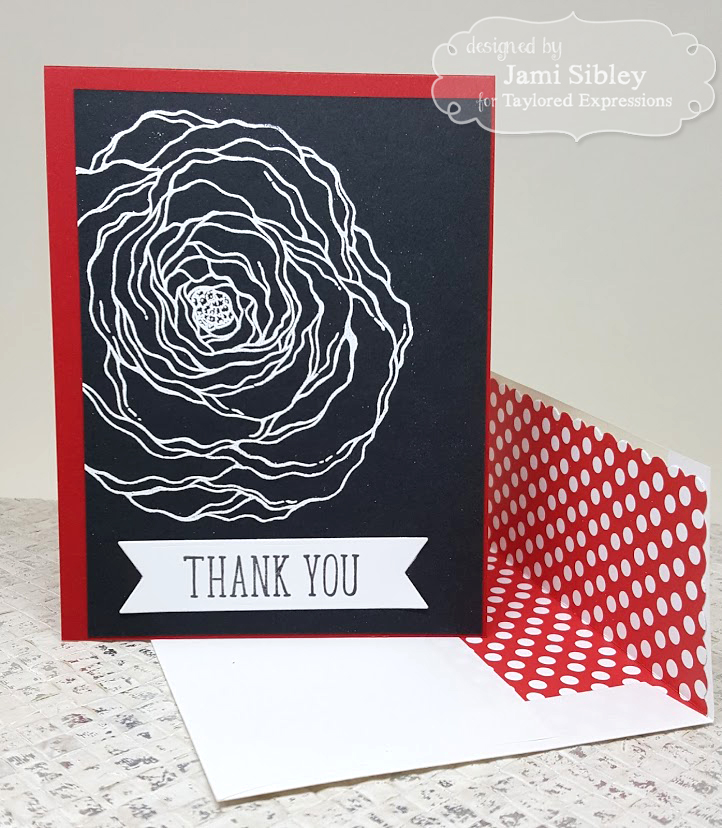

These Blooms are GORGEOUS colored-in with Copics or watercolors, but there was no way I was going to make multiple card sets with coloring. I just don’t have the time and plus, in all honesty, I’m really not all that great at coloring. LOL! I can do a decent job, but it’s just not my forte. So, I really love how impactful these Blooms are in just black and white!

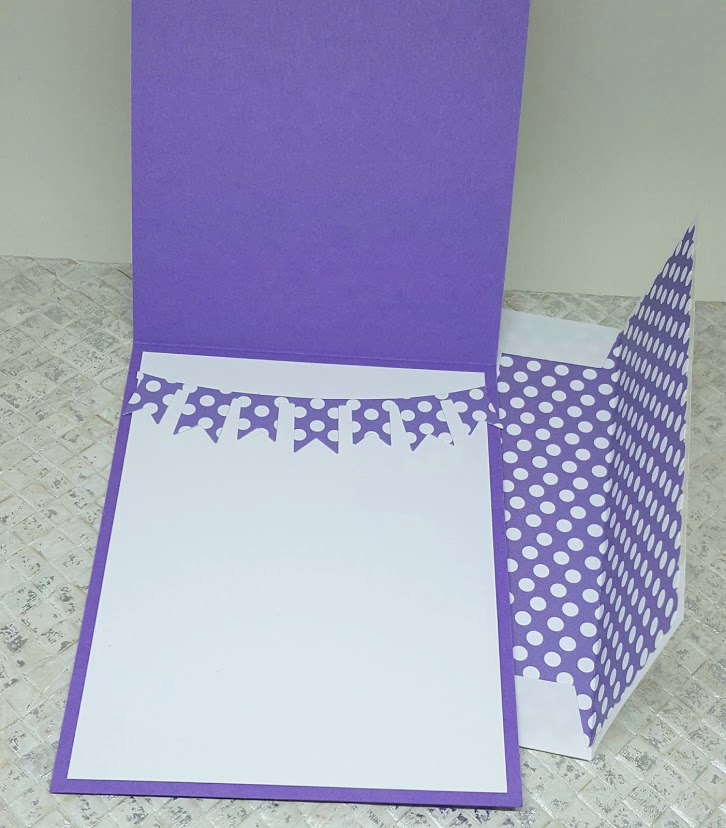
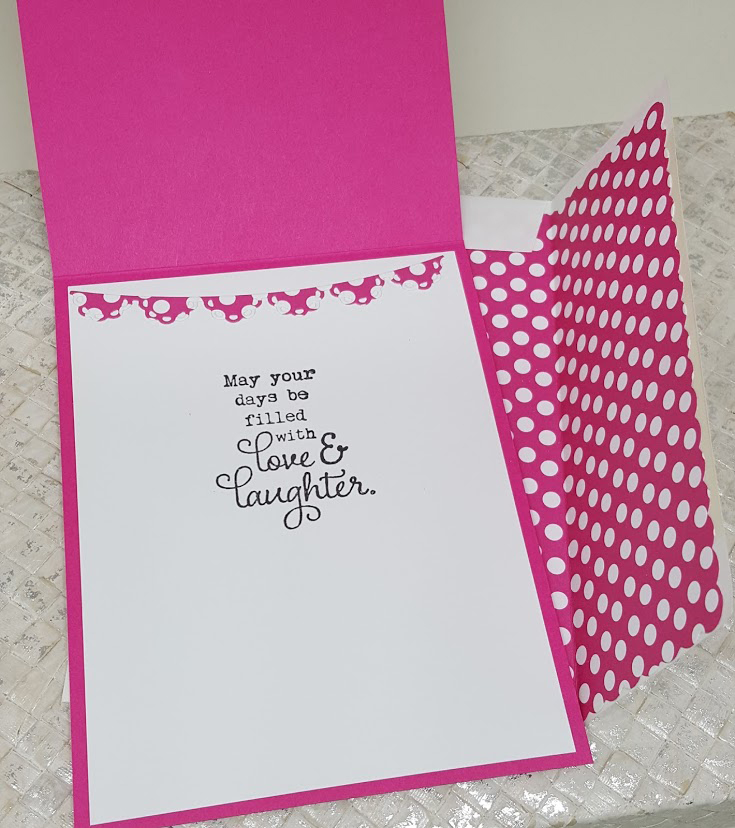
The addition of the patterned envelope liners really gives a special touch to a set of simple cards to be given as a gift. And I also used a little bit of the same paper – left over from die cutting the liner – along with various dies to add some inside interest.
How about you? Will you create some notecard sets for Christmas gifts? They are fun and easy and everyone loves to receive them!
If you didn’t start at the Taylored Expressions blog, be sure to go there for links to all the Creative Team members who have projects to share today! Thanks for stopping by!

4th of July
July 4th, 2012
Happy 4th! Here’s a little hostess gift I put together for my niece who invited us for a BBQ this evening. 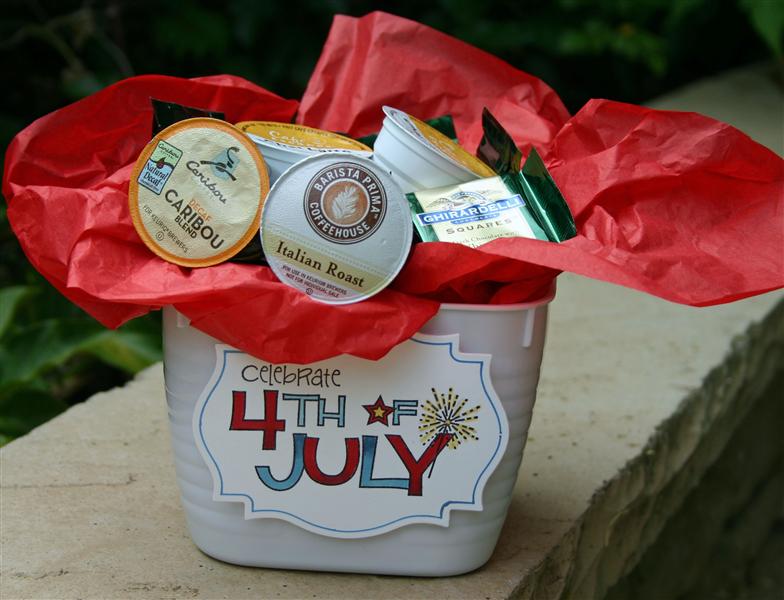
I used a little plastic bin from the Target Dollar Spot and filled it with assorted K-cups and my favorite Ghiradhelli Chocolate Mint Squares. For the decoration I used a Taylored Expressions A la Carte stamp along with the word “celebrate” from a Moka set. The image is colored with copics and die cut with a nestie. It’s just a quick simple gift.
Unfortunately we had to eat and run and not stay for fireworks, as Curt had a kidney stone attack while we were there. Yep they’re back and he has another lithotripsy scheduled for next week. So the evening was cut short, but I was happy to get him home for pain meds before it got really bad.
Hoping for a good couple of days for him as we both have vacation days for the remainder of the week. 🙂 I got a little stamping done today, so if I can get stuff photographed, I might even have some things to share here. Thanks for stopping by. Hope you had a wonderful day of celebrating!
![]()
Baby Blog Hop – It’s a Girl!
May 6th, 2011
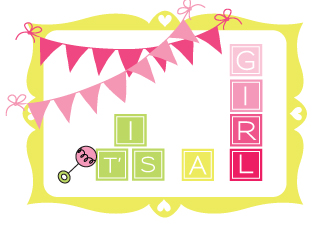
I am beyond thrilled to participate today with some special in friends to help Taylor spread the word that she’s expecting a GIRL in September! Taylor invited each of us to share a sweet girlie project in celebration of this wonderful blessing! Create something PINK and sparkly and share the joy of a sweet friend? You didn’t have to ask me twice!
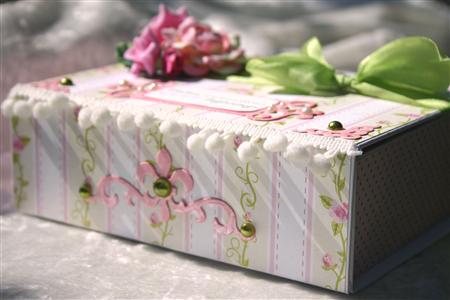
I decided to decorate a Perfect Package to coordinate with the baby card I posted on Monday. The box holds a little gift now and I’m hoping it can hold special keepsakes in the nursery in the future. This was a really fun “play” project…the more pink and flowery and pearly, the better! Click on the photos below to see them larger.
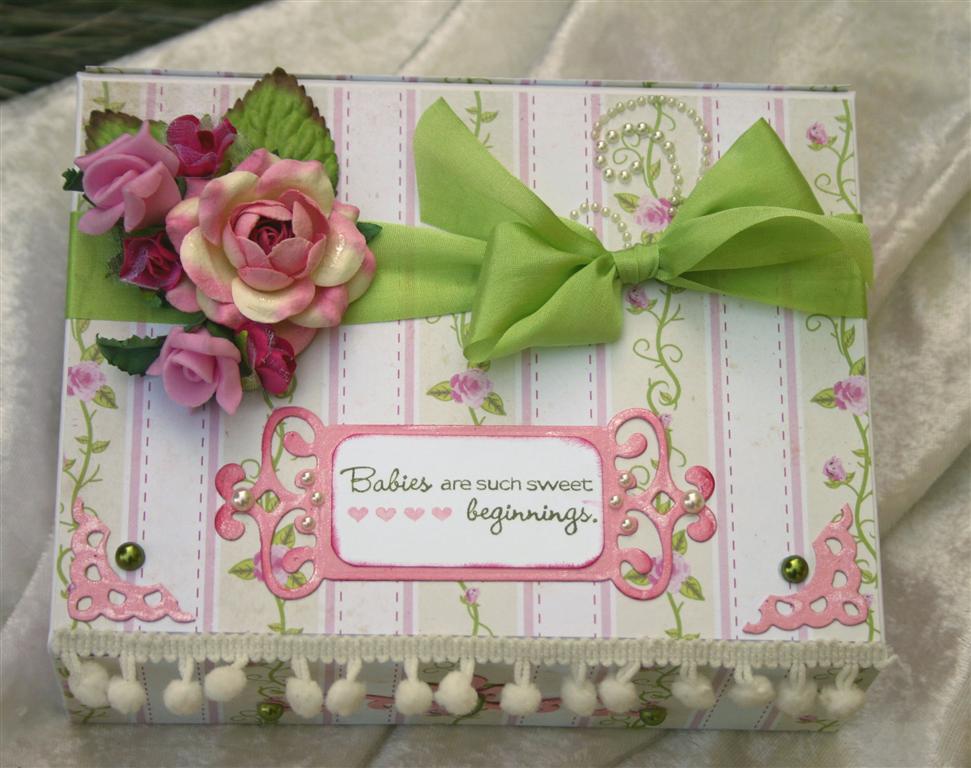
I love Perfect Packages and they are so easy to decorate! The paper I used here is Girls Paperie *swoon*. I think pretty much all of the supplies, other than the flowers, came from Taylored Expressions. Spellbinders Fancy Tags, Fleur de Lis, celery silk ribbon, pearls, pom pom trim and more. All of the pink cardstock elements were painted with Smooch Illuminate, so they have a pretty soft sparkle.
Here’s the inside of the lid of the box.

The two sentiments I used are from two new stamp sets at TE – Baby Cakes and Welcome Little One.
I really couldn’t be happier for Taylor and Jon! Well, ok…I’d be a tiny bit happier if they still lived in California and I could play Auntie in person! I know they are going to be fabulous parents and that’s going to be one lucky little girl!
I’m looking forward to seeing what everyone has created today. You’ll also want to hop around to the rest of the blogs linked below as Taylor will be giving away one stamp set of your choice from the May release to a lucky commenter on one of the blogs! You have through Sunday, May 8th to leave your comments and the winner will be announced on Taylor’s blog on Monday!
- Beate Johns
- Jami Sibley – you are here!
- Jenn Balcer
- Joy Kennedy
- Lori Craig
- Sharon Harnist
- Veronica McCollum
- Taylor
- Thanks for celebrating with us today!
![]()
Taylored Expressions Special Release
April 19th, 2011
**Please press Ctrl-F5 to “hard” refresh if you’d like to make sure you are seeing my latest post. Thanks!**
![]()
Taylored Expressions is bursting at the seams with so much sweet rubber that we couldn’t fit it all in the regular monthly release. I’m super excited to get to play along with the Baker’s Dozen today as we reveal 3 new stamp sets – Labels of Love, You’re My Type – Upper and You’re My Type Lower. And as if that weren’t enough, you are going to LOVE the fact that these new sets are designed to coordinate with Spellbinders Dies! Everything we are showing you is available NOW in the TE Store – no waiting!!
We also want to take this opportunity to express a HUGE thank you to Spellbinders who generously provided our team withh Grand Calibur Die Cutting Machines. WOW!! The large format of this machine makes it perfect for the Grand size dies as well as running multiple dies for a project through all at the same time.

My sample today is a set of cards that showcases the brand new stamp set Labels of Love designed by Taylor Van Bruggen as part of the *te* Collection of stamps. Labels of Love coordinates perfectly with Spellbinders Ribbon Tag Trio Three die set. It includes a whopping 31 images (7 frames, 6 flourishes, and 18 sentiments.) I really think that once you get your crafty little hands on this set, it’s going to be left out on your stamping table as your go-to set for sentiments! Click here to purchase the Labels of Love Bundle including the matching dies.
To get started today I pulled out the Emma’s Shoppe Taylored Card Kit and played with it until I got the papers and cardstocks I wanted to work with for this set.
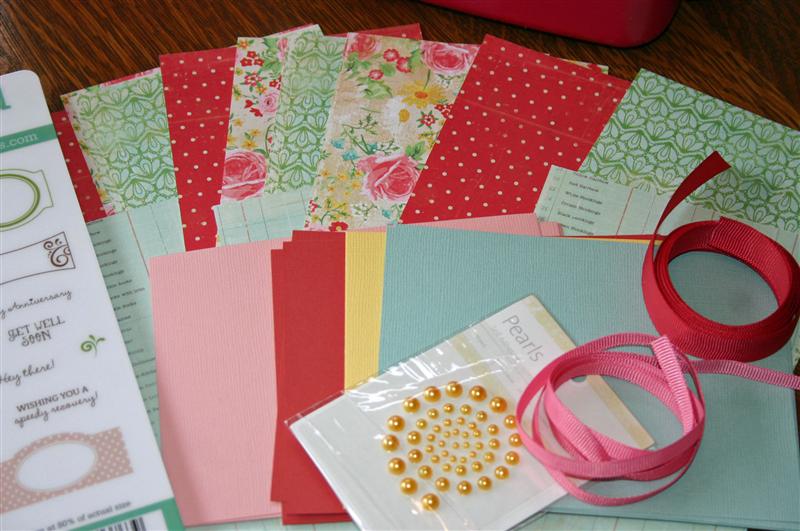
There are so many choices in these TE Card Kits, that I like to narrow them down a bit before I start even though I do sometimes change my mind as I go along. After making a set of 6 cards, I stillhave tons of materials left and am anxious to see what else I can create. Using this kit and Labels of Love, here’s the card set I came up with. Click on any photo to see it larger.
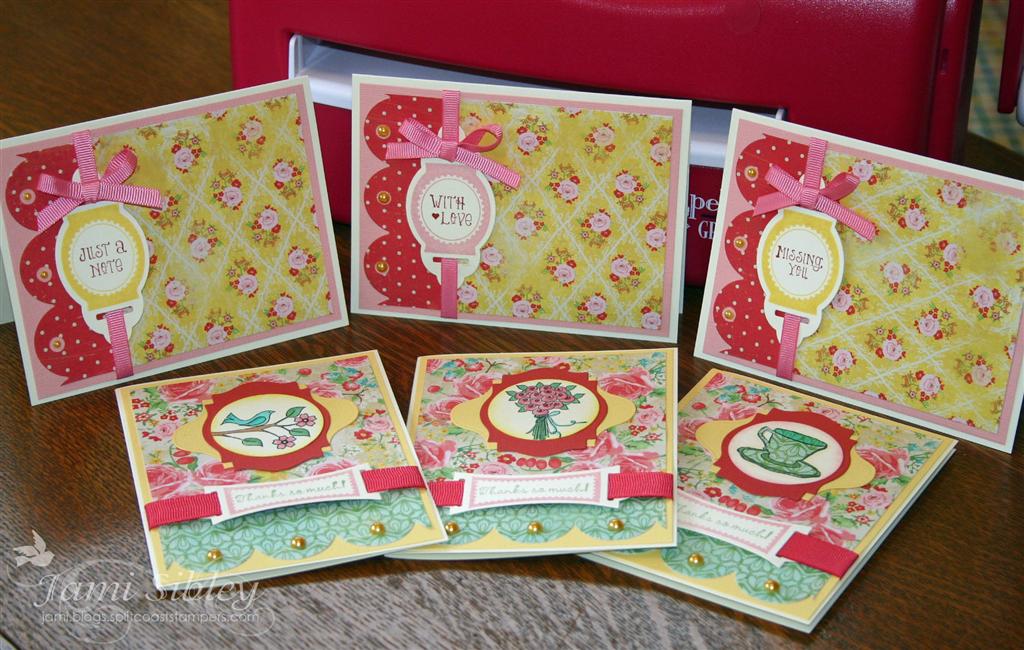
There are 2 basic designs, with 3 of each of those (with some variations.) I used 2 different frames from Labels of Love along with several different sentiments that fit in those frames – Just a Note, With Love, Missing You, Thanks so much!
For the top set above I let the fame and sentiment be the focal point. These cards would be super quick to make in multiples for gift sets. On both designs I used the large Scallop Border Taylored Die.
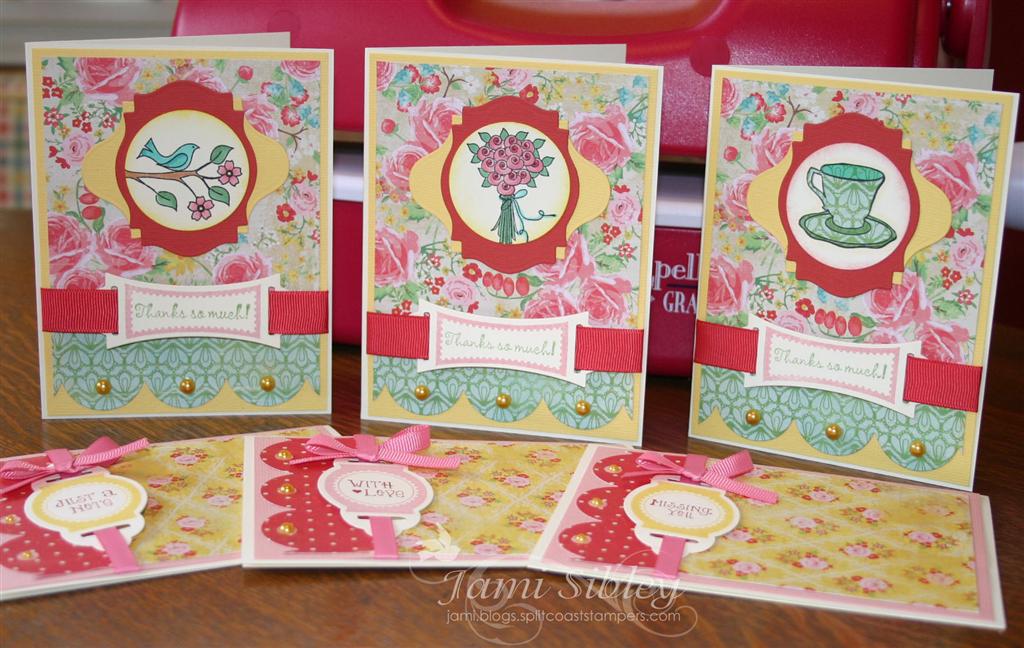
For the top set in the above photo I layered Spellbinders Labels 18 (red) on top of Labels 13 (yellow), then stamped a focal image and punched it with 1 3/4″ circle punch and layered that on top. I love the look of layering different shapes like this – such a simple technique to add a little pizazz! Focal points were stamped from Branching Out, Fresh Flowers and CreativiTea and colored with copics (tea cup was paper-pieced.)

This set is also for the TE Card Kit Challenge I posted in the Taylored Expressions Forum. Have you purchased either the Emma’s Shoppe or Hello Luscious Card Kit? If you haven’t, you still have time. You have through April 29th to show us your card set (4 cards or more) made from either kit and be entered to win the TE stamp set of your choice! It’s easy and it’s fun and you’ll end up with a wonderful gift for Mother’s Day or Teacher Appreciation or an upcoming birthday, Or maybe you just need a stash of birthday or thank you cards. Come play with us!
The Baker’s Dozen will have lots more samples of Labels of Love as well as the two new Alphabet sets You’re My Type Upper and Lower. Let’s go check it out!
- Charmaine Ikach
- Danielle Lounds
- Jackie Pedro
- Jodi Collins
- Karen Giron
- Karen Motz
- Melissa Sauls
- Regina Mangum
- Sankari Wegman
- Taylor VanBruggen
- Tori Wild
One more piece of news you’ll want to know – TE has the brand new Spellbinders Nested Pennants Dies and Lacey Pennants Dies available at 30% OFF while supplies last…that’s only $13.99 a set….WOWZAS!!! Get ’em while you can!
Thanks for stopping by.
![]()
Bridal Shower Gift Set
September 13th, 2010
Happy Monday! I’m pretty happy about it because I’ve lost 13.1 pounds in these last 9 weeks and I *just might* fit into the dress 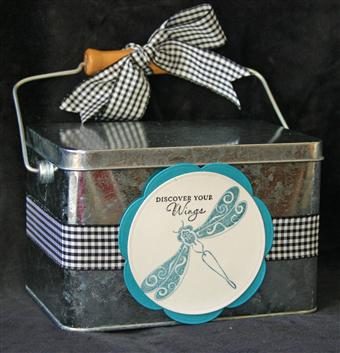 I’m hoping to wear to our niece’s wedding in a little less than a month PLUS I’m over 25% of the way to my overall weight loss goal! Curt has lost 18 pounds and he’s back to bike riding again after being totally sidelined with his illness. I’m super proud of both of us!
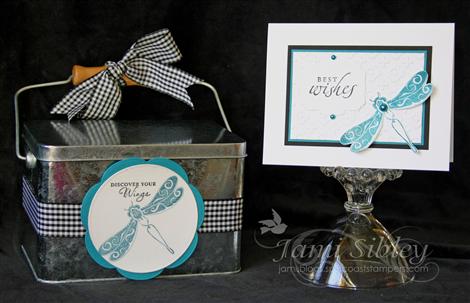
Speaking of the wedding…I attended a bridal shower for Kira on Saturday. I was totally bummed that the gift I ordered from her registry didn’t arrive in time (it’s out for delivery with Mr. Brown TODAY, wouldn’t you know it!), but I had a little extra gift planned so I did have something to take with me. For many years now I’ve made it a practice to include a set of handmade thank you notes with any bridal or baby shower gift I give. After a shower there are always lots of thank you notes to write, so I know it is a gift that will be used and appreciated. Kira loves dragonflies so I knew I wanted to use the TE set Discover Your Wings for her card set. I found this adorable tin at Tuesday Morning for just $3.99. Isn’t that wood handle sooooo cute? It’s not quite the right height for standard sized cards, but I was able to fit a set of 12 with envelopes by having them lean back slightly. I might go back this week and see if they have any more because I think this would make a wonderful recipe tin!
Here’s a photo of 3 of the 12 the tent topper cards that are inside the tin. I made 4 of each color – Taken with Teal, Burgundy, Elegant Eggplant.
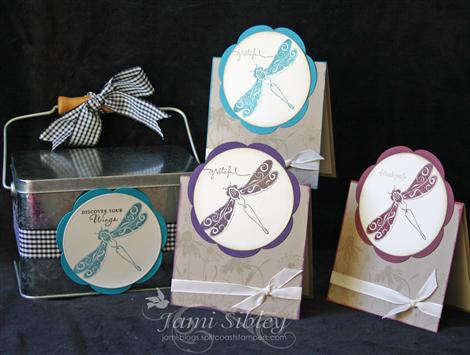
Cardbase is 4.25″ square made of kraft cardstock. I stamped the floral silhouette image from the set in SU Crumb Cake ink (why 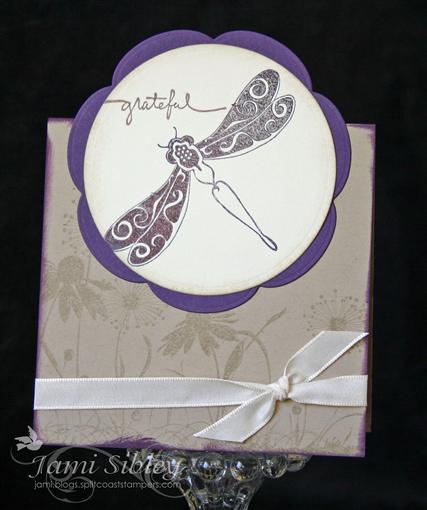 oh why did they feel the need to change the name of kraft???) along the bottom of each cardbase. Then I used craft ink (eggplant, burgundy, teal) to ink the edges of the cardbase. The dragonflies were stamped in the same craft ink on TE Choice Buttercream cardstock and heat embossed with clear ep. The images were cut with a circle nestie, edges were sponged with Crumb Cake, and then matted on a Blossom nestie. (Curt used my Big Shot to cut out the blossoms for me because I wasn’t feeling well when I made these and I was running out of time. Isn’t that so sweet??? )
Sentiments (“grateful” and “thank you”) are from SU sets and were stamped in Brilliance chocolate ink. Some vanilla taffeta ribbon finishes these off. {Tip: When putting ribbon toward the bottom of a card like this use a small piece of TE Sticky Tape under the ribbon on the inside of the card, so the ribbon doesn’t slip off.)
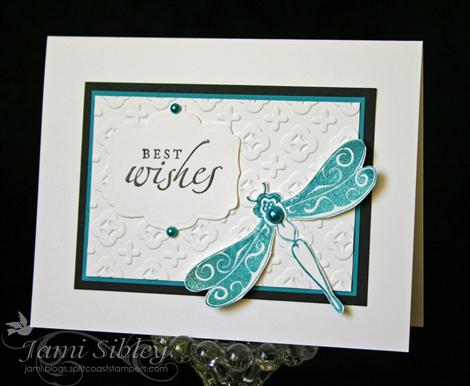
Here’s a photo of the card I made to coordinate with the tin. I wanted to do something CAS with lots of white space. I love this style, but it’s not particularly easy for me. I was super happy with how this turned out!
Thanks for stopping by. I hope you have a great week! I’m looking forward to what I hope will be a very productive week – not a lot of commitments, so hopefully some time to catch up on some things I’ve been wanting/needing to accomplish for awhile that I just never seem to have time for.