My First Paper Bag Album
September 29th, 2011
Happy Thursday! Sorry for the delay. I had hoped to have this up by Monday, but it’s just always somethin’. LOL!
I held my September Stamp Class two weeks ago and the project was a paper bag album – my very first paper bag album ever! I had gotten gorgeous paper kits from My Mind’s Eye (Lush Collection) and was dying to do a special project with them in class. During my August class I spouted off that we would make paper bag albums, despite the fact that I had never made one and at that point really didn’t have a clue as to how it was done. But I had wanted to make one for years and this seemed like the perfect opportunity to learn! I watched a bunch of videos on YouTube, which I was extremely grateful for, but ultimately chose a more simplictic approach that worked really well for me. The Rocket Scientist helped me put together a video to show you the album page by page as well as a little tutorial on how it’s constructed. I even have a couple of tips in case you want to teach something similar in a class like I did. I hope you enjoy it.
[youtube]https://www.youtube.com/watch?v=V3uVPvlora8[/youtube]
Some of the ladies in my class asked that I post still photos also for easy reference. So here’s the book, page by page.
Here’s the cover (the scallop is made with the TE Medium Scallop Die and the leaf is a SU punch):

Pages 1 and 2:
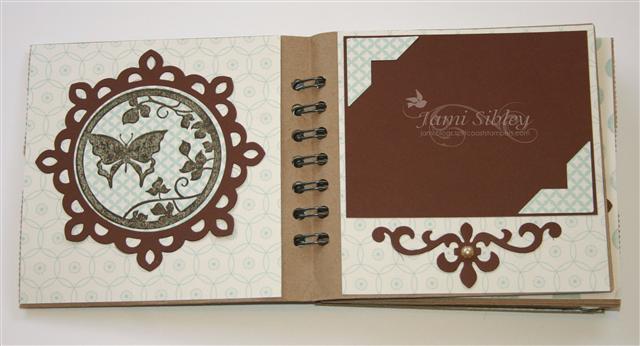
Pages 3 and 4 (under the scallop is a little pocket for a memento):
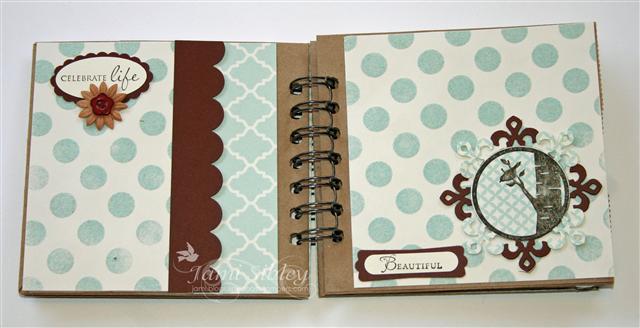
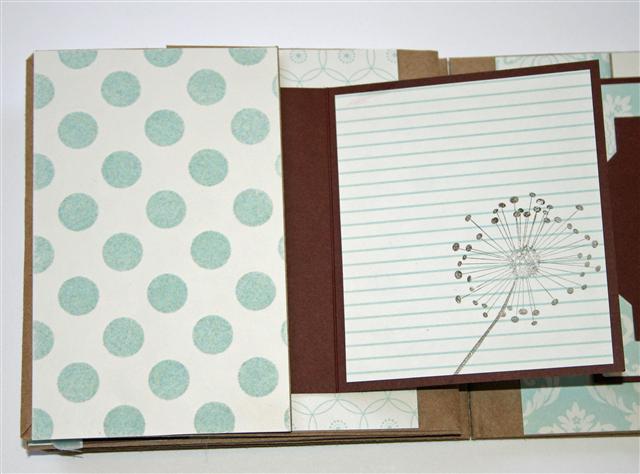
Pages 5 and 6:
Pages 7 and 8 (these are little fold-over cards tucked into pockets created by the feet/flaps of the bags):
Page 7 – showing the journaling card open:
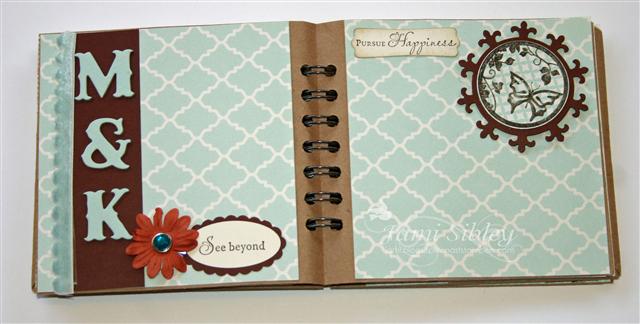
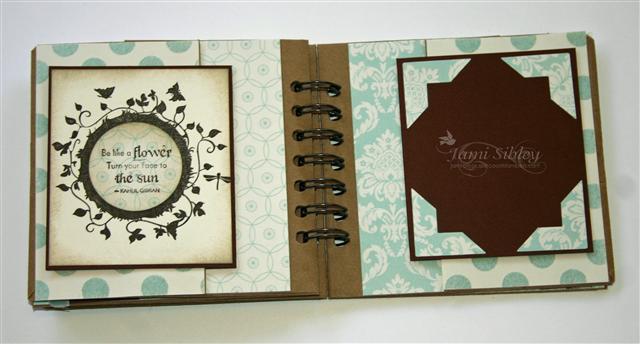
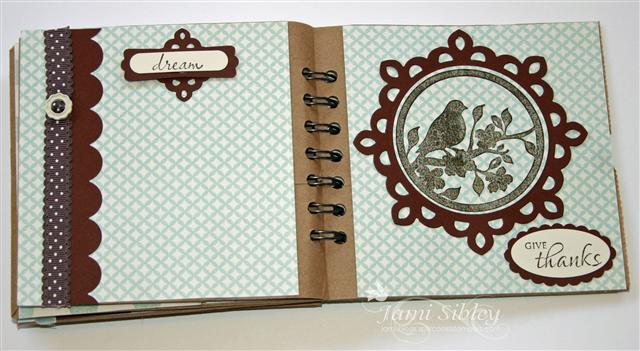
Pages 9 and 10:
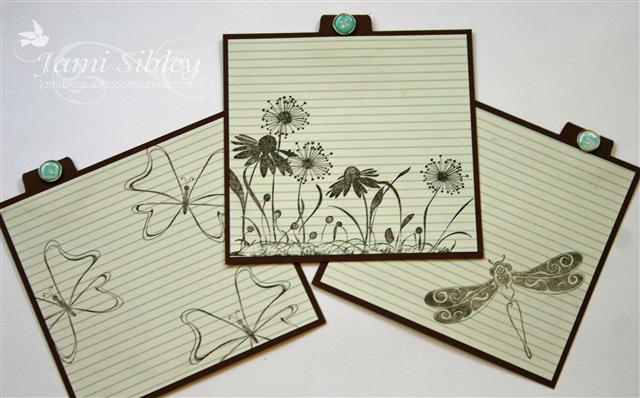
The insert cards (these are tucked into the 3 bag top openings):
This project was created with 3 brown lunch sacks, the MME Lush kit, my Cinch Binding Machine, Spellbinders Fleur de Lis Dies and stamps from Taylored Expressions: Embrace Beauty, Summer Afternoon, Celebrate Life, Discover Your Wings.
I created mine for my niece and her husband who will be celebrating their First Wedding Anniversary soon with a little trip. There are plenty of spots to add photos as well as opportunities to journal about the trip. I hope they like it. I was tickled pink with it! I had so much fun with this project that I want to do one for Christmas now! Oh and did you see the card I created to go with it? Just scroll down one post or click here.
So tell me, have you ever made a paper bag album? If you haven’t, you really need to! Check out my video and let me know if you have any questions. I will admit that this was a big project for an evening class, but really it went pretty smoothly and I think everyone loved the result. Next month we’re back to cards though. 😉
![]()
TESC147 Blessings
September 23rd, 2011
Happy Friday! What on earth happened? I had grand plans of stamping and blogging every day this week….hmmmmm. Well at least I didn’t miss the new Taylored Expressions Sketch Challenge! This is another really good one with tons of possibilities. I hope you’ll play along with us. TE stamps are NOT required to play and there is a prize up for grabs by random draw.
Here’s my card featuring Embrace Beauty along with gorgeous elements from the MME Lush collection.
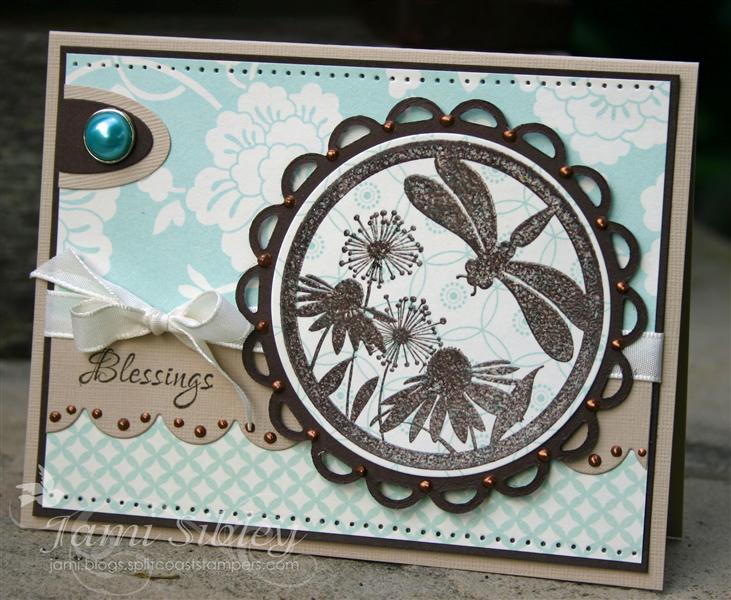
I created this card to coordinate with a paper bag album that we made in my class last week. I hope to have photos and a video of that project up tomorrow. For my card I stamped the image onto patterned paper with Chocolate Chip Craft ink and heat embossed with clear embossing powder before die cutting with a circle Nestabilities. That was layered onto a mat die cut with Lacey Circles. The scallop was created with the TE Medium Scallop Border Die. The little element in the upper left corner was created with two SU oval punches and a big pearl brad. I added some piercing, taffeta ribbon and chocolate liquid pearls. The sentiment is from Celebrate Life.

This is an anniversary card for a very special couple, so I will finish off the inside with anniversary wishes. Now let’s see what the rest of the Sketch Crew has in store:
- Cassie Trask
- Lisa Hjulberg
- Lori Craig
- Margie Cortina
- Monika Davis
- Taylor VanBruggen <— Get all the info to play along here
- Tracy Clemente
- Guest Stampers: Bonnie, Michelle
Thanks so much for stopping by today. I hope you have a great weekend. I’ll be back soon (in a day or so) with the paper bag book.
![]()
Taylored Expressions Sketch Challenge Sew Happy
September 9th, 2011
Happy Friday! It’s time for a new Taylored Expressions Sketch Challenge and I know you’ll really like this one. Lots and lots of possibilities! I decided to use the Crafty Petite set Sew Happy. I love the Crafty Petites, but I’m ashamed to say that I had not ever inked this set before. SEW glad to finally make some time to use it! (Sorry for the photo – I was running late and had to take this at night.)
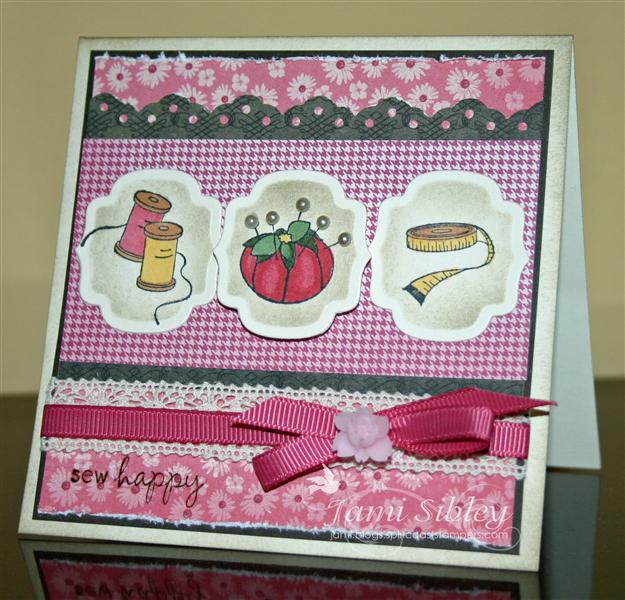
My card is 4.25″ square and I used the smallest die in the Spellbinders Labels 9 set for my images. The images were stamped on TE Choice Buttercream cardstock and sponged with Crumb Cake ink while still in the die, then colored with Copics. The middle image is popped up on double thick 1/8″ foam tape. I used Want2Scrap Baby Bling Pearls for the heads of the pins – they are perfect! Patterned papers are from the MME Lost & Found Two Blush 6×6 pad – I think this is my current favorite paper! I added a Webster’s Pages Little Whimsy flower on top of the bow for that special little sumthin’-sumthin’.
 Now lets’ see what the rest of the Sketch Crew came up with:
- Cassie Trask
- Jami Sibley <– you are here
- Lisa Hjulberg
- Lori Craig
- Margie Cortina
- Monika Davis
- Taylor VanBruggen <– get all the deets to play along with us here
- Tracy Clemente
- Guest Stampers: Jessica, Chris
I hope you’ll give this sketch a try. TE stamps are not required to play and there is a prize drawing! You have two weeks to enter. I hope you have a wonderful weekend! Thanks for stopping by!
![]()
Taylored Expressions September Release is HERE!
September 1st, 2011

- All of the new products are now available for purchase! Check out the Fresh Out of the Oven Department for all the goodies!
- More projects from the Baker’s Dozen to inspire you. Just follow the link list below.
- FREE Party Favor with every order! Every order placed between Thursday, September 1st at 8 am PST and Monday, September 5th at 10 pm PST will receive a FREE Party Favor ranging in value from $2.50 – $10.00. These are all fun products from the TE Store. We’ll chose a favor for you based on the amount of your order. If your order total is over $100 (before shipping and tax) you will also receive the Sweet Party Petite stamp set as our FREE gift to you! The set will NOT appear on your order, but we promise to include it in your shipment!
- One more chance to win… head on over to our forum on SCS and tell us your favorite stamp set from this release. We’ll be choosing one person to win their favorite set FREE! You have until Sunday, September 4th at 6 pm PST to enter to win.
I have one more sample to share with you for the Taylored Expressions Release and Birthday Bash. Ok, so I know I said I’m not into Halloween, but I just had to play with Toil & Trouble. I think one of my very favorite things to do in stamping is scene building. This set (illustrated by Nancy McKinney for the Whimsical Wishes line) has so darn many possibilities. I’ve paired it with the Apothecary Shelf A la Carte Stamp for today’s 5.25″ square card.
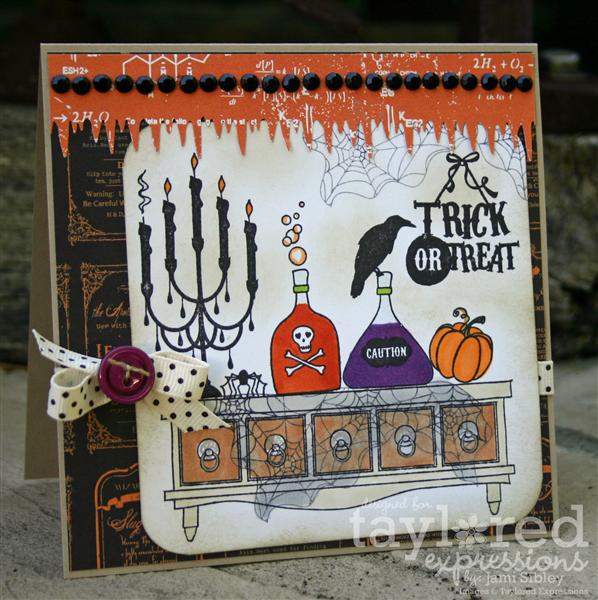
I used kraft cardstock for my card base and papers and ribbon from the Spooky Project Pantry Basics kit featuring Echo Park Apothecary Emporium. I stamped my scene piece by piece (using my beloved stamp-a-majig) on TE Choice White cardstock and colored it with copics. I used some crumbcake ink and a sponge to dirty it up a bit. I had intended to use my TE grass border die for that top strip of paper, but of course I couldn’t find it, so I used a Martha Stewart icicle punch.
Now that I’m staring at the card to write about it, I think I may go back and add a little sparkle to the webs and candles – perhaps some stickles or a Spics Glitter pen.
If you haven’t done much scene building in your stamping, this would be a great set to start with. It has lots of elements that work together very easily. And here’s my little tip when you want to start a scene: take a piece of copy paper (you know, something sitting in your printer that you didn’t really need to print out and are never going to use) and just start stamping the elements you think you might want to use together. Don’t worry about perfect placement, just eyeball it for this step. From this you will get an idea of how much room your images will need and what things look good together and what you might need to add for balance. You might do this step 2 or 3 times. Once you get a basic idea that you are happy with, then you can move on to cardstock and a stamp-a-majig. Start now with your largest image or any image that will appear to be in front of the others. (You will need to mask the “front ” image if you want things to appear behind it.) It’s really fun and not scary at all! For those of us who can’t draw a lick, this is the closest we get to creating a painted scene! Enjoy!
Before you head off to shop, how about a little hop around to see what the Baker’s Dozen has cooked up? You’ll see samples of ALL the new releases!
- Charmaine Ikach
- Danielle Lounds
- Jen Shults
- Jodi Collins
- Karen Giron
- Melissa Sauls
- Melody Rupple
- Regina Mangum
- Sankari Wegman
- Taylor VanBruggen
- Tori Wild
- Wanda Guess
Thanks for stopping by! Happy Shopping to you and Happy Birthday to Taylored Expressions!!!
![]()


