Basic Grey Blocks
February 26th, 2007
I got the idea for this fun simple project from the February 07 issue of Sunset Magazine. Sunset is a regional magazine about Living in the West. It has great travel, decorating, gardening and food articles…and apparantly the occassional craft! If you live in the Western United Sates you NEED this magazine! As soon as I saw the picture in Sunset I asked my sweet hubby if he would cut me some wood blocks. He ran right over to Home Depot and picked up a piece of 4×4 – which interestingly enough is 3.25″ x 3.25″, but it’s called a 4×4. I guess that’s not so different from 12×12 paper often actually being 11 7/8″x 11 7/8″, huh?
We fiddled with the heights and came up with 2.5″, 3.25″, and 4.5″. I proceeded slightly differently than the magazine directed. They suggested wrapping one piece of paper all the way around the block, but I was afraid it would get funky at the corners. I opted to start by painting all the edges with 2 colors of brown acrylic paint (you know the little bottles that go on sale at Michael’s 2/$1.00) and then with a touch of aqua acrylic paint.
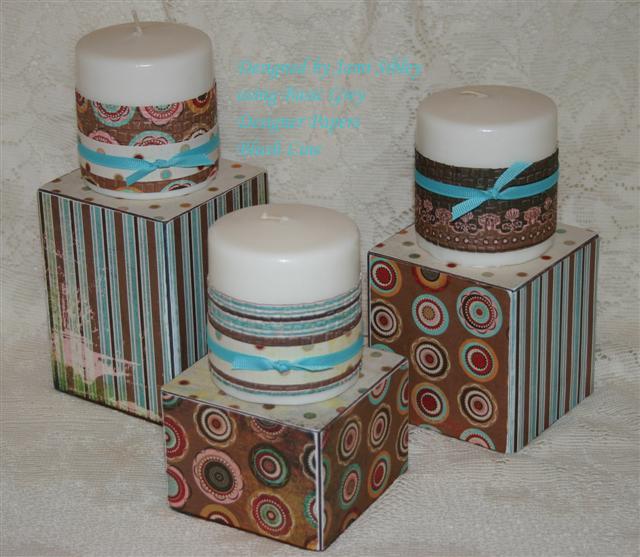 Then I cut pieces of Basic Grey Blush for all 4 sides and the top of each block. Each one is the same with the stripe on 2 adjacent sides and then the circles on the other sides and the polka dots on top. (This way the blocks can be displayed a number of different ways – all the same or showing different patterns as in this photo.) I adhered with Plaid Royal Coat Decoupage Finish. It is basically the same as Mod Podge but I find MP often has a tacky feel when used as a top coat – even when fully dry. I don’t get the tackiness with Royal Coat. After they were compelety dry I used a fine grit sand paper to sand all the edges. I had intended to apply more RC as a top coat, but liked the look and feel of the bare paper so I stopped at that. Of course a top coat would make them more durable.
The candles are from Big Lots and come in a 2 pack for $2. I cut strips of BG Blush 1.75″ and ran them through my Cuttlebug with the Tiny Mosaic A2 folder – hard to see in the photo, but gives a really nice texture. Then wrapped a smaller piece of the polka dot Blush pattern and finished with some Caribbean grosgrain ribbon from Fabric Barn.
I am so in love with Basic Grey papers right now even though I feel like I have been cheating on my big background stamps. LOL! I can’t wait to get the Phoebe, Perhaps, and Stella Ruby lines today. I am so excited for my friend Joy and her wonderful business partner Daisy with the opening of their on-line store electic Paperie! Check it out! They have some amazing stuff already including lots of Basic Grey, Crate, and Cosmo Cricket and are getting new stuff in almost every week right now. You definitely have to check out their alterables section. I got to see the Bare Elements stuff in person at CHA and it ROCKS!
I hope some of you will try this candle block project. If you do, please let me know so I can see what you’ve done. I think it could be great for just about any seasonal decoration and definitely easy enough for the kids to do with you as well. If I planned to burn these candles I would just burn down a bit and scoop out a small hole so that a tealight would fit on top. That way it’s safer and the tealight can be replaced.
Thanks for visiting my blog today. I’m just getting started and would love for you to leave me a comment! Happy Monday. 🙂
The Check’s in the Mail
February 23rd, 2007
Happy Friday everyone!!! Thanks for reading my brand new blog! It just went live last night and I’m pretty excited about it. 🙂
I need to mail a check to a stamping friend and I can’t just stick in an envelope without a card. So I decided to stamp a quick 6.25″ x 3.25″ card to fit in a check size envie I have. Who am I kidding? I can’t make a quick card! I want to…I really do. I just can’t. I guess it goes along with my More is More philosophy – LOL! This card took me about a half hour or so to complete. I had to tear myslef away from my stamp table to keep from adding stickles or glitter or brads or rhinestones or something for crying out loud! I still think it’s cute without that stuff, but I keep hearing my friend Taylor in my head saying “When you think you’re finished, just keep going.”
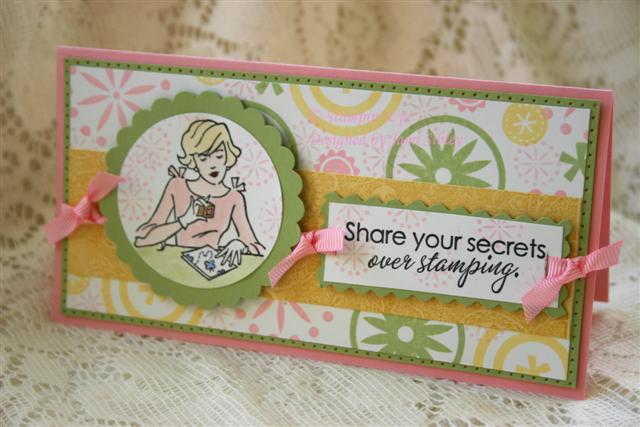
I love the Stampin’ Up! set Stampin’ Fun for Everyone and wanted it as soon as I saw it last year. Other things kept taking priority though and it kept getting bumped off the order list. I was finally able to justify buying it before my Watercolor Class last month by telling myself it would be a perfect set for my customers to use to practice watercoloring! Good one, huh? I haven’t used it much yet, but I do love it and am looking forward to using it lots more. I think it will be great for cards to send to stamping buddies as well as for SCS RAKs (Random Acts of Kindness).
Here I paired it up with Big and Little Pieces in a color scheme of Pretty in Pink, Certainly Celery and Barely Banana. The Banana strip was stamped with the SU Paisley background stamp in So Saffron ink (the Banana ink just doesn’t show up enough). I pierced around the edge of the celery mat for a little more interest. The focal image is popped up on foam tape. Boy those Marvy circle, oval and scallop punched were one of the best stamping purchases I have ever made! I use them on almost every card! Well, I guess I’d better get that check in the mail! Hope you have a great weekend!
Friendship
February 22nd, 2007
There are times when things just get to you, KWIM? You know they shouldn’t – logically speaking – but they do anyway. Last night was one of those times for me. My feelings were hurt and it was just a really rough evening. But it is in those times that friendships really have a chance to shine. I got several supportive phone calls as well as private messages over at SplitCoastStampers. And this morning I woke up to even more support from my “computer friends”. I know it’s hard for some people to understand how I could have “real friends” through the internet, but wow…I could go on and on about the friendships I have been blessed with.
 Anyway, I went to work feeling a lot better and determined not to focus on the negative when there are so many wonderful friends to focus on. Boy was I shocked when a man walked into our office this afternoon with one of the most beautiful (and very “me” ) bouquets I have ever seen. I could hardly wait to open that little envelope to read the card…and it said “Hugs from your friends”. Ummmm….WOW! I still haven’t figured out exactly which friend(s) sent the flowers, although I have some suspicions. And I really haven’t figured out how they knew my address at work (but that’s a whole other issue – LOL). So…anybody wanna ‘fess up? Thank You Thank You for such a wonderful surprise! I was/am truly BLOWN AWAY!!! And of course I’d love to know who you are!
What can you do today…even some very small thing…to make someone smile, make someone feel loved, make someone feel a little better about something…what unexpected thing can you do today to let someone know you are so glad to be their friend?
Fall Back on Black
February 21st, 2007
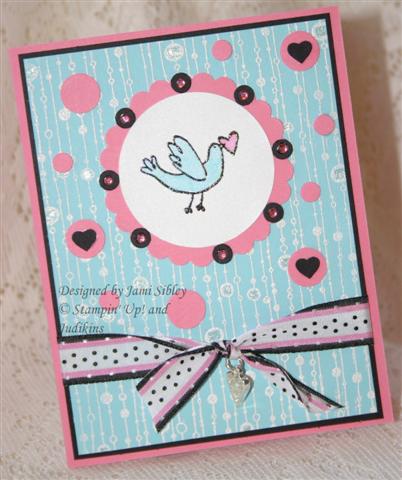
One of my most basic stamping principles, along with More is More, is Fall Back on Black! Whenever I’m working on a card and it just seems to “need something” I try adding just a touch of black and it almost always looks better! Since black ink is so often used to stamp outline images there is often that tiny element of black already there. Adding a narrow black mat layer and sometimes a bit of black somewhere else can really make the other colors *POP*. I’ve been using this principle in my stamping for a long time and it just recently dawned on me that maybe a touch of black is what my kitchen decor needs too. I’m just starting to work on that in my head, so hopefully sometime in the future I’ll be able to share with you how it turns out.
Card recipe:
Stamps : Bird is a SU jumbo incentive stamp, Bead Curtian Background is by Judikins
Paper: Regal Rose, Cool Caribbean, Basic Black, Shimmer White Ink: Black Craft, White CraftOther: white EP, Iridescent Ice EP, pink rhinestones, ribbon from Costco, Stardust Gel Pen, Marvy mega Scallop Punch and Super jumbo circle punch, 5/8″ circle punch, tiny circle punch and heart from Target Dollar Spot, heart charm
Watercolor Class
February 19th, 2007
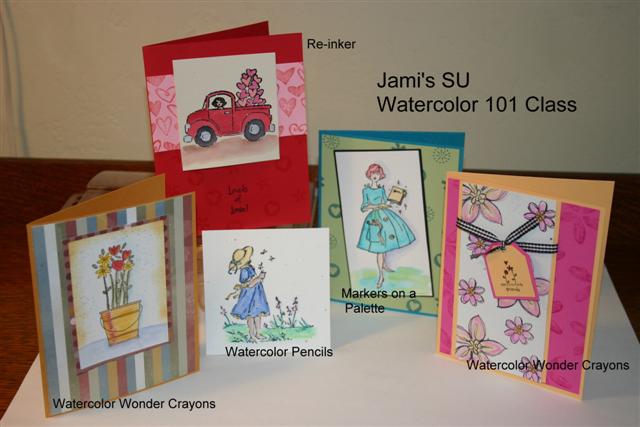
Thought I would share a photo of the projects from my Watercolor Class earlier this month. I am by no means a watercolor expert, but I sure have learned a lot from ladies like Cindy Lyles, Janine Tinklenberg, Valerie Stangle and others at Splitcoast. It’s so fun to try different mediums for coloring. My two current favorite methods are Watercolor Wonder Crayons with an aquapainter and Markers scribbled on a cd and an aquapainter. I love to watercolor on Shimmer cardstock and watercolor paper, but most often just reach for Confetti White. My students got to try them all. What is your favorite medium and cardstock for coloring?
Inspiration
February 18th, 2007
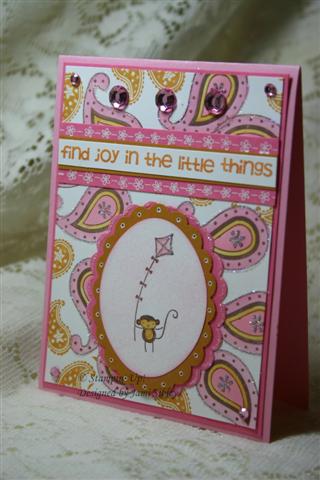 I love getting inspiration for stamping projects from all sorts of different places. One of my favorites is when I’m out shopping and I see blouse or skirt or something with a striking or unexpected color combo. Here’s a card I made after spying a cute cotton summer blouse at Macy’s – the fabric had a white background and a paisley print of Regal Rose, Pretty in Pink and More Mustard. I never would have come up with this color combo on my own! Pink and Mustard? The Limited Supply Challenge on SCS was to make a Summer card, so I used that Summer Blouse as my inspiration.
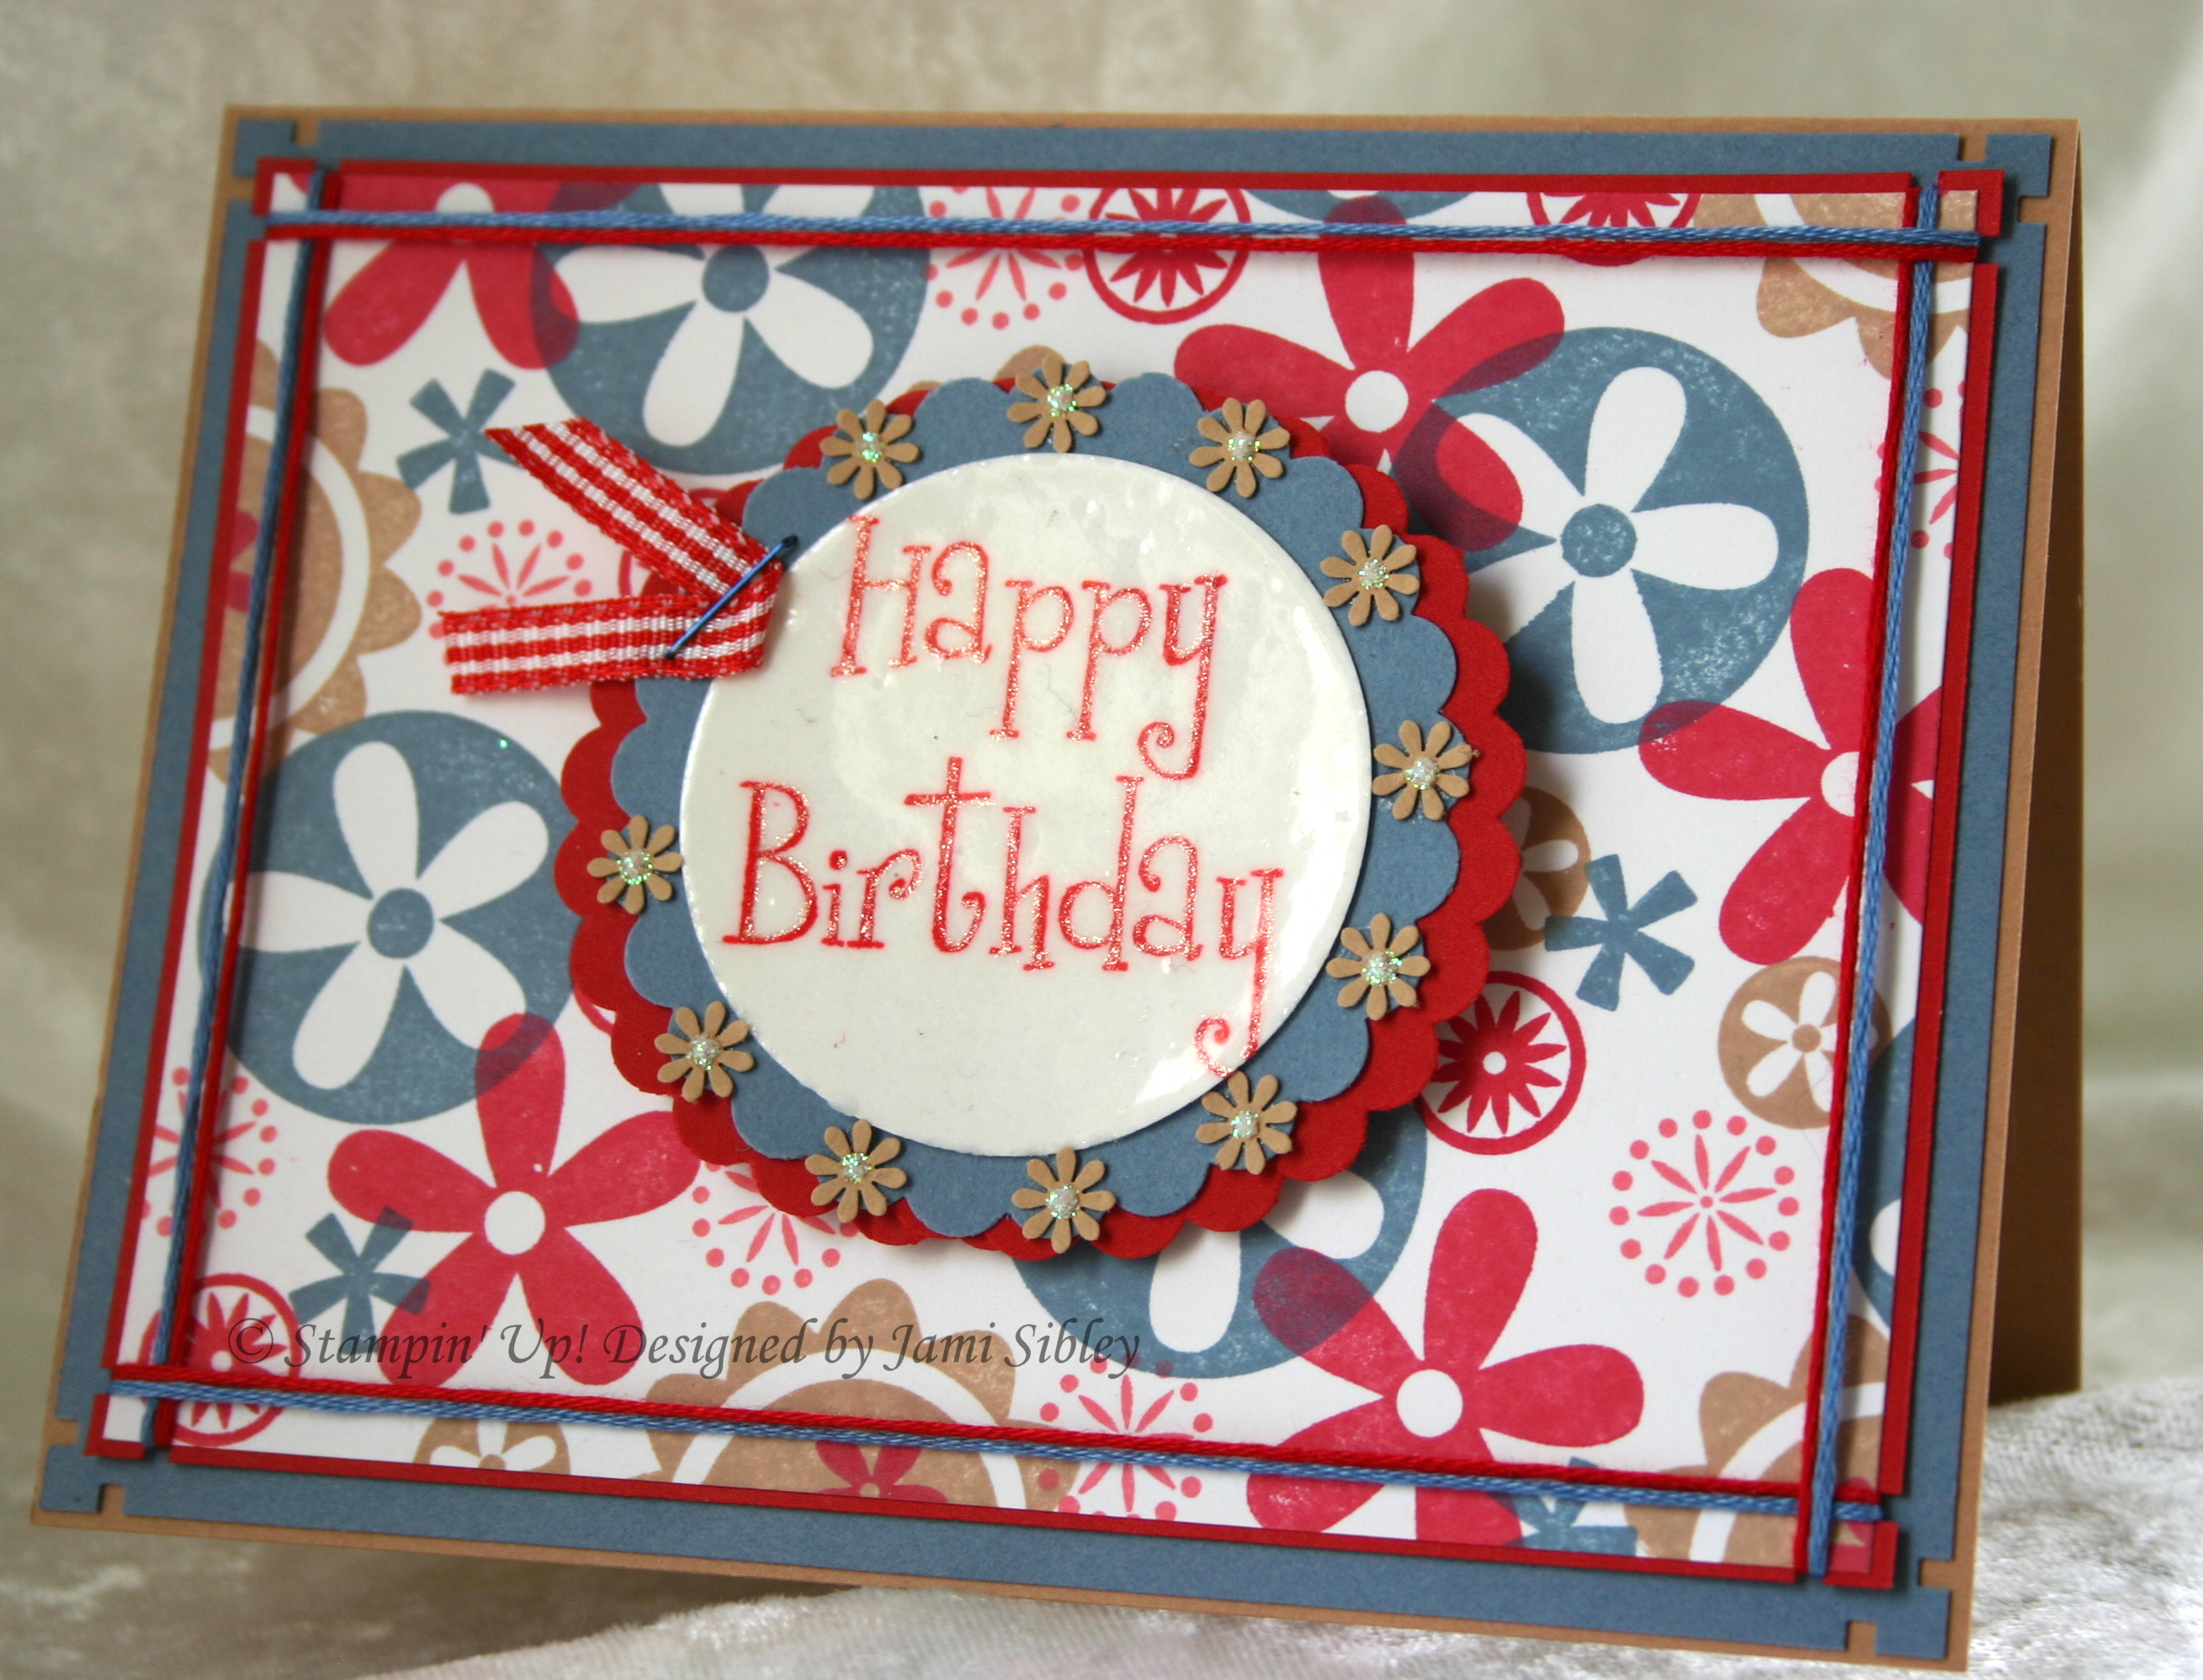
Another color combo I fell in love with while shopping: Real Red, Buckaroo Blue, Creamy Caramel and just a touch of Regal Rose. I spotted this on an adorable infant dress at Target while shopping for a baby gift. Unfortunately the gift was for baby boy so I couldn’t purchase the dress, but I came home and started playing with the colors right away. The pattern on the dress was a bold floral so I started looking at floral sets but then I saw my brand new Big Pieces set and knew it would be perfect! I made this card for my niece’s 20th b-day. She was the 4 year old adorable flower girl in my wedding…makes me feel kind of old. LOL! The focal image is simply the sentiment stamped in Real Red ink on Confetti White cs and then traced over with a Stardust Gelly Roll pen. The the whole thing is covered in Versamark and embossed with 3 layers of Clear Embossing Powder.