TECC40 Happy Halloween
October 31st, 2008
And here it is…my LAST Halloween card! WooHoo!!! Happy Halloween!

Have I mentioned that I really don’t care much for Halloween? You’d never know it from looking at my blog over the last few weeks. LOL! I have truly enjoyed playing with both Anna’s Whipper Snapper and Taylor’s Stamp a Sweet Impression Halloween images – fortunately they are all super cute – but I am officially Halloween’d out!
That being said, I have to admit that I had a blast creating the little scene above and I think it may be my fave of all the Halloween cards I’ve created. (Of course my most recent creation is often my fave – LOL) This week’s sketch ROCKS! It’s so versatile – I’m sure I’ll be using it again. I started by stamping and masking Vampy from Trick or Sweet and then adding all the other images from Frightful Night. I then colored everything with the Copic markers pictured below.
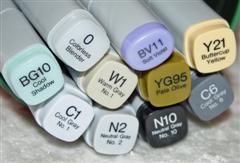
Vampy has a red pearl for his cherry and a little clear rhinestone for his cape clasp (both Kaiser Craft). The ghosts are outlined with Dazzling Diamonds glitter. I don’t have a black Copic, but N10 seems to work just fine for most things I would use black for. The card base is Kiwi Kiss and I stamped the tiny ghost along with the little stars (Frighful Night) in Kiwi ink for a tone on tone background. The dp is SU and I used a bit of black cardstock for matting. Some black diamond stickles on the sentiment and some pumpkin grosgrain ribbon knotted on the left side are the finishing touches.
So you want to play along, right? Check out Taylor’s blog for the sketch and all the deets to play! And now let’s see what the rest of the Cupcake Crew has cooked up:
And this week’s Featured Cupcake Stamper – Mary Fish at Stampin’ Pretty.
What are your Halloween plans for tonight? Oddly enough I’m hoping to work on Christmas cards. Can you believe it will be November tomorrow? November!!!! Yikes – this month has flown by! And don’t forget about the time change Saturday night…an extra hour to sleep Sunday morning – yea! Have a great weekend!

November Class Preview
October 30th, 2008
I’m getting really excited about my upcoming Christmas Gifts and Projects Class on November 7th since I spent some time working on samples yesterday. Last week I shared a Birthday Bookmark Card and I was so pleased with it that I adapted it into a class project.
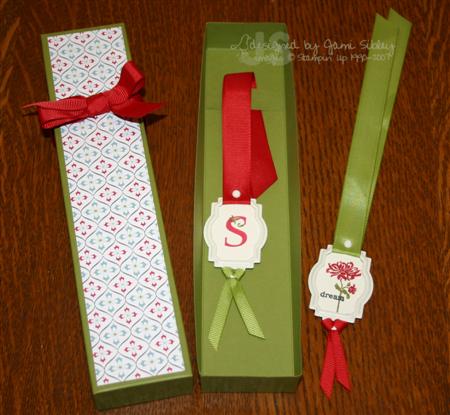
Instead of a card, we’ll be making a little gift box for the bookmark. There’s a strip adhered to the inside bottom of the box for the ribbon to slip through to hold the bookmark in place. The dp on the box top is from Ski Slope – I’m loving that pack of paper! Class participants will be able to choose between the Bella’s Bloom design or a monogram of their choice using Lovely Letters. This is really a simple project and I think the result is a really elegant gift.
This is one of four projects we’ll be making at class. If you’d like to attend you must pre-register by Wednesday the 5th at noon. Registration fee is $20 and I have limited space available. I’d love to see you here! 🙂
In the meantime I’ll see you back here tomorrow with my one LAST Halloween card and of course Taylor’s sketch – it’s an especially good one so be sure you set aside a few minutes to play! You’ll also want to check out the SASI Blog tomorrow for our very first Our Friday Friend feature! Thanks for stopping by!
Join me for Class!
October 29th, 2008
Just dropping by to say “HI!” and let you know that I have a post over on the SASI Blog today…please come check it out!
I’m working on samples today for my upcoming Stampin’ Up! Christmas Gifts and Projects Class. The class will be Friday November 7th at 7:00pm and the registration fee is $20. We’ll be completing 4 projects including chipboard ornaments/package ties, a tealight tin, a hardware bookmark with coordinating gift box and a fourth surprise project. I have some spots available so if you’d like to attend you’ll need to let me know right away and get your registration fee to me. Sorry, but I cannot hold your spot until I receive the fee. Registration fees are non-refundable. The cut-off for registration is Wednesday November 5th at noon or when I’m full whichever comes first.
What a fun way to start your Christmas shopping and decorating with a fun evening out with the girls. We’d love to have you join us!
Christmas Kisses
October 27th, 2008
Happy Monday! After weeks and weeks of being non-stop busy nothing could stop me from a three hour nap yesterday. It must have been just what I needed since today I’ve been better able to focus and get a bunch of little chores done around the house fairly quickly. I swear every horizontal surface in our house had something on it and I couldn’t take it anymore. Does that ever happen to you? Anyway after doing a quick clean sweep of the kitchen, bathroom, lving room and dining room I decided to take a time out to create a quick little project I had in my head.
I got the JustRite Baking Ensemble recently and the first project that came to mind was one using Hershey Kisses. When I was at Taylor’s over the weekend I picked up some clear acetate favor boxes. They are available at TE 10 for $7.50 – click here. My goodness they are just the cutest things! I’ve seen Taylor’s Snowman Poop with them in the past and the possibilities are almost endless for party favors, place settings and other little gifts.
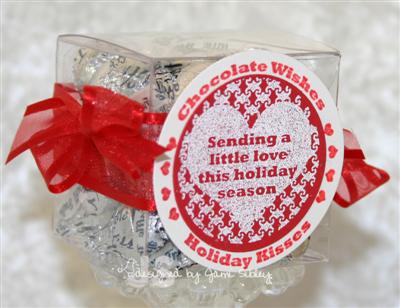
I simply wrapped it with some satin edged organdy red ribbon and tied bows on both sides. I stamped the JustRite elements separately – for the outer ring I inked the image with Versamark and then Classic Real red ink and stamped on Shimmer White cardstock and heat embossed with clear ep. For the center I inked the image with White Craft ink and and stamped on Real Red cardstock and then heat embossed with some ep I bought several years ago at a local LSS – it’s called Christmas Jewels and it’s a white powder with some silver and gold flecks mixed in – really pretty! Each element was then cut out with Nestabilities Classic Circles – Large. The two pieces were glued together and the badge was then adhered to the box with mini glue dots. Super duper simple.
Two things to be aware of if you do order these boxes – first: there is a protective coating on both sides of the acetate that needs to be peeled off and second: putting the box together does require one small piece of Sticky Strip. I kept thinking I was doing something wrong when the box wouldn’t stay together without any adhesive. LOL!
Thanks for stopping by. I need to get back to my endless to-do list!
TECC39 Isaiah 9:6
October 24th, 2008
My apologies to Taylor and the rest of the Cupcake Crew for being late this morning with my sample for TECC39. With all the SASI Release excitement last night I didn’t get my card made before birdie bedtime so I couldn’t work in my stamp room (for newer readers here who might not know – I share my stamp room with 2 huge sleeping cages for our 2 macaws). But here I am – better late than never.
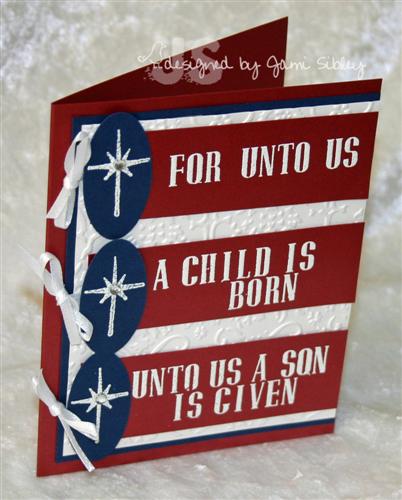
I recently got some new JustRite Stamper toys including the Brayton font and the rectangular blocks and I’ve been dying to play with them. The strips in this sketch seemed perfect for a Bible verse – I choose the first part of Isaiah 9:6 and paired it with the Christmas star from the new SASI set Home Sweet Home. The burgundy cardstock is a Stardream Metallic so it’s super shimmery IRL. I also used Shimmer White for the Cuttlebug embossed panel. The navy is SU. The stars were embossed with white ep and punched out with my SU small oval punch. A Kaiser Craft rhinestone was added to each star. The sentiment was also embossed with white craft ink and white ep.
One of the really cool things about these JR fonts is that you get 3 different sizes of letters so you have lots of options when building a sentiment.
I’m not really sure if I like this card – it’s much bolder than my usual style and now that it’s all finished I feel like it’s a little too *patriotic* looking which is not at all what I was going for. I guess I still like the concept, but I’d make different color choices if I were to do this again.
I hope you’ll play along with the TECC sketch this week – You could be chosen to be Taylor’s Featured Stamper next week if you do. See Taylor’s sample today and get all the details to play along by clicking here. This week’s Featured Stamper is Kathie Bailey at Just an Inkling.
Let’s check out what the rest of the Cupcake Crew has cooked up.
Thanks for stopping by. Hope you have a great weekend!
SASI Holiday Release
October 23rd, 2008
WooHoo! It’s party time at Taylored Expressions/Stamp a Sweet Impression! The Holiday release is ready for your shopping pleasure! Head on over to Taylored Expressions (the blog) to get all the yummy details! From there you can click over to go shopping in the TE store and you can blog hop to all the Bakers Dozen sweet samples!
Tonight we’re featuring the first SASI mini set – Tag Treats. This set is made up of must-have holiday sentiments in beautiful fonts. The possibilies are endless with this set! I have a project to share with you tonight that showcases the sentiment “Warmest Wishes for a Glowing Holiday”. I think this sentiment will be really versatile and the first two things that came to mind for me were the Christmas star and projects involving candles. Tonight I have a candle project to show you – a pretty little gift set.
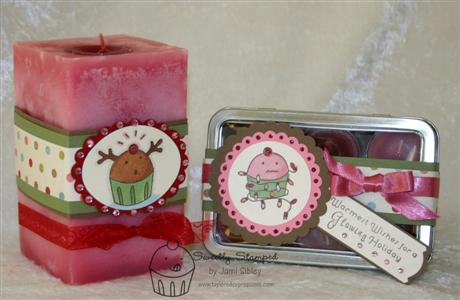
I started off with a nugget tin filled with 6 of my very favorite PartyLite tea lights (nothing better than PartyLite candles!!!!) and a Primrose square candle I picked up at Tuesday Morning because the color was just so perfect with the TE Christmas Key Ingredients. I couldn’t decide between Rudy and Tangles so I colored one of each with my Copics for this set. All the cardstock and dp and embellishments are from the KI kit…I am just loving the pink/red/green aspects especially (there’s also blue and brown in the kit for those of you more drawn to those colors).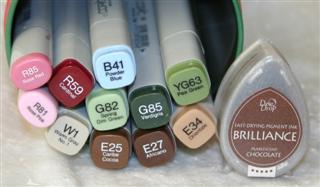 I used my circle and oval Marvy punches to punch and layer the images. Rudy is surrounded by Kaiser Craft pink rhinestones and Tangles is surrounded by pink stickles (the only thing not from the KI kit). Here’s a photo of the Copics I used along with the ink – Brilliance Pearlescent Chocolate. I love the pearly finish, but be sure to allow enough dry time – or heat set it. Don’t ask me how I know this! *eye roll* The shaped end of the tag was cut with an old-school pair of Fiskar corner scissors. Can’t remember the last time I pulled those out!
Belly bands were wrapped around the candle and the tin. The one on the tin easily slides on and off. The one on the candle would slide off also, but it doesn’t have to. If you look closely, you will see that there is a tea light in the top of the square candle. I like to do this when I am giving any type of decorated candle as a gift. It takes a little bit of time, but it’s easy to do and makes the candle last longer, plus it’s safer. To make the hole for the tealight begin by taking a metal tealight cup with the candle part removed. Turn it upside down and twist it in the middle of the large candle. This gives you a template for where you want to remove the wax. Then burn the candle for awhile – checking it frequently. Once a nice pool of melted wax has formed I take a small metal measuring spoon and scoop out the melted wax as well as much softened wax as I can being careful not to damage the top of the candle. You may need to light the candle a few times to get the proper sized hole needed. Once the hole is formed just cut out the wick and drop in a tealight. With my gift set the recipient will be able to burn the tealight already in the candle and have 6 more to replace it with so it can be enjoyed throughout the Christmas season.
While your blog hopping please be sure to check out the SASI blog where we’ve posted yet another opportunity for you to win a prize if you’d like to help TE/SASI Spread the Sweetness! Wow! This almost too much excitement for one night! I can hardly wait to hear what you think of the 3 new sets and the Christmas Key Ingredients. Don’t forget – the stamp sets are unmounted deeply etched PINK rubber that stamp like a dream and come on a full color index storage panel! And hey – Taylor has added quite a few new things to the store recently so be sure to browse around so you don’t miss anything!
Thanks for stopping by – I’ll be back tomorrow with the Friday TECC.
Bookmark Birthday Card
October 23rd, 2008
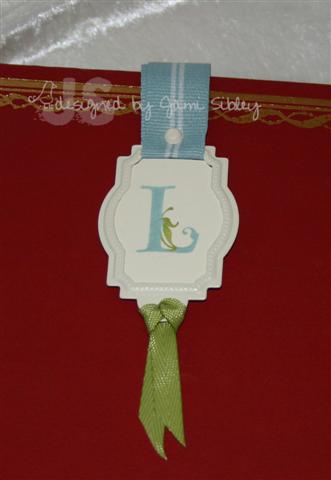
Ever since the SU Convention in the Summer I’ve been seeing photos here and there of bookmarks made with Hodgepodge Hardware. I thought they were really cool and decided they would be a great project for my November Christmas projects class. I was excited that SU has offered a bulk buy to Demonstrators of one of the hardware pieces I would need to do the bookmarks – and it’s in the Vanilla finish which I just love. After asking some questions of people who were at Convention I got a better idea of how the bookmarks are made and I set to work creating one myself using the info I had gleaned. The first sample I made was *ok*, but when I actually put it in a book the image was upside down. But I knew pretty much how I wanted to make my next one.
My friend Lisa has a birthday coming up on Saturday and since she’s an avid reader the bookmark seemed like the perfect little gift. Here’s what I came up with
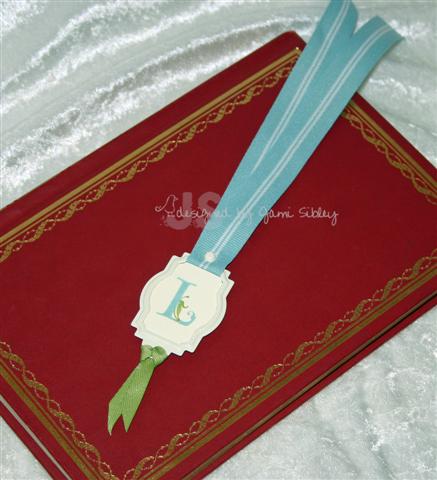
And here’s what it looks like in a book.
So I was meeting Lisa at a Bible Study yesterday afternoon and planned to take the bookmark and a birthday card…but I was trying to think of a quick and pretty way to package the bookmark. I decided to combine the card and bookmark into one and I think it turned out really pretty!
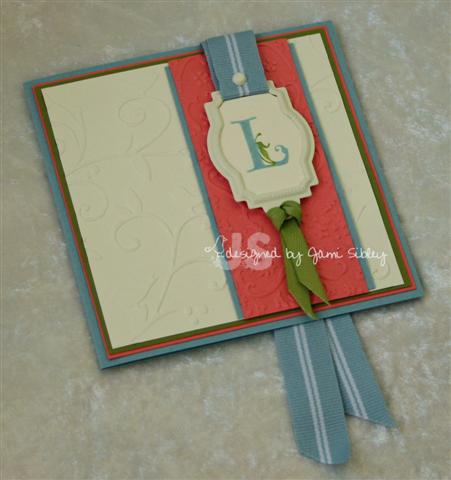
I had to snap these pictures really quickly as I was on my way out the door so the color is not the best. I used Baja Blue, Old Olive, Cameo Coral and Very Vanilla. The vanilla and coral panels were embossed with my cuttlebug. Card is 4.25″ square so when I put it in a standard envelope there was room for the ribbon hanging down. I cut 2 slits on the inside of the card for the ribbon to slip through and hold the bookmark in place. Here’s a photo of the inside of the card.
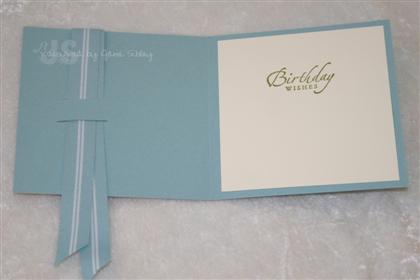
I whipped up the card super quick in the morning morning (maybe about 20 minutes or less) and now that I have the bookmark figured out they will be very quick and easy to make.
I’ll be back tonight with my project for the SASI release at 9pm PST (midnight EST). In the meantime, the Bakers Dozen Rotating Team members – along with Taylor – have more sneak peeks for us all to enjoy.
And don’t forget – you have until 6pm PST this evening to enter the drawing on the SASI blog for our SASI Sweet Treats give-away! Don’t be shy – we want everyone to enter! Thanks for stopping by – see you tonight I hope!


