August Class Favor Box
August 24th, 2011
Happy Hump Day! Just a quick post to share one of the projects we made in my class last week. Even though I am no longer a Stampin’ Up! demonstrator, I still like to hold a New Catty Class once a year and take an order as the hostess. So here’s an SUO project featuring the Box #2 Die and the Four Frames stamp set.
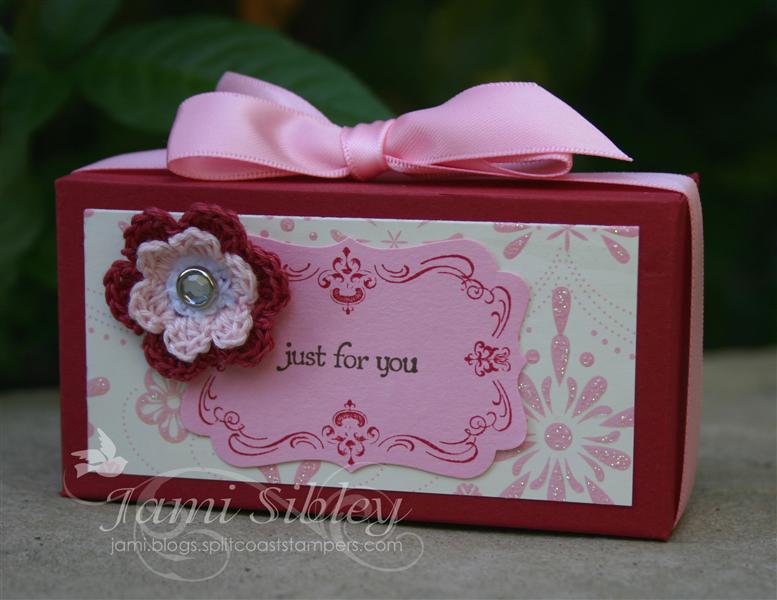
I purchased the box die quite some time ago and I hate to say that I had never used it. It’s an adorable little favor or gift box and these went together in a snap. I checked and Ghiradelli squares will fit inside, among other things. 😉 I picked up several packages of the crocheted flowers from the SU clearance rack awhile back, so I pulled the color scheme from there. Sweet and simple!
I hope you’re having a great week! Thanks for stopping by.
![]()
CHA Specials for All in the TE Store!
July 21st, 2011
Are you feeling left out because you can’t make it to the CHA Craft Supershow this week? Well some of the Baker’s Dozen and I were feeling the same way, so we got together to create some fun Taylored Expressions shopping specials of our own. Because you know…

We’re throwing our own little party and you’re invited!
Each of us perused the TE Store and
chose a favorite product to bring to you
at 20% off!!
My Pick: Picket Fence Border Die
Wanda’s Pick: Crafty Cuppie
Jodi’s Pick: Sweet Celebration
Karen M.’s Pick: Wings of Joy
Tori’s Pick: Sprinkled with Love
Regina’s Pick: 1/16″ foam tape & 1/8″ foam tape
Charmaine’s Pick: Take Note Die 3
Melissa’s Pick: Kitschy Kitchen Cardstock Stickers Homemade and Retro & Tag Collection
PLUS We’re bringing you the actual Show Specials to you so you can feel like you are there!
- Purchase any 4 full-size stamp sets (including those on sale listed above) and receive a FREE Mini Binder Box! (Do not add the Binder Box to your cart, it will automatically be included in your package upon shipment.)
- The first 10 orders each day (Thursday – Sunday) beginning at 8am PST will receive a free A la Carte stamp of our choice.
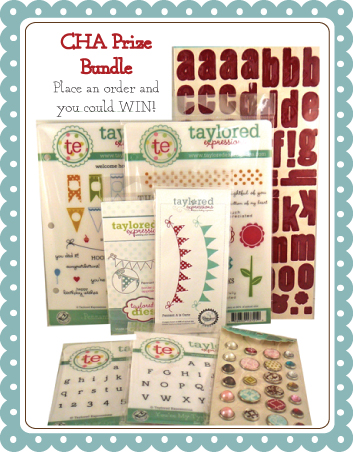
- All orders placed Thursday through Sunday will be entered into a random drawing to win our CHA Prize Package (pictured below) which includes two exclusive stamp sets never available for sale. This prize package is valued at over $100! The winner will be announced on Taylor’s blog on Tuesday.
ALL OF THE ABOVE OFFERS ARE VALID THURSDAY JULY 21ST AT 8 AM PST THROUGH SUNDAY JULY 24 AT 10 PM PST while supplies last.
Shipping Notes
- Shipping is suspended from Monday July 18th through Monday July 25th while the TE Crew is away at CHA. Shipping will resume on Tuesday July 26th.
- Remember that shipping is FREE on all orders over $75 within the United States every day!
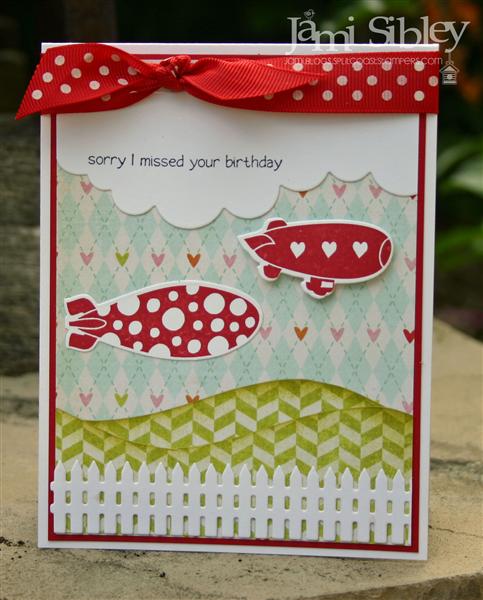
My choice was the picket fence die because it’s so versatile. I’m continually amazed at the cards created by the Baker’s Dozen using this die. My sample above was the 3rd card we made in my class last week. Seriously, if you don’t have this die YOU NEED IT! And 20% off is a great deal! Think of it with outdoor sets like In the Park, A Day in Paradise, Garden Party Critters, etc…with florals…with blimps…with hot air balloons…and on and on!
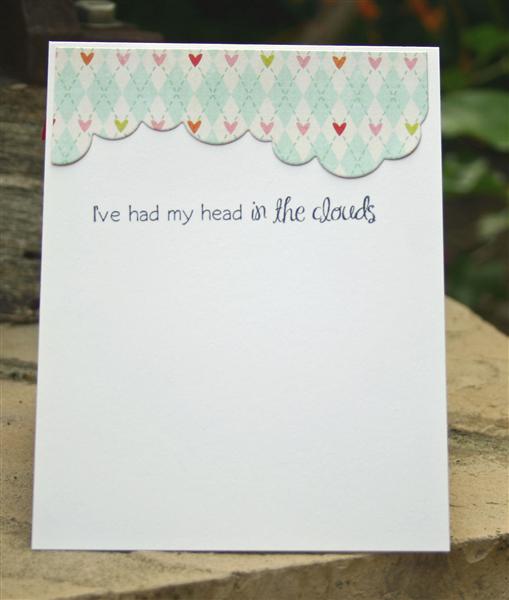
My card features the new stamp set In the Clouds (withthe coordinating die set) and Alphabet Soup – Girl papers from My Mind’s Eye. We hand cut the rolling hills and used the cloud border die both on the front of the card as well as the inside. Notice that’s the same cloud die, but since it’s 6″ long, we just used different ends of the die for a different look on the inside. Cute, huh? I love that fresh fun color scheme with the pops of red!
I believe several of the mice girls are planning to post new samples featuring their sale picks, so you might want to hop around to check them out.
Glad you could join us! Hopefully our little party wil help ease the pain of not being at the SuperShow in Chicago for all of us! I’ll be back tomorrow with a new Taylored Expressions Sketch Challenge. Thanks for stopping by.
![]()
Birthday Bag
July 19th, 2011
Happy Tuesday! It seems so weird to be getting ready to go to work while seeing all the photos from CHA on my Facebook feed. But, alas, I can’t just sit and daydream all day. LOL! Before I head out to the office I wanted to share another prjoject we made in my class last week. This might be my favorite.
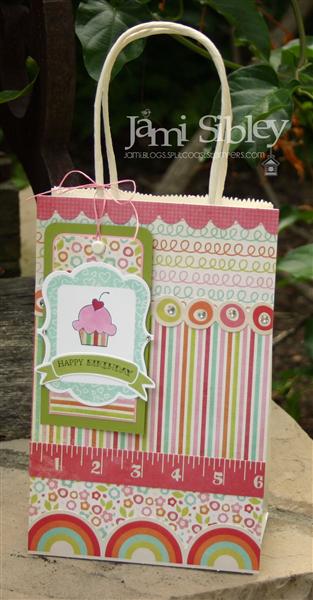
It’s a birthday gift bag and matching tag. I had almost forgotten how easy and fun it is to decorate custom gift bags. I always keep a stash of white and kraft bags on hand, but am often in too much of a hurry when it comes time to wrap a gift to actually decorate them. This bag is approximately 5.25″ x 8.5″ – perfect to be covered with a half sheet of cardstock and some fun patterned papers. I think I might do up a few of these to have on hand. 🙂

Here’s a close up of the tag made with TE stamp sets Kid at Heart and It’s a Banner Day 1 along with the coordinating TE dies for both sets. Inks are the new SU Pool Party and Lucky Limeade. I think that would also make a really cute focal point on a card!
Thanks for stopping by. I gotta run. Have a great day!
![]()
July Class Pair
July 18th, 2011
Happy Monday! I hope you had a great weekend. It was a busy one here. Summer Sunday Suppers started at our church last night and I coordinate/oversee the program for 8 weeks. We had sloppy joes last night and the team did a wonderful job! So many of my papercrafting friends are in, or on their way to, Chicago today for CHA. Although it really was the best choice for me not to go, it’s still likely that I’ll be incresaingly pouty as the week progresses. Happens every Summer. But I’ve got a little mischief up my sleeve, so be sure to check back later in the week.
Last Thursday evening I held my July Stamp Class. We created birthday projects featuring Taylored Expressions stamps and the My Mind’s Eye Alphabet Soup Girl 12×12 kit. For the first project everyone had a choice to make either of these cards:
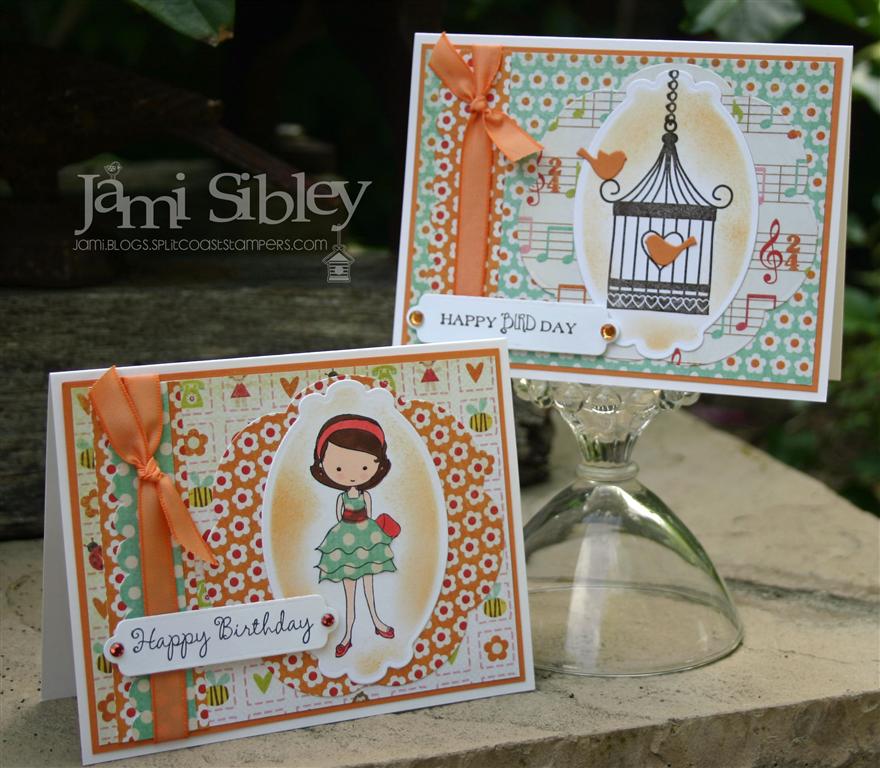 The two cards use the same paper elements – just opposite sides of the two-sided patterned papers. One pattern was die cut with a Spellbinders Blossom die. Then they had the choice to use Moka Taylor Petite Stamp Set of Birds of a Feather Full Size Stamp Set (along with the birdies from the coordinating die.)
Here are close-ups of the two cards.

We paper-pieced the dress and colored the rest of her with Copics. The Spellbinders tag is popped up on foam tape and KaiserCraft rhinestones cover up the holes meant for brads.

Ink used for the bird cage is Early Espresso. Ribbon on both cards is SU Pumpkin Pie Taffeta and the cardstock is Peach Parfait. Images were die cut with Spellbinders Labels 10 and sponged with Peach Parfait ink with the die still in place. Card layout was losely based on the Sweet Sunday Sketch Challenge 125.
Thanks for stopping by. I have more class projects to share this week so stay tuned. Have a great day!
![]()
Nestie Frame Two Ways
May 26th, 2011
Oh. My. Word. What a week! The Rocket Scientist and I were scheduled to go on a fun RV weekend down to San Diego last week. We had a spot reserved right on the bay. We were excited. Tessa was excited. On Wednesday I shopped for groceries and got the trailer mostly packed so we could finish up and leave Thursday sometime before noon. When TRS arrived home from work Wednesday night, he was feeling a little “off” and we both thought the trip would do him good. But then…Wednesday night/Thursday morning he was struck by a NASTY stomach virus. The worst of it lasted 2 full days and our trip was obviously OFF.
I did quite a bit of stamping, as I considered it still “vacation” of sorts and completely put aside my regular to-do list. By Sunday morning, TRS was feeling up to going to church and I was feeling relieved that I had not succumb to the ugly illness. Uh…yeah…then Sunday afternoon I started feeling nauseous as I struggled to put the finishing touches on a card. YEP…by Sunday evening it was clear that it was my turn. UGH! It’s Thursday and while I am over all the bad stuff, I still just don’t feel 100%.
WHAT. A. WEEK.
I do have 2 cards to share with you today. These are the last 2 cards we created in my class a couple of weeks ago. The first card was used to teach how to make a nested frame with Spellbinders dies and it was the jumping off point for the much fancier version I made for Lori’s birthday. Everyone had a choice of 2 different sentiment combos all from TE stamp sets. We also used the TE butterfly die. Paper is MME Mary Mary. I love how the one sheet has a scalloped edge!
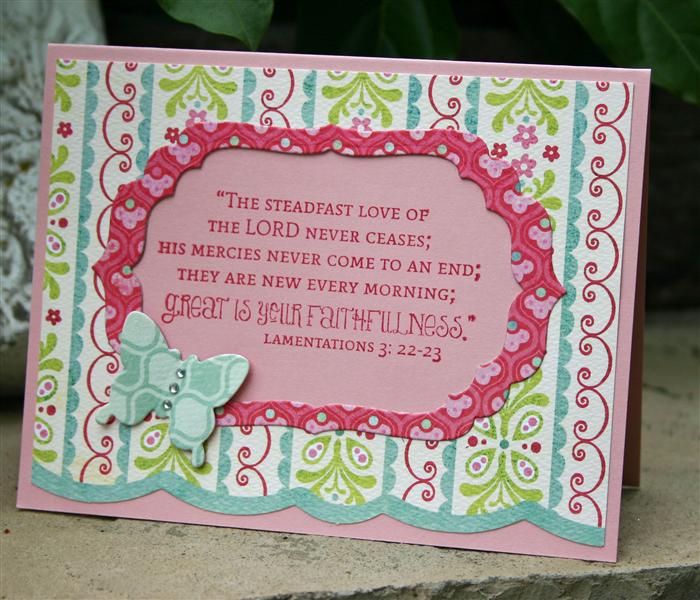
We used 2 sizes of the same Nestie set. First the larger size was centered into the striped dp panel and secured with temporary tape and die cut. This leaves you with the large frame pice you see here and the smaller shaped pice which we used inside the card. Then BOTH dies were centered into the other patterned piece (bright pink) and secured with temporary tape and die cut. That second die cut leaves you with 3 peices – 1. the bright pink frame you see here, 2. the center which we used to die cut the butterfly (you see the opposite side of the paper here), and 3. the large frame piece you will see in the next card. This is an easy way to make a WOW card that is still flat for mailing. And of course you can frame and feature a sentiment or an image.
I had only planned to do 3 cards in class, but when I got done with this card I had this beatiful piece of designer paper left over already cut into a frame. The sage colored side would be wonderful for a masculine card so I decided to see what I could come up with.

I adhered the frame panel to an Early Espresso cardbase. Then I stamped this retired SU lighthouse image with Sage Shadow ink on vanilla cardstock and die cut it with the smaller nestie. I sponged Espresso ink aorund the edges to fill in where the image did’t quite fill the shape. That was adhered to the card and I added some twine and called it done. I think this will make a great Father’s Day card! Isn’t it amazing how two such different cards could come from the same piece of designer paper?
Yesterday all I managed to accomplish was a few loads of laundry. Today I absolutely must get groceries and hope to cross a few more things off my almost-forgotten to-do list. Tomorrow I’ll be back with a fun sample (already done – YEA!) for the new Taylored Expressions Sketch Challenge. I hope you’ll come check it out.
Thanks for stopping by. Have a great day!
![]()
Inspired by JulieHRR
May 16th, 2011
Happy Monday! I hope you had a great weekend. Mine started out with my stamp class on Friday evening and ended with a fun tradition at our church of celebrating Jesus’ resurrection with a fish taco supper last night. YUM! I’m here today to share one of the cards we created in my class Friday night. The theme of class was It’s a Frame Up! We explored different ways to frame images and sentiments on our cards such as Faux Framing (you can see that card in this post), Nestie Frames (to be shared later this week), and Recessed Windows.
It was serendipity when my friend JulieHRR posted this adorable Recessed Window on her blog last week. Initially I planned to just take loose inspiration from it, but as I sat down to work I found myself CASEing it fairly closely. I mean, really…who am I to mess with the perfection that is Her Royal Rubberness?!? Well, ok, I did add a celery base and that large flower embellishment…’cause you know me…can’t leave well-enough alone. *snort*
So here’s my version:
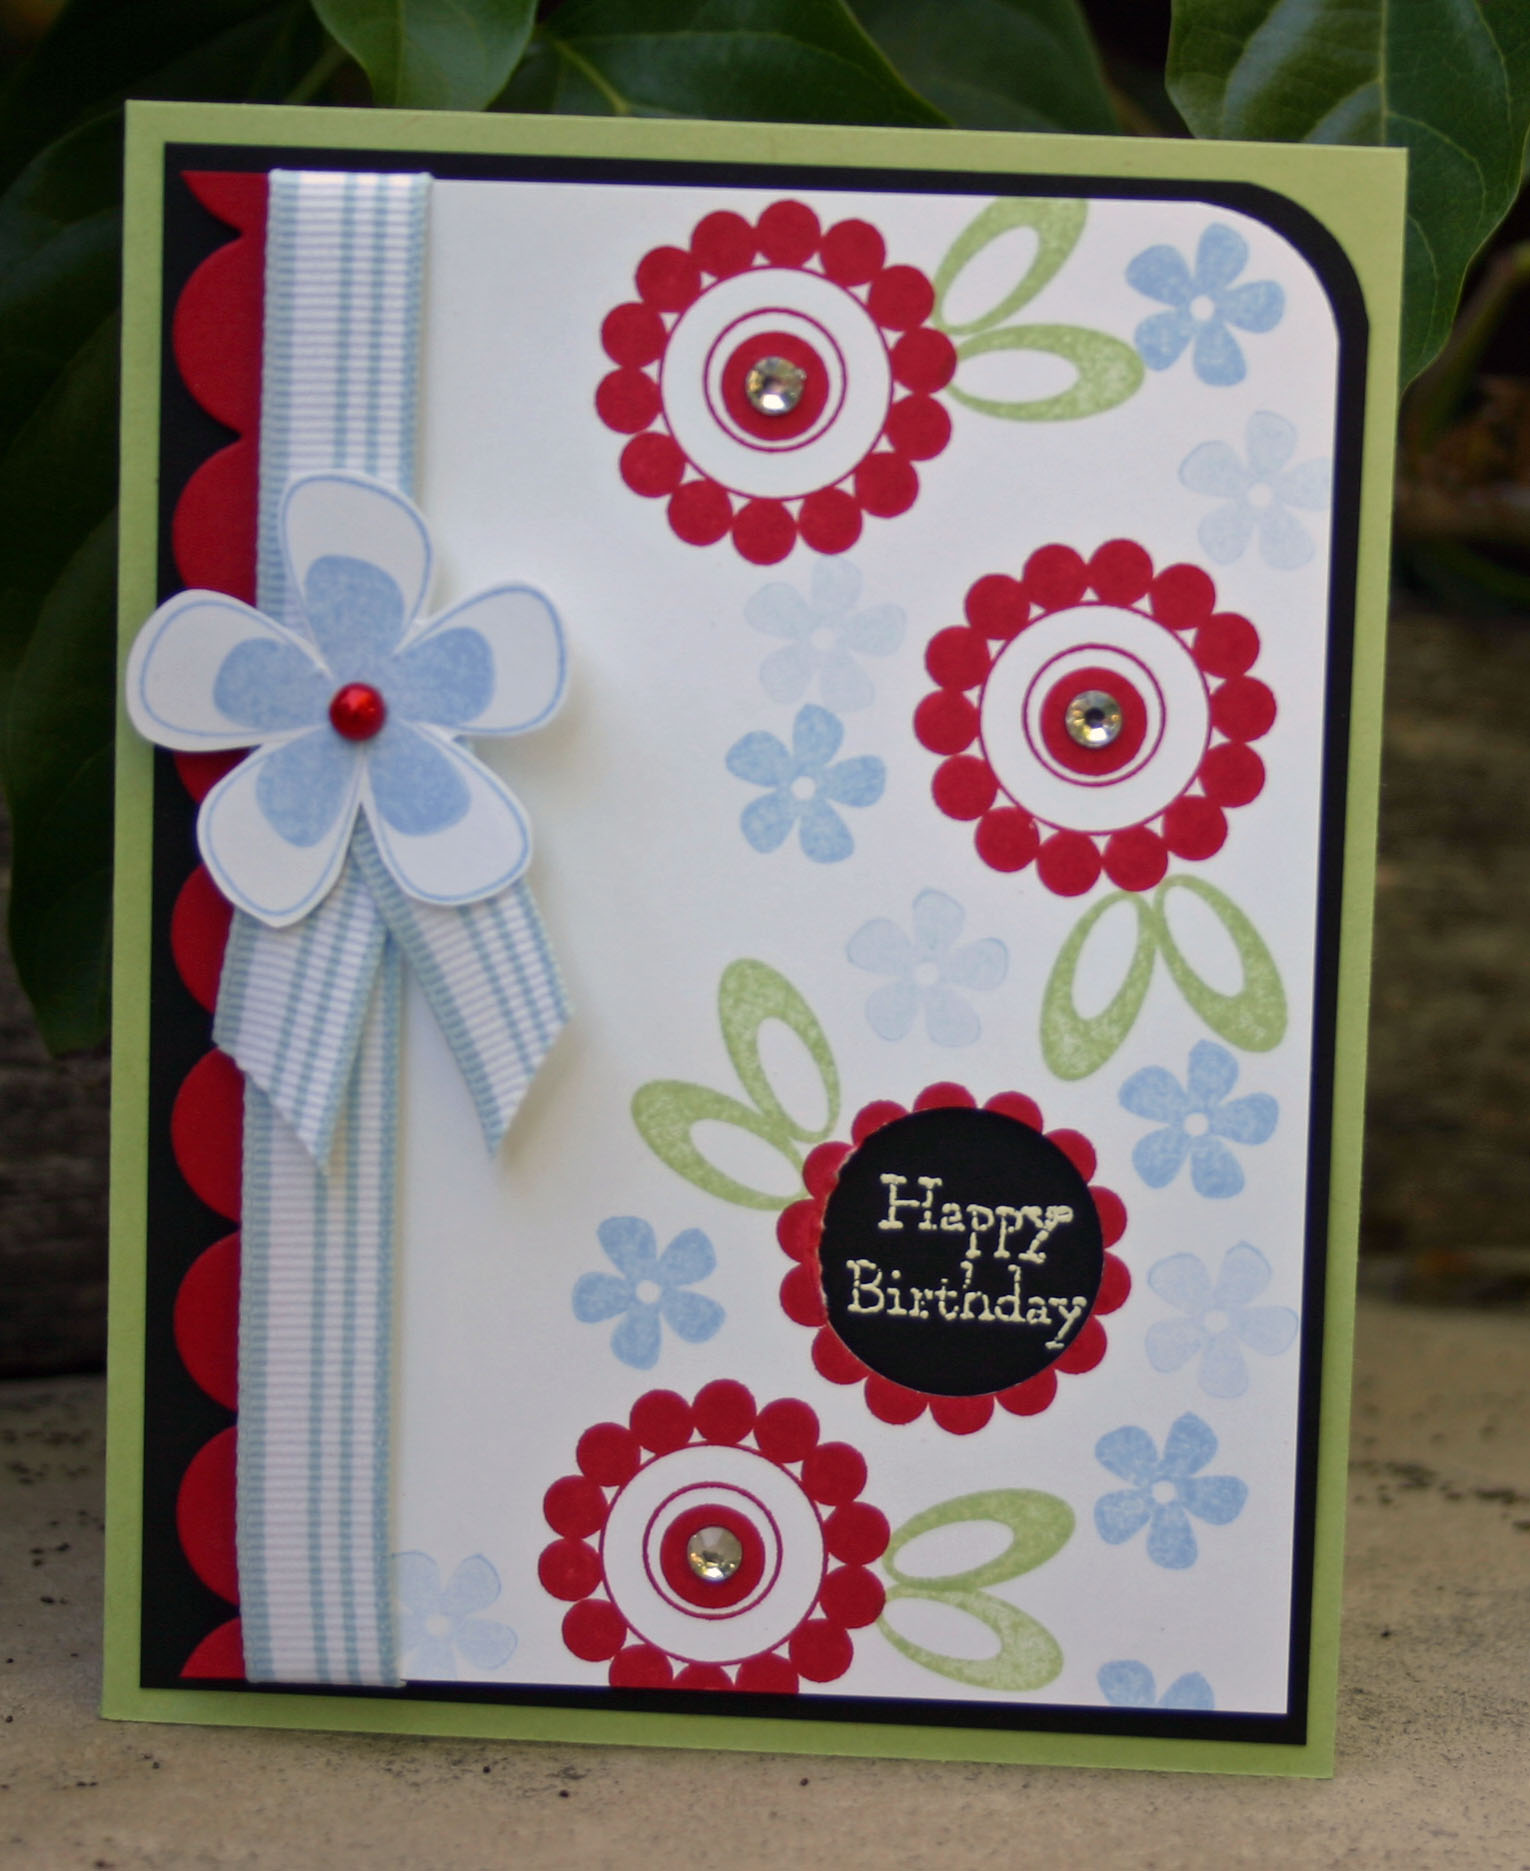
My card features the Taylored Expressions Stamp Set Garden Party Blooms (Plus Garden Party Critters for the sentiment.) The large blue flower was die cut with the coordinating Taylored Die set. The scallop border is the TE Medium Scallop Border die. Colors used are Real Red, Bashful Blue, Certainly Celery, Basic Black, Whisper White. It’s hard to tell in the photo, but the white panel is up on foam tape, so the sentiment is recessed in the punched window. For a how-to, I refer you to Julie’s awesome quick video. It’s really an easy technique that packs a punch!
Thanks for stopping by!
![]()
May Stamp Class is Coming!
April 30th, 2011
Happy Saturday! I hope you are having a great weekend! Next week promises to be very busy with the Taylored Expressions Sneak Peeks, Newsletter and Release among other things, so this morning I took a little time to play in my stamp room. I created one of the cards we’ll be making in my May Stamp Class – It’s a Frame Up! The class will focus on three different simple framing techniques that you’ll want to use over and over again! For this card I used the Faux Framing Technique – so simple, yet so PRETTY!
It’s a Frame Up!
Stamp Class
Friday May 13th
7:00 pm
Registration $15
We’ll create 3 cards, chat, and of course eat some yummy dessert. If you’d like info on how to register, just send me an e-mail (button in my sidebar.) At the moment I have 6 spots open, so don’t wait! I’d love to have you!
![]()


