October Technique Class
October 5th, 2007
My class tonight was a ton of fun! A couple of the cards took a little longer than I expected, but it’s always so hard for me to estimate how long it will take other people to re-create a card. I was super happy with all three designs for tonight.
The first is a CASE of a card I saved to my Favorites gallery at SCS awhile back using the Faux Tearing technique. It’s such a simple technique with such a wonderful result. I was so happy to see that after I had initially saved it MicheleTx edited her upload to include a link to her blog tutorial. Since it’s such a great tutorial I won’t even try to explain this technique – just click that link to see how it’s done.
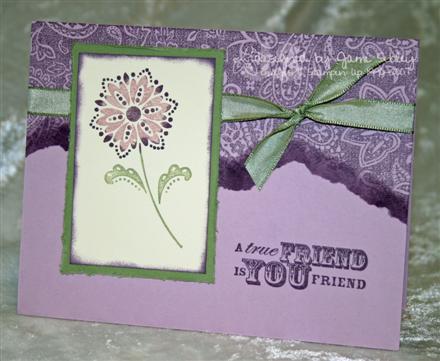
For my card I changed the colors to Pale Plum, Perfect Plum, Mellow Moss and Vanilla and I changed the stamp set to True Friend. We sponged Perfect Plum around the edge of the vanilla panel and we distressed the moss panel with the SU Cutter Kit distresser. The flower was colored with markers and given a good strong huff!
This next card teaches the Hot Card technique. I originally learned this technique from the Monday challenge on SCS – the Technique Lover’s Challenge hosted by my friend Beth (showmestamper). I’ve been wanting to work it into my class for awhile and the Snow Burst set seemed perfect for it!
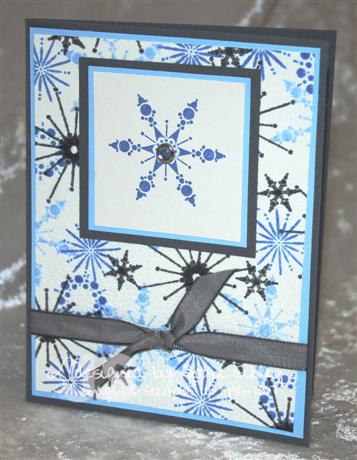
It’s hard to get a good photo of the texture on the background of this card, but it is super cool in real life! To achieve this, stamp your desired background on a piece of white tissue paper. Crumple up the tissue into a ball and then gently uncrumple. Place the tissue over a piece of clear plastic wrap (such as Saran Wrap) and then over a piece of white cardstock (the plastic wrap will be in the middle). Place the *sandwich* between two pieces of parchment paper (found in the baking section of the store) -so as not to ruin your surface – and iron with a hot iron until the plastic melts. Allow to cool and trim the edges and you have a beautiful background for a card! In class tonight we did quarter sheets, but you can do full sheets and simply cut them to make several cards.
Colors used for this card are Basic Gray, Bashful Blue (cs and ink) along with Brocade Blue (ink) and shimmer white (cs) for the focal image. A blue rhinestone brad and gray tafetta ribbon are the finishing touches.
Wow I’m extraordinarily tired! Thanks for stopping by. I have one more class card – I’ll try to get it posted tomorrow. Good night.


October 6th, 2007 at 4:06 am
Jami! Those are beautiful! Both sets are on my next order I am completely convienced now!!
October 6th, 2007 at 2:49 pm
HA!!! I thought it was REAL tearing — fabulous job — love the green and purple together!!! Great card!!! Love the snowflake card as well!!! I’m sure you had some happy ladies!!!
October 9th, 2007 at 6:50 pm
Wow! That first card looks genuinely torn! I love the Paisley in Plum. I’ve forgotten all about the hot card technique. I always loved the look of that but I’ve never done it. I don’t do techniques very often. So cool, though, and they’re always fun. I just don’t usually have time, darn it. Your background with the snowflakes is just awesome!