SASI New Year – Sneak Peek Time!!!
December 31st, 2008
WooHoo! The time has finally come when we can share sneak peeks of the upcoming Stamp a Sweet Impression release. Friday January 2nd will mark the most extensive release in SASI history so strap on your seatbelts! My sneek peek project for today is from A Year of Sweets 2 (yes that means there’s more than 1 of these sets!) and it’s a page from the brand new perpetual calendar that will also be available at Taylored Expressions. I’m especially excited about the perpetual calendar because I helped to design it. *bouncin’ in my chair*
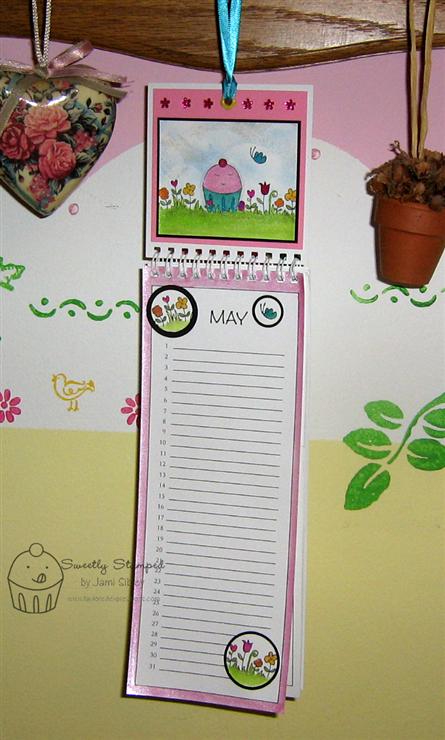
There is a blank panel that can be decorated for each individual month on the calendar and that panel folds down to reveal a new one as the month changes. The thing that had always bothered me about other blank perpetual calendars I have seen was that it tends to be difficult to design for a long skinny panel. I wondered for a long time why someone didn’t make one with a smaller, easier to decorate panel on top…and now here it is!! Can I get a *WOO HOO*?
The scenes in the A Year of Sweets series are designed to fit nicely on this calendar as well being the perfect size for cardmaking. You could easily stamp the scene image directly onto the calendar panel, but I chose to do just a little bit of layering this time. There is a hole already punched in the top of each panel and you could simply hang the calendar on a nail through that hole, but I added a flower eyelet (retired SU) as well as some ribbon so the calendar could hang from a knob. That’s my stamp room wall in the backround. I apologize for the picture quality as our Canon Rebel is on the fritz and I’m using our point and shoot which I’m not as familiar with.
Perpetual calendars make great gifts any time of year since everyone has birthdays, anniversaries and other important family rememberances to keep track of. You’re going to want to pick up several of these when they become available on Friday.
When I started this project I thought about what I could do that might be fun and different. I’ve been using Copics so much lately, that I thought maybe I should try watercolor instead…and then it hit me…why not drag out my Twinkling H2O’s that I haven’t used in ages? 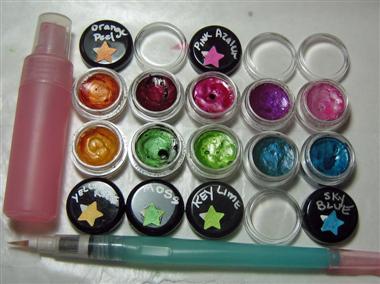 I love Twinkling H2O’s and I just wish you could really see the shimmer – there’s just no way to capture it in a photo. If you’ve never used them, they are little cakes of super shimmery/twinkly watercolors. You simply take off the lids and place the little pots onto a tray or sheet of wax paper and mist them with water. Wait a couple of minutes to let them soften up and then paint with them using a watercolor brush. You can also mix colors on a palette or a CD.
I stamped the image on Taylor’s brand new awesome Choice cardstock with Memento Tuxedo Black ink and colored with the Twinking H2O’s. I stamped the image a 2nd time and colored just the flowers and butterfly and punched them out with circle punches to be added to the bottom portion of the calendar. I also painted with Twinkling H2O Cherry Sorbet around the entire outside edge of the bottom portion of the calendar using Eclipse masking tape for a clean line. The cuppie was also masked with Eclipse so I could sponge the sky with my SU cloud template and Bashful Blue ink. Then I also sponged on a bit of TH2O’s.
Here’s a close up of the scene.

Here are the layering measurments for your reference in case you want to decorate one of these calendars in a simlar fashion –
Image layer – 3-1/4 x 2-5/8
Black layer – 3-3/8 x 2-3/4
Pink Layer – 3-5/8 x 3-1/2
Project Recipe:
Stamps – A Year of Sweets 2 (just one stamp is used here)
Cardstock – TE Choice White, Basic Black, Pink Prism from Christmas Key Ingredients
Ink – Memento Tuxedo Black and SU Bashful Blue
Other – yellow flower eyelet (SU retired), dark pink Kaiser Craft rhinestone flowers, SU cloud template (retired), circle punches, teal ribbon.
Twinking H2O colors – mystic blue, sky blue, key lime, moss, yellow rose, orange peel, ruby red, pink azalea, jasmine, cherry sorbet.
I can hardly wait to see the Sneak Peeks from the rest of the Bakers Dozen! Let’s hop over to Taylor’s blog to see what she has today and from there we can visit the rest of the BD team as well! I’ll be back tomorrow morning with another sneak peek so be sure to come back! And then the big release is January 2nd at midnight (which is Thursday at 9:00pm for those of us on the West Coast). So put us in your schedule now so you don’t miss a thing!

Felt Clip Favors
December 22nd, 2008
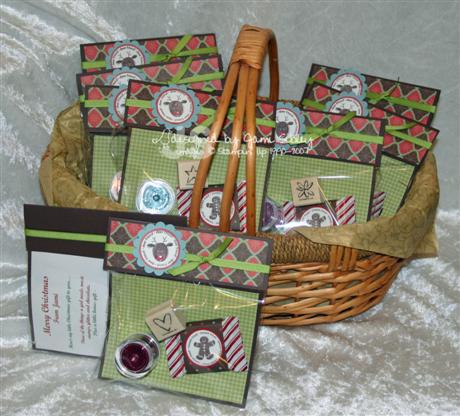
Today I had lunch with six girlfriends from church. I took Lori’s advice from this post after deciding there was no way I was going to be able to host the Cookie Exchange Party of my dreams. Instead I printed up the reading from Lori’s post along with a little note inviting some friends to join me at a favorite sandwich shop for lunch. Despite the busy time of year, they all accepted the invite so I was excited! I decided it would be fun to have a little party favor for each lady, but it would have to be something quick and easy since it’s Christmas crunch time. Here’s what I came up with.
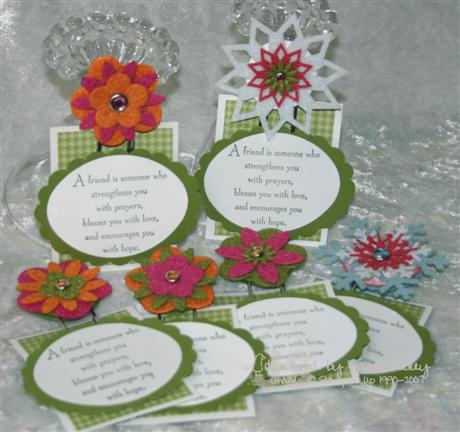
These are just the jumbo paper clips from Walmart with SU Felt Fusion flowers and Felt Flurries snowflakes attached to punched out cardstock circles with rhinestones brads. There’s another punched circle on the back and the paper clip is sandwiched between the circles with E-6000 adhesive.
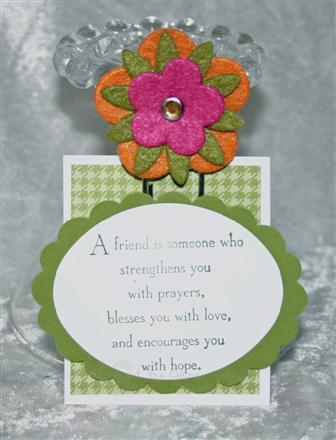 I put the 6 clips together last night in a very short amount of time, but of course this morning I decided they needed to be attached to *something*. In my frenzied haste I went through about three different ideas for stand up place cards that just didn’t work. I ended up with this little card – the clip slides through a hole punched with the slot punch and the oval is attched with foam tape to the front. The sentiment is from a retired SU set.
I arrived at the sandwich place a few minutes early and put some tables together and set out decorative napkins from my stash in the pantry along with these little clips. So even though we went out I got to play *hostess* just a bit. I do love playing hostess! So even if you don’t have the time or energy to cook a meal or clean your house or decorate for a party, you can still have time with friends. Just pick a time and a place and type up a heartfelt note to invite them!
Lunch was a great break from the last minute Christmas frenzy (which at the moment feels like it’s going to kill me). I still have just a few more gifts to shop for tomorrow as well as planning Christmas Eve dinner and going to the grocery store….aahhh and the wrapping, wrapping, wrapping. I’m off to bed with plans to get at it all first thing in the morning. Thanks for stopping by.
TECC47 Snowflake Wreath
December 19th, 2008
I’ve been itching to make something with some kraft cardstock and Taylor’s Friday sketch 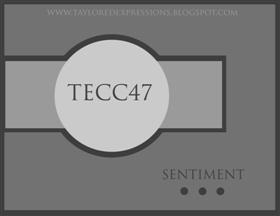 (TECC47 Taylored Expressions Cupcake Challenge – cupcakes not required) was just the stamping *excuse* I needed to play! You are welecome to play along as well – you can get all the deets (plus see Taylor’s sample) by clicking here.
I started out by stamping snowflakes on the kraft panel with white and red Craft Ink. I decided I liked the color combo of kraft with Real Red and Mellow Moss (it’s funny how I’ve recently rediscovered both Mellow Moss and Sage Shadow, neither of which I had used in ages.) I was kind of working at this card backwards as I would normally choose my focal image first. My intention was to find a Christmas or Winter image I could stamp onto kraft and color with Prismas Pencils or Copics or something, but when I went looking through my stamps I just couldn’t find anything to fit what I had in mind….so I went another direction entirely.

Recently I’ve seen a couple of cards with wreaths made from punched flowers. Last year in one of my classes we created wreaths using snowflake stamps. So I combined the two ideas to try a wreath made with punched snowflakes. I have a Cuttlebug snowflake die that I had never opened so this was the perfect chance to try it out! (ooo..check it out – it’s on sale at eP!) I punched a bunch of snowflakes out of Mellow Moss cardstock and sponged them with Always Artichoke ink and glued them onto a white scallop circle created with a Marvy punch and also sponged with the Artichoke ink. I also had a brand new Nestabilities bird die and was so happy that the smallest bird in that set worked for the wreath I had created. I added a bow with some red & white ribbon from my stash and some Kaiser Craft red rhinestones. The horizontal panel is SU dp from the hostess Patterns pack and the wide moss grosgrain ribbon is from the TE store. The sentiment is a rub on fromt he SU Chit Chat set. Some faux stitching was the final touch. I’m super happy with how this turned out!
Now it’s time to check out what the rest of the Cupcake Crew has cooked up this week
And this week’s Featured Stamper is Karen Motz at the Paper Playhouse.
Also you’ll want to be sure to stop by the Stamp a Sweet Impression blog to see who won the Top Chef contest and meet Our Friday Friend. AND Taylor has just announced that the next SASI release is only two weeks away! You are going to flip over the new sets – believe me! It’s going to be a great way to kick off a whole new year of stamping! *grin*
Have an awesome weekend!
Cocoa Cones
December 16th, 2008

Two parties in one day! I’m off to work and our office Christmas breakfast at Mimi’s. We’ll come back from breakfast and work for awhile and then have an appetizer potluck and a Grinch Gift Exchange.
Then as soon as I get home I need to put together a broccoli corn casserole and a sweet potato casserole and get them baked so I can take them to my prayer group annual Happy Turkey Dinner. This is always one of my very favorite nights of the Christmas season.
Before I’m out the door to work, I wanted to show you the little gifts I have for everyone in my office. I found these cocoa cones all made up complete with red satin bow at Costco.

I simply removed the tags that came on them and added some quick and cute tags made from elements of the TE Christmas Key Ingredients set along with the tags from TE and a sentiment from SASI Season’s Sweetings. The sentiment was punched out with my SU Key Tag punch. When I’m in a hurry I find that punching out sentiments is so much faster than getting them lined up straight directly on my project. Boy – those TE tags have come in so handy for so many things! I just used up the last of my supply. I’m going to need to get some more to have on hand for sure!
Yesterday I broke a tooth and I have an appointment tomorrow morning to get fitted for a crown. In the meantime I need to be really careful about chewing, so it’ll be a big bowl of oatmeal for me at Mimi’s this morning. Good thing I love oatmeal!
Thanks for stopping by. Have a great day!
PRAY
December 11th, 2008
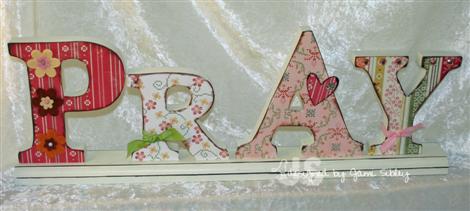
Here’s the final piece of the Bible Verse Gift Set I made for my friend Ruth’s birthday. This wooden plaque was given to me by friend TexasJodyLynn when she was visiting California with family a year or so ago. She picked it up at Hobby Lobby (which we don’t have here in CA.) I thought it was such a sweet gift and I knew it would be so fun to decorate. I decided to pay it forward by by making it for a gift rather than keeping it for myself. If you want a slightly larger view you can click on this thumbnail.  I used Plaid Royal Coat adhesive to attach the Cosmo Cricket Honey Pie dp to the wood letters. Then I inked all the edges with Versamagic Jumbo Java ink. Then I just added some ribbon, a chipboard heart (cut with my Cuttlebug), some fun rhinestones (Zva Creative in pink and KaiserCraft flower), plus some Zva Creative felt flowers. (Zva Creative from TE and KaiserCraft from eP)
Here’s the entire set of 12 verse journaling cards, clippie holder, tin and plaque. Click the thumbnail to see it larger. 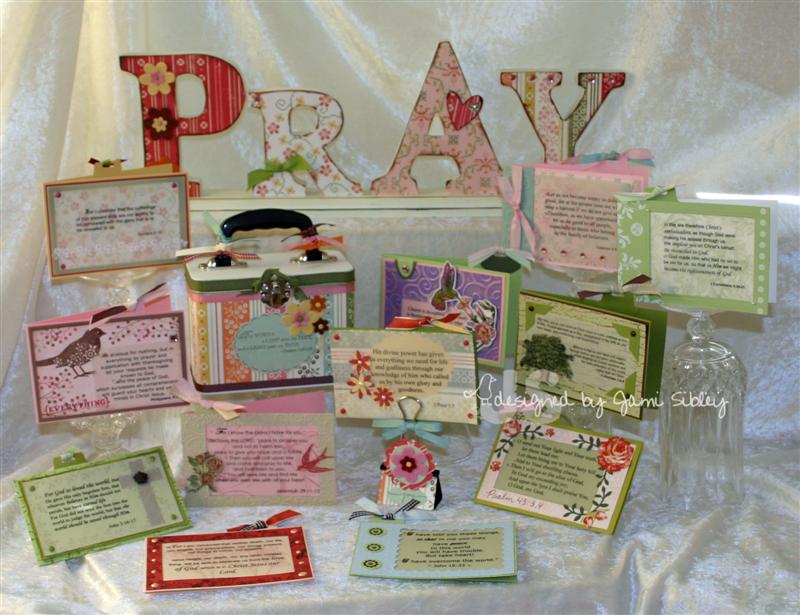 If you’d like to see and read about the individual projects you can click on *Divine Design* just under the title of this post and it should take you to a listing of all the individual entries. Thanks for sharing in this with me throughout the year.
Ruth’s birthday was yesterday and even though the set was finished a few days ago, I have yet to get it in the mail. I’m off to work today, but I will definitley get it out tomorrow. I still need to show you the birthday card I made for her. I’ll try to get that up over the weekend.
This has been a wonderful challenge to participate in this year. Be sure to subscribe to this thread on SCS so you’ll get updates on the 2009 version of the challenge and please come play along!
I promise you’ll want to read the whole post…
November 26th, 2008
Wishing you an early

I have a little gift project to share and some links and info you’ll definitley want to know about! First the project – I made these little gift packets for my SU Club Members.
Included is a container of Cosmo Fine Glitter, a little rubber stamp, a wrapped Ghiradelli Peppermint Bark Square and on the back a little sale special just for them. I used Holiday Treasure dp and Chocolate Chip cardstock to create an insert and a topper for cello bags. Here’s a close up.
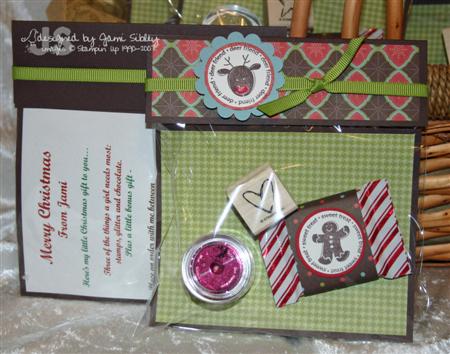
I love my Club girls and feel very blessed to have them! I hope they’ll enjoy these little gifts and feel the love! 🙂
And now all the news you need to know….
****Stampin’ Up! is having a fantastic Bundles sale today through Monday – it’s a Holiday Extravaganza for you to shop for yourself or for Christmas gifts. The product bundles are up to 50% off and are in limited quantities so you’ll want to do your shopping ASAP! Here’s a listing of what’s on sale su-nov-08-holiday-extravaganza.pdf You can shop with me 24/7 in my on-line store by going through my Stampin’ Up! website https://www.stampinup.net/esuite/home/jamisibley/promotions and don’t forget the Rub on promotion is on through Sunday as well. If you don’t have another Stampin’ Up! Demonstrator you normally do business with, please bookmark my SU site and feel free to shop with me any time!
****Taylored Expressions has a big sale and some new products starting tomorrow (the 27th) morning. Be sure you are signed up to receive the TE newsletter to get all the deets!
****My sweet friends Sharon Harnist and Lori Craig have a wonderful blog give-away running that includes SASI stamps AND Copic markers! I’m sure you’ll want to register so check out their blogs Paperfections and Make a Difference. Even if you don’t want to sign up for some crazy reason (which I can’t imagine) you’ll still want to hop over and see the cute projects they’ve posted!
****On a very serious note – please take a few minutes to read the blog post *Just Say No* by Julie Ebersole (the highly venerated JulieHRR) on the subject of image harvesting – click here – it’s becoming more and more prevelent and we need to make sure people are aware of this issue before it forces some talented stampers to stop sharing their creations on the internet! I already know of some people who refuse to share SU creations because of a few thoughtless harvesters. Thanks Julie for addressing this issue like only you can!
****In this season of thanks and this season of sharing and giving would you like to send a card out to brighten someone’s day? To offer encouragement? I have a couple of opportunities for you.
1. Holly (Toy on SCS) has posted a request for prayers and cards for her Aunt Marci who is battling cancer for the fifth time! See her post here. Please send a card to Marci if you can.
2. Laurie (Lauraly on SCS) has a 12 year old daughter dealing with a brain tumor. Laurie’s friend Tosh has posted this thread on SCS asking for prayers and cards for little Ali.
If possible please take a minute out of the busy-ness of this holiday season to do something small like sending out a card to these 2 families to say that you are praying for them. I know from personal experience what an incredible blessing that small act of kindness will be!
Wow! That was a lot of info! Is your brain fried yet? I’ll be back Friday with Taylor’s Cupcake Challenge. In the meantime I hope you get plenty of pumpkin pie and have lots of blessings to be thankful for!

The Texas Scrappy Christmas Challenge
November 24th, 2008
The morning I was preparing to leave for Texas I decided it would be fun to put together a little scrappy challenge packet for the girls staying at Sharon’s house. I was still finishing it up when Darla came to take me to the airport.
The Challenge rules were very simple
***Create a card or 3D item and post it on Monday 11/24/08
***Use at least a portion of each item in the packet
***Add anything you like to these materials
***Have FUN!!!
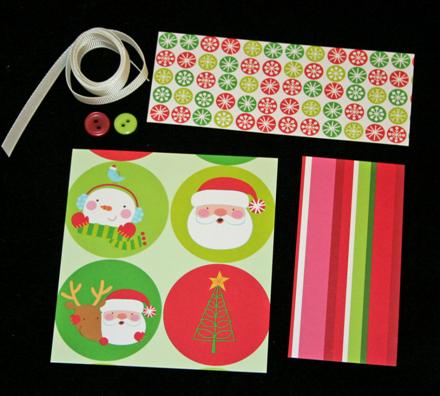
Here’s a picture of what was included in the packets. It was just some swatches of designer paper from that pad of Me & MY Big Ideas patterns I bought at Michael’s recently along with some white grosgrain ribbon and a couple of buttons. I thought it would be really fun to see what my friends might do with those circle elements especially.
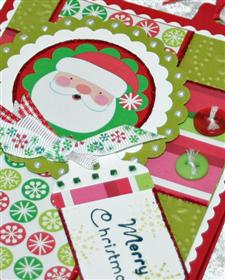
I decided to create a genie bag and I had a blast playing More is More with it. (Also known as *when you think you’re finished, add one more thing!*) The base panels adhered to the mini white lunch bag are standard card sized (4.25″ x 5.5″) and I added tabs punched with the SU round tab punch with ribbon slots punched with the slot punch.
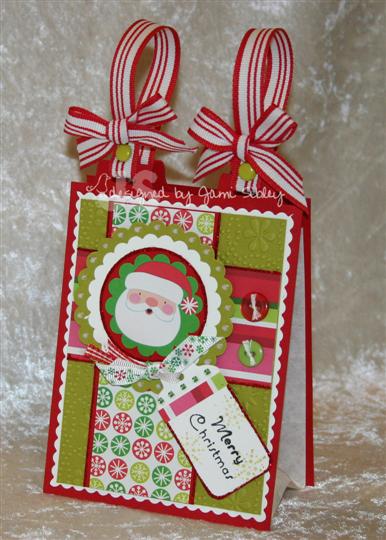
The Santa image was punched with my SU scallop circle punch and then layered onto cardstocked punched with various Marvy punches. The Kiwi layer was run through my Cuttlebug with the Snow Dots embossing folder. That layer was then adhered to a white layer and the white layer was closely trimmed with scallop scissors. The tag was created by stamping the sentiment from SASI Season’s Sweetings onto a tag from the Tag Treats available at TE and then simply cutting it down to size and rounding the bottom corners. This is a great way to make tags of various sizes and they’re such a good value I don’t feel like I’m “wasting” them! I added some snowflakes from Snow Burst and a snippet of the dp (which I had already cut off the bigger peice to make it fit.) I also added square green Adoro tiny rhinestones. I looped ribbon through the tag – if you look closely you’ll see that I did use some of the white grosgrain from the challenge kit. I wanted some bling so I added Fire Engine Red glitter (using a Sakura Quickie Glue pen) in several places – the red circle under Santa, the edges of the dp, the edge of the tag. I couldn’t get it to really show up in the photo, but it really adds a lot IRL. I put some white embroidery thread through the buttons (I just hate nekkid buttons!) and attached them with mini glue dots. Then I just had to add some Liquid Pearls to the Kiwi scallops.
The final touch is the ribbon handles. I used SU striped grosgrain and Basic Grey Sultry brads. I rarely tie bows – I think I must have been channeling Taylor! LOL! So what do you think? Did I get back to my *More is More* roots? Now I just need to find a gift worthy of my special little scrappy bag!
I’m not certain who has had a chance to play, but I’m anxious to hop around and find out – Sharon, Lori, Jenn, Jess (since she hasn’t blogged in over a year we’ll see!) and Taylor.
Thanks for stopping by. Happy Monday and enjoy the short week!


