Taylored Expressions October Sneak Peeks – Lots and Lots of Wreaths!
October 4th, 2016
Hey everybody! I’m excited (as always) to play along with the Taylored Expressions Sneak Peeks this weeks. The Christmas release is always my favorite, and while there are a myriad of awesome new products, I got totally stuck on just one! The first thing I started to play with right out of the box was the new Wreath Cutting Plate and I seriously could not put it down. Seriously. As in…I have EIGHT cards to show you today! And it was really only a lack of time that stopped me from having even more! There are just so many things you can do with this cutting plate as you can go from super quick and simple to as fussy and detailed as you might like!
Plus this product is a TE Webstore Exclusive – meaning you can’t buy it anywhere else. And TE is running a limited time promotion on it, where you can earn double points!
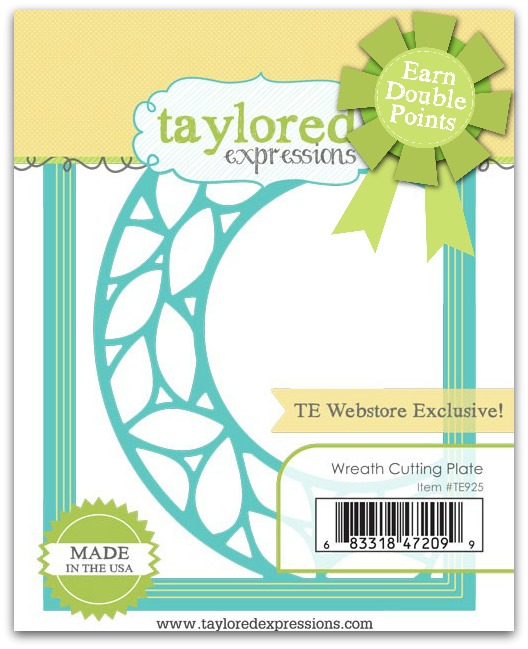
For a limited time, earn DOUBLE CRAFTY POINTS on our Wreath Cutting Plate! Not a Crafty Points member? It’s free and easy to join: Visit THIS PAGE and earn 48 Crafty Points on the purchase of this TE Web Store exclusive! Release Day is Thursday, October 6 at 7am PST!
Offer valid on qualifying purchases made between 7am PST on Thursday, October 6 and 11:59 pm CST on Sunday, October 9, 2016 only while supplies last. Only available to purchases made via our retail site www.tayloredexpressions.com.
Now, let’s get to the cards! The very first thing I wanted to do was to play with some watercolor smoosh backgrounds, so I created these:
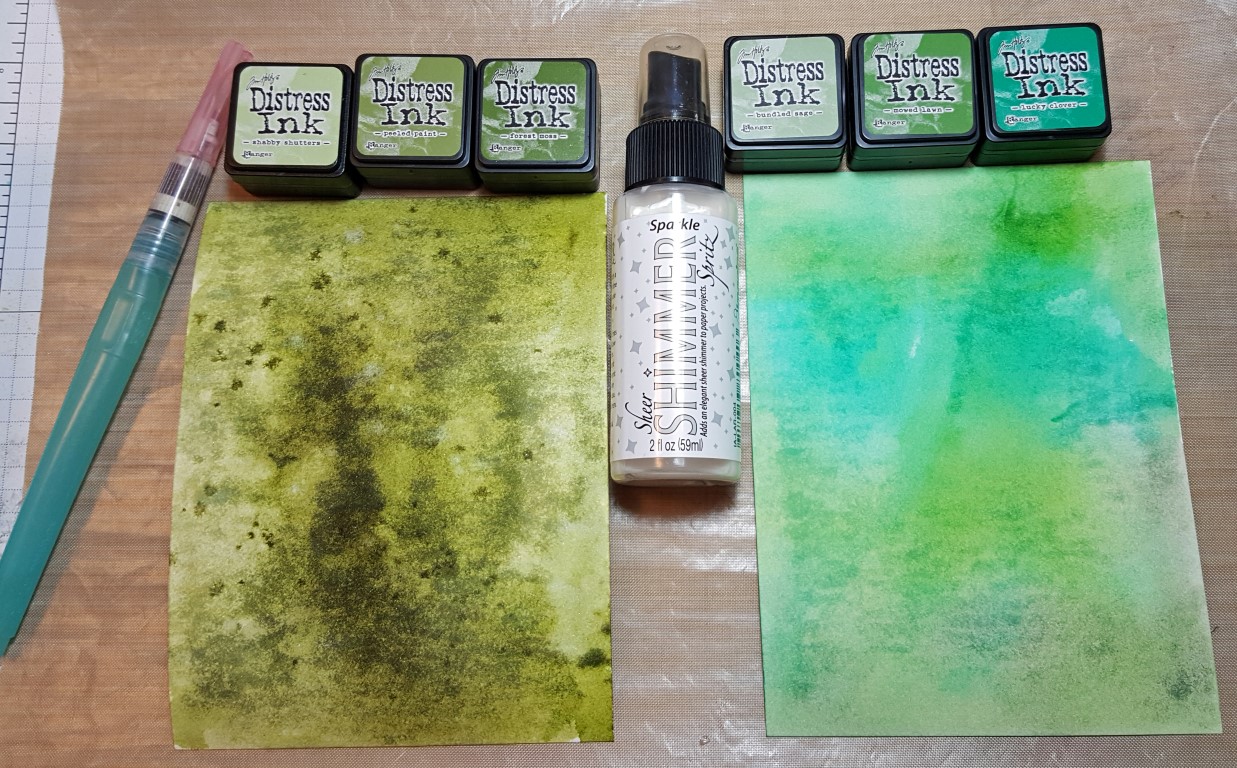
I used Tim Holtz watercolor panels and starting by spritzing them with a generous amount of water. Then I smooshed the Distress ink colors pictured on a large acrylic block and smooshed them onto the paper. I added more ink as needed and used a waterbrush to move and mix colors. On the darker panel I also sprayed a Sparkle Shimmer spray. I took those two panels and combined them to create these two cards:
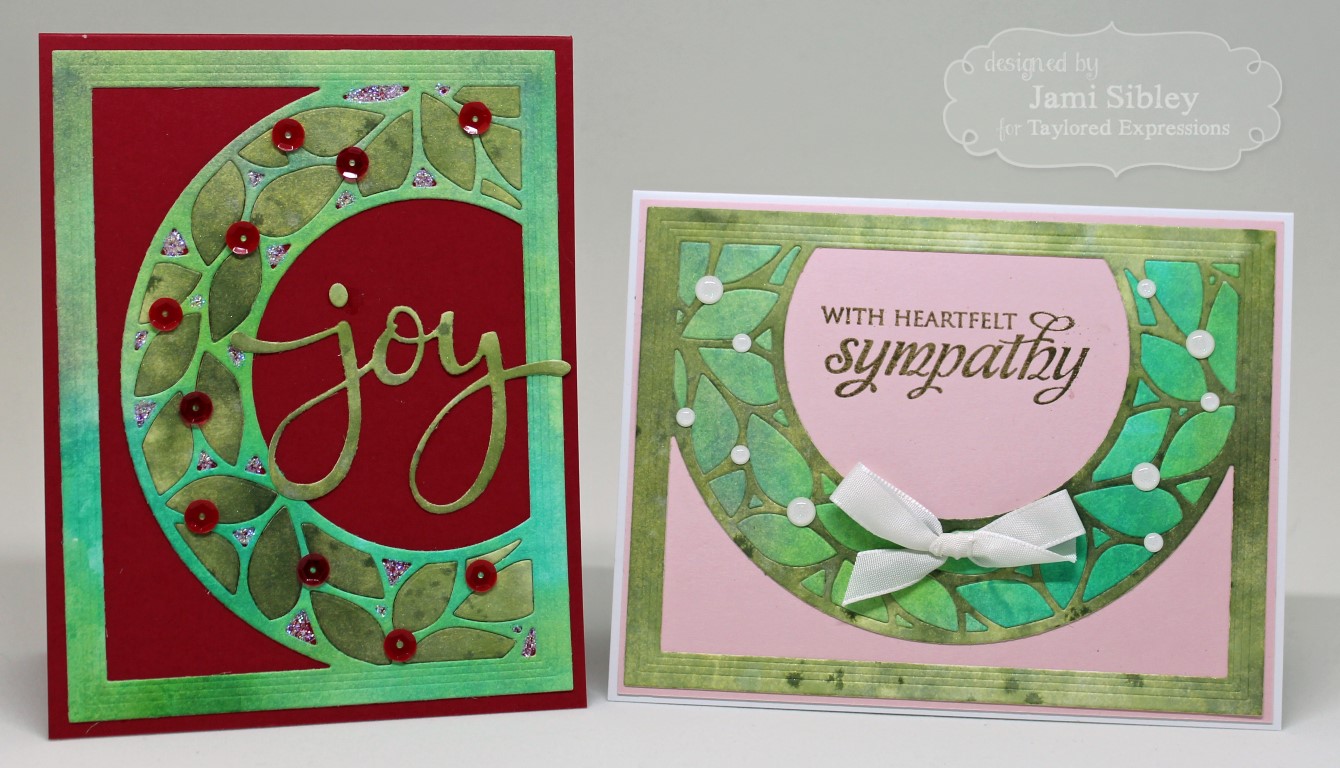
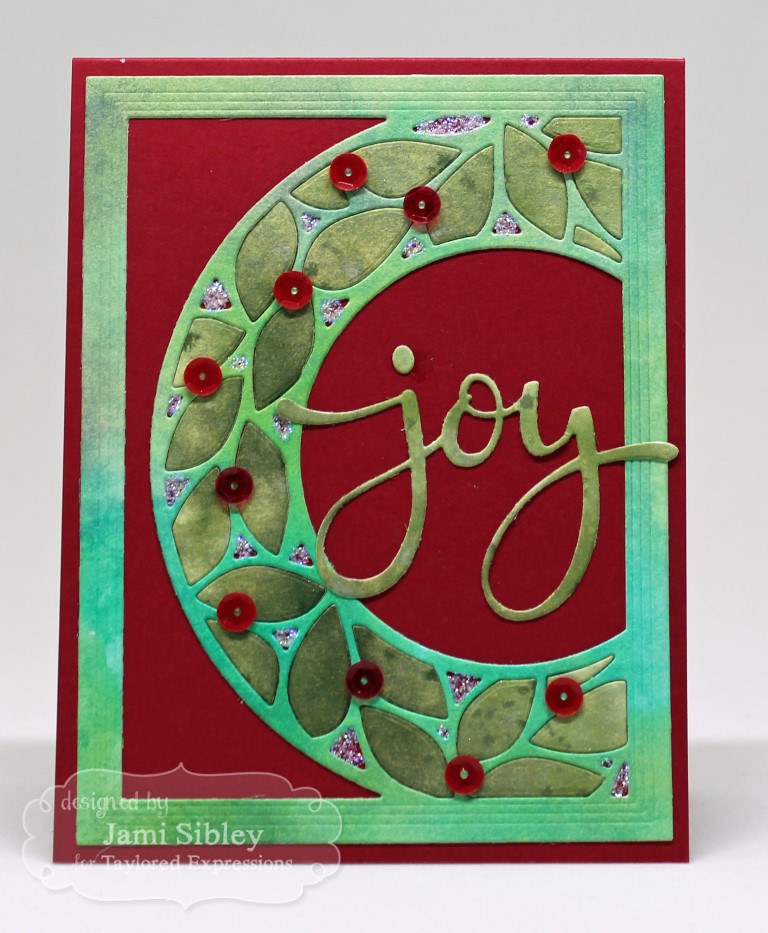
I inlaid the leaves cut from one panel into the other and visa versa. The “joy” is a new die – Joy Script. I added some stickles and some red sequins. Piecing in the leaves is a little fussy, but I actually enjoyed doing it.
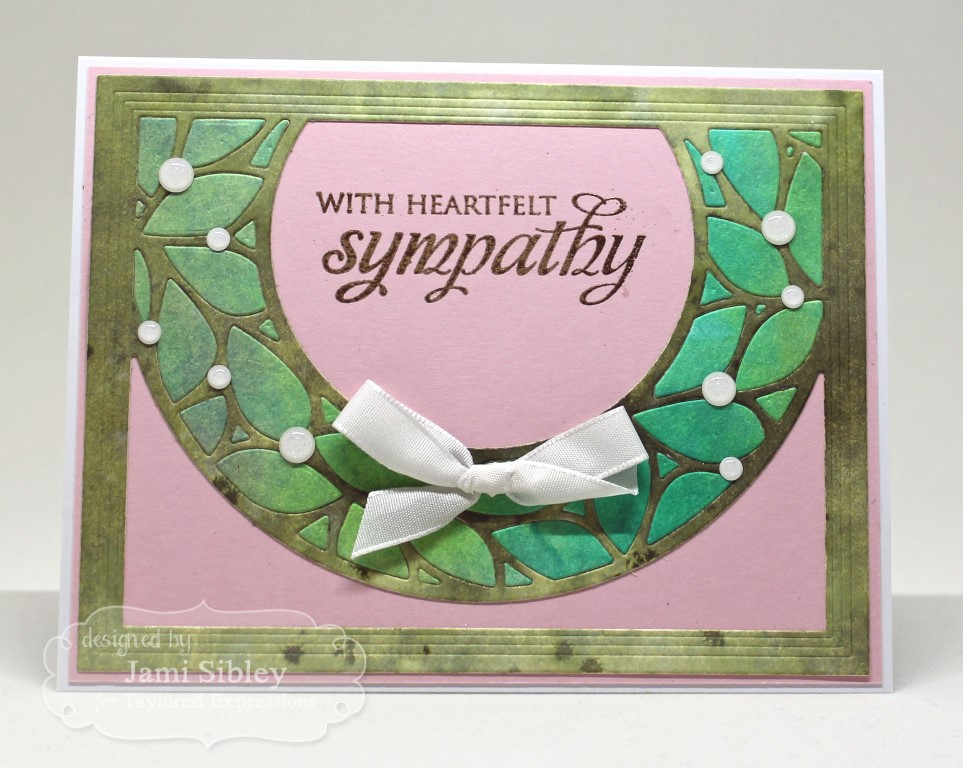
Next, I wanted to turn the wreath onto a horizontal card. I love that this wreath works in all four directions. Here I went with a soft pink for a sympathy card. The sentiment from Care & Comfort II was stamped with Versamark and heat embossed with gold embossing powder.
Here’s a trio of Christmas cards and these showcase a much simpler method.

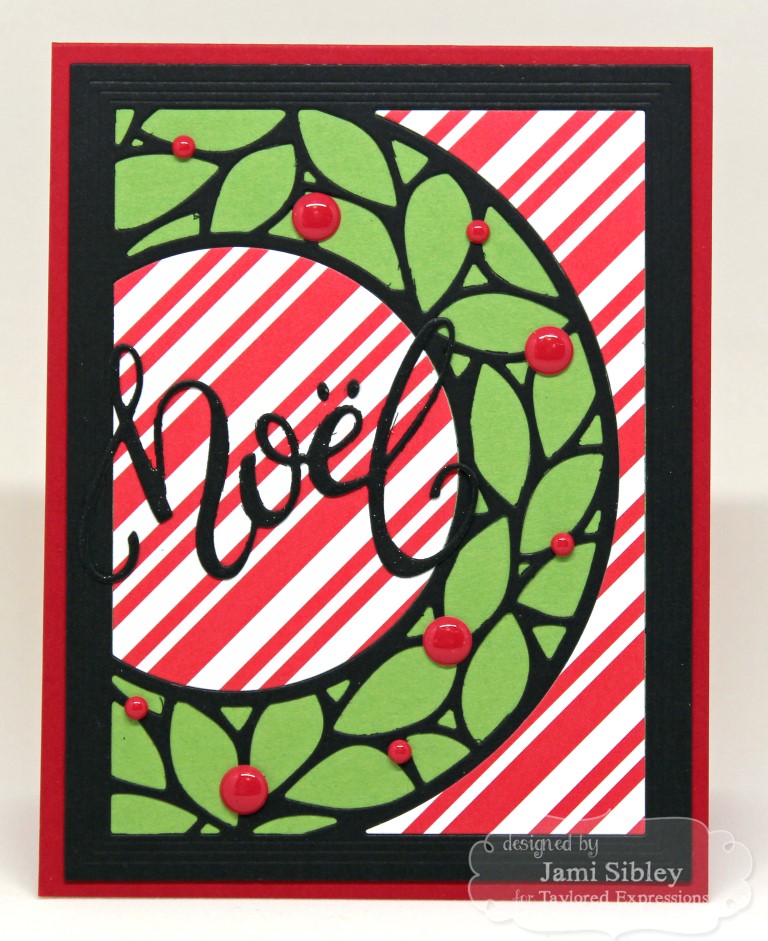
For this card, I cut the plate from the striped patterned paper and simply attached it to a panel of the green polka dot paper. No need to piece in the leaves – they just show through the holes. Then I cut the plate from black cardstock and just adhered the two pieces you see here over the green polka dots. The whole thing was then adhered to a white card base. Sentiment is from the previously released In & Out Christmas. Easy peasy!

For this one, the plate was first cut from white cardstock. I was careful to keep the leaves in and adhered the whole thing to a red cardfront. I then colored the leaves with Copic markers. Sentiment is from another new stamp set, Ornamental.

The third card in this group uses the striped pieces left over from the card above. The plate was cut from black cardstock and adhered over a green panel. Then those striped pieces, which I already had, were added. And actually, the black here and the black pieces in the card above are all from the same pass through with the die. Once you start with these, it’s kind of self-perpetuating! Ha! Again I have another new script die – Noel Script. Super super easy!
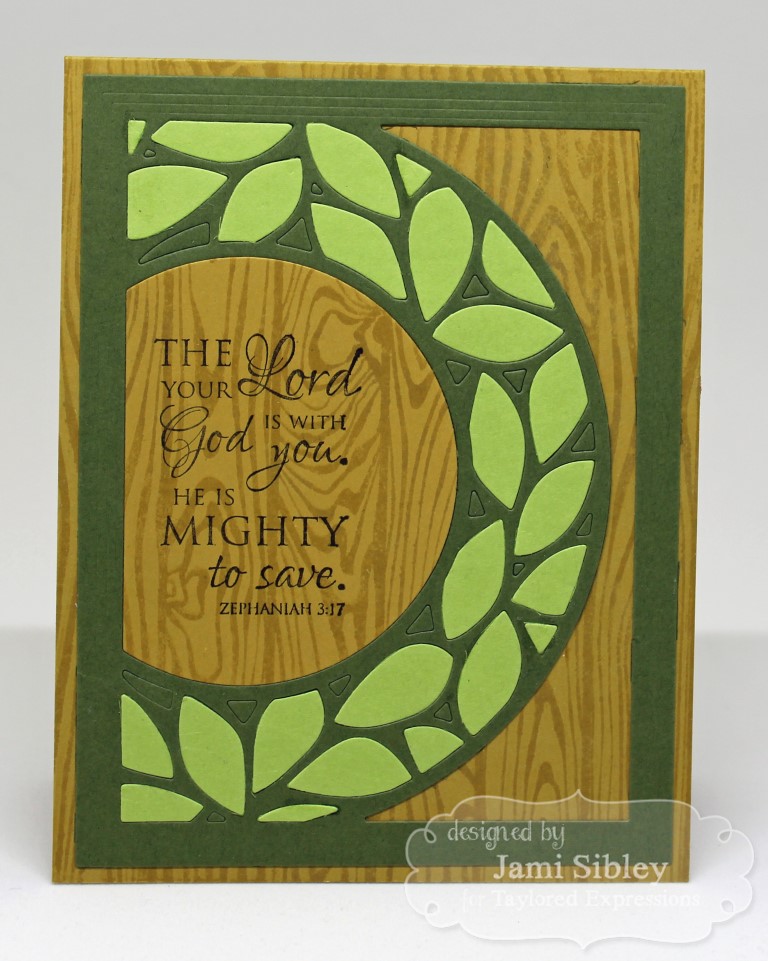
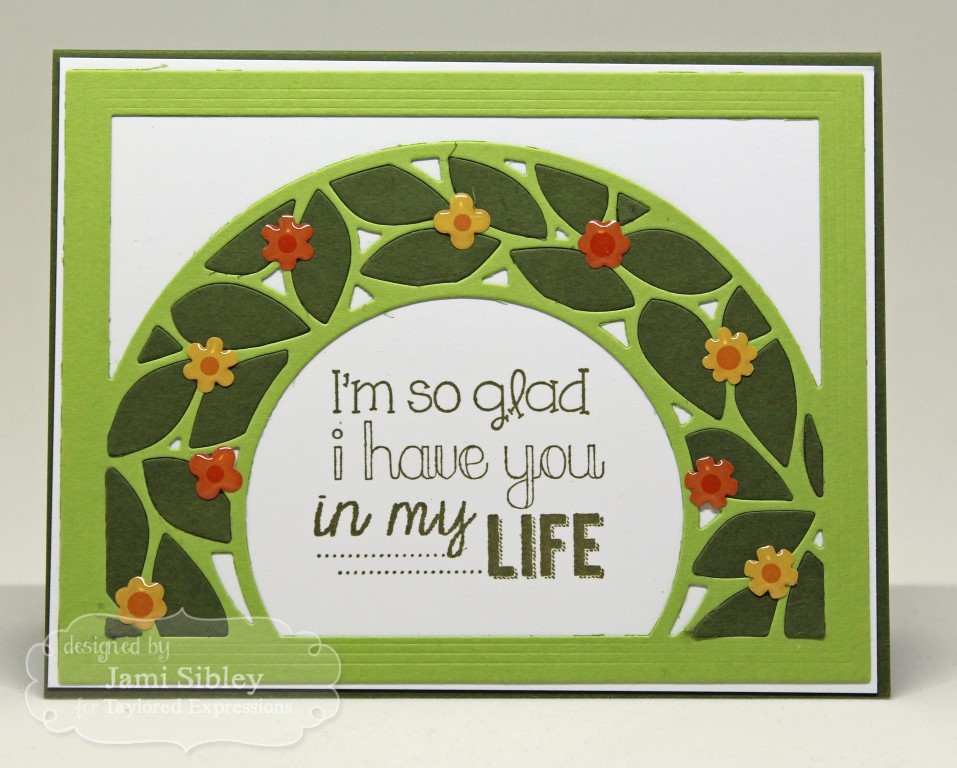
For this pair of cards, I wanted to play with the new Woodgrain background stamp.
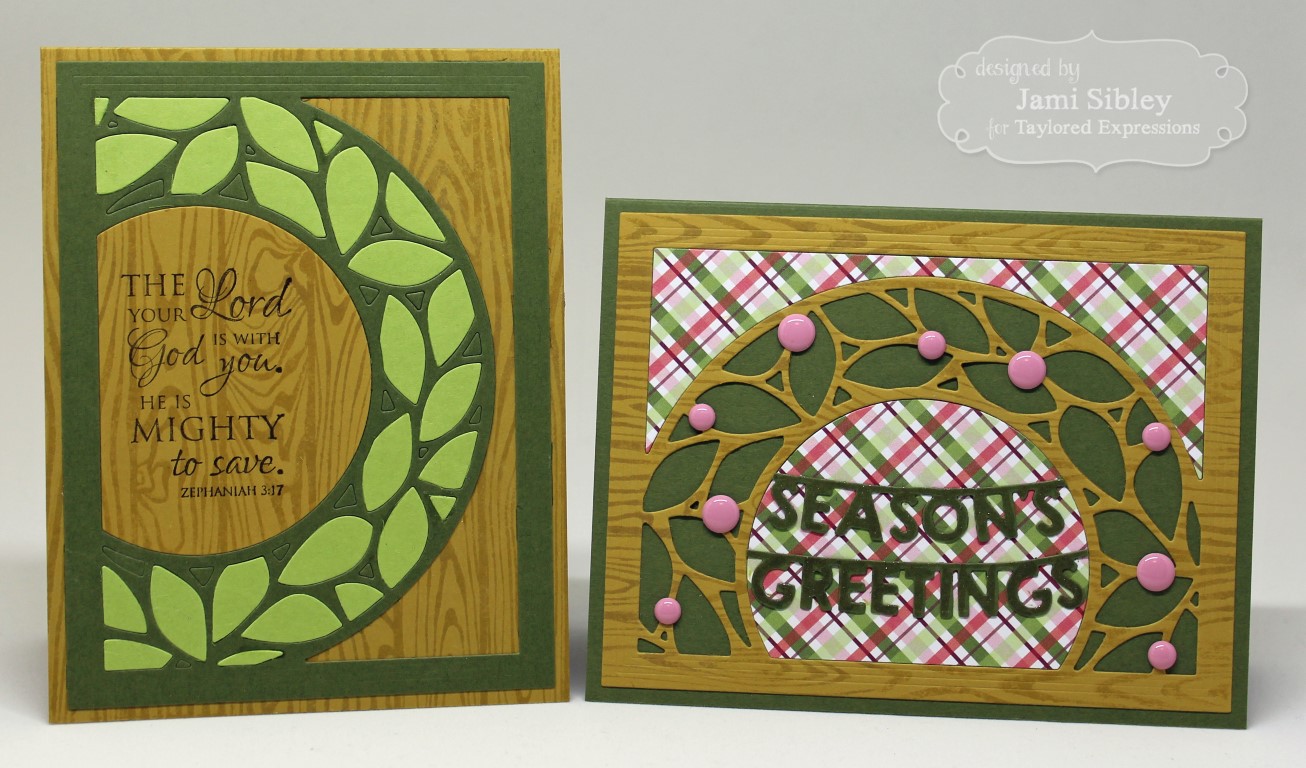
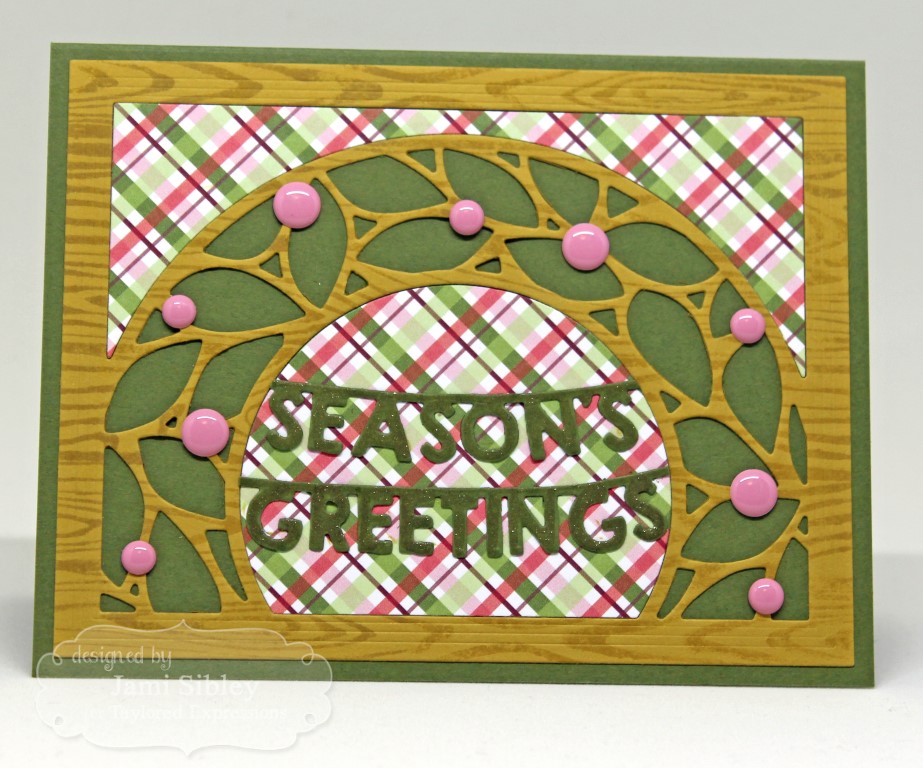
First a simple Christmas card using the Seasons’ Greetings Banner. Again, once the plate was cut from a piece of cs that had been stamped with the Woodgrain, the die cut piece was adhered directly to a cardfront.
This rustic card features a sentiment from the stamp set In the Word. I actually did inlay the leaves on this one. The two greens pair up with the springtime card below. Told you…self perpetuating!
And finally this springtime card featuring a sentiment from Happy Heart might be my favorite!
All supplies used – cardstock. patterned paper, ink, embellishments, etc are found at Taylored Expressions.
There were so many cards to show that I didn’t want to get too detailed with my descriptions. If you have any questions, please feel free to post them in the comments. I hope you’ve seen the fun and versatility of this year-round cutting plate! Which card is your favorite?
Be sure to head over to the TE Blog for a list of designers with sneak peeks today as well as a chance to comment to win a prize! Thanks so much for stopping by!


October 4th, 2016 at 8:32 am
Gorgeous cards today Jami! It’s amazing how many different cards you were able to make with just one cutting plate!
October 4th, 2016 at 5:21 pm
I love that you showed us how versatile this wreath die is! It is hard to choose a favorite, but I think it is your last one, because making it a spring time design really showed me the possibilities.
October 5th, 2016 at 2:40 am
Awesome, awesome cards! My favorite is the one with the Doodlebug holly enamel shapes added, but of course I love them all!
October 6th, 2016 at 11:09 am
WOW!! Miss Jami you definitely out did yourself!! These are all SOOOO Wonderful! Now I am kicking myself for not getting this one, lol So many Fabulous designs and great inspiration my friend! 😎
Hugs
Shannon
October 6th, 2016 at 2:12 pm
Beautiful cards! You’ve done your job well Jami, I want that die really bad!