Taylored Expressions November Release Day
November 4th, 2010
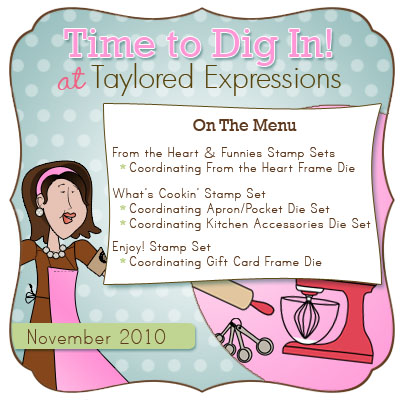
Taylored Expressions Store! It’s time to DIG IN!!! Be sure to check out the Fresh Out of the Oven Department for all the stamp sets and dies plus tons of other new products. I’m joining the Baker’s Dozen today in presenting even more shopping inspiration for you. *wink*
It’s Release Day at Taylored Expressions. Everything we’ve been showing you over the past several days in now available for purchase at the
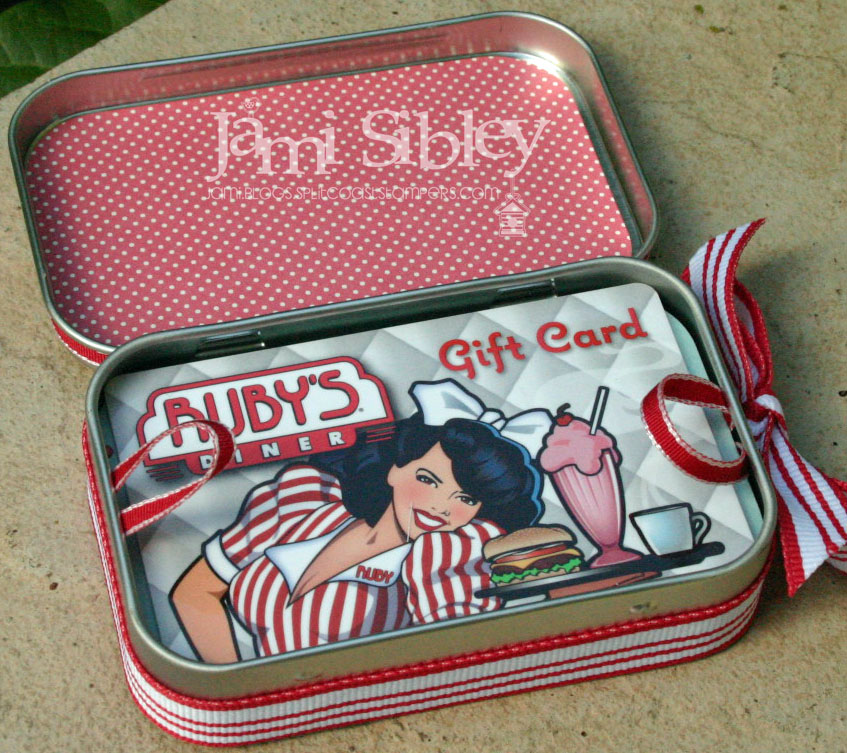
Today I have 2 gift card holders made with the new stamp set Enjoy!, the Gift Card Frame Die, and a couple of small hindged tins (or altoids tins). The frame image and die were designed to fit perfectly on or in these tins.

This first tin was made to coordinate with the card I showed you on Monday as part of a little thank you gift. I stamped the place setting image on Buttercream cardstock and colored it with Copics. Then I punched it out with a 1 3/4″ Circle Punch and trimmed it out with Taylor’s Tiny Twinkles. You can see the polka dot frame was cute with the Gift Card Frame Die and fits perfectly on top of this tin.

I trimmed the edges with ribbon adhered with Zip Dry. Inside is a gift card for Ruby’s Diner. YUMMMMM! Did you know that they have these gift cards at Costco here in SoCal? Only $40 for two $25 gift cards! Like I said…yum!
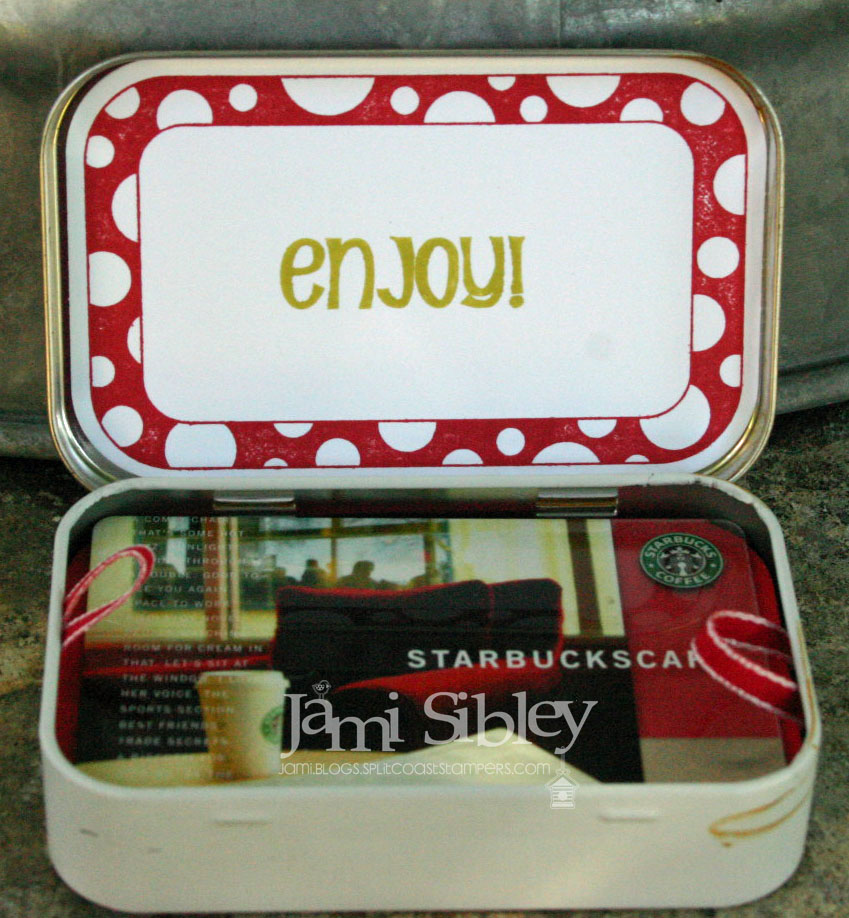
My second tin was created to hold a Starbuck’s card – still a super popular gift for all sorts of occasions!

This time I used dp from the Snow Day Project Pantry and put the frame image on the inside of the tin. This tin is super simple and it would be really quick to whip up several of these to have on hand. You could even leave off the image until you’re sure what type of gift card will go inside. Although this is Christmas paper, it will really work year-round.
You might notice that my cards are raised up on a platform in my tins and that I included little ribbon loops. I simply use a piece of 3×3 cardstock scored and 1/2″ on each side to create the platform. I’ve put together a video to share a few tips about creating these gift card tins. If you have a few minutes, take a look and let me know what you think. I’m going to ask you to please cut me a little slack as this is the first time I’ve made an over-the-shoulder video. There are several times when I thought I was holding something up to the camera for you to see close up, only to find that I was actually holding it out-of-frame! LOL! I promise to get better! I’d love to make more video tutorials!
[youtube]https://www.youtube.com/watch?v=ufhd1uP-7H8[/youtube]
Thanks so much for spending some time with me today. Let’s check out what the Baker’s Dozen has cooked up with all the new goodies…they will have samples of all the new sets…
- Charmaine Ikach
- Danielle Lounds
- Donna Baker
- Jackie Pedro
- Jodi Collins
- Karen Giron
- Karen Motz
- Melissa Sauls
- Mona Pendleton – Guest Designer
- Regina Mangum
- Sankari Wegman
- Taylor VanBruggen
- Tori Wild
Happy Hopping and Happy Shopping! Have a great weekend!
![]()
Taylored Expressions November Sneak Peeks Day 3
November 3rd, 2010
Welcome to Day #3 of the sneak peeks for the November Release at Taylored Expressions! Everything we are showing you will be available for purchase in the TE Store tomorrow, Thursday, at 8am PST. I am especially excited about the peeks for today’s stamp set – Enjoy! – because it was developed from my very own concept! *GRIN* Nancy McKinney took my elementary (as in looked like a 2nd grader drew them – LOL!) sketches and worked her magic on them to become a Whimsical Wishes stamp set. I am so thankful to Taylor for the opportunity to see my ideas in rubber and to actually get to stamp with them.
The idea behind Enjoy! is to have images available to create special, yet quick and easy, packaging for gift cards at Christmastime and throughout the year. And I think you’ll also find plenty of uses for this set even beyind gift cards! There is a fun polka dot frame image and coordinating Gift Card Frame Die that fit perfectly on a small hinged (altoids style) tin and also makes a wonderful tag or focal point on a card. Plus there are 11 images for all types of gift cards – from Starbucks (or other coffee houses) to Macy’s (or any boutique or department store), from iTunes to Home Depot…and much more!
Enough of my yammering…let’s get to some projects. The first project I have to show you today is a tin to give movie tickets in. I love to buy movie tickets at Costco ($15.95 for a pair) and give them as gifts, but the paper tickets need to be dressed up a bit and I’m always looking for ways to do that. I think I’ve finally found the perfect way to present movie tickets as a gift!
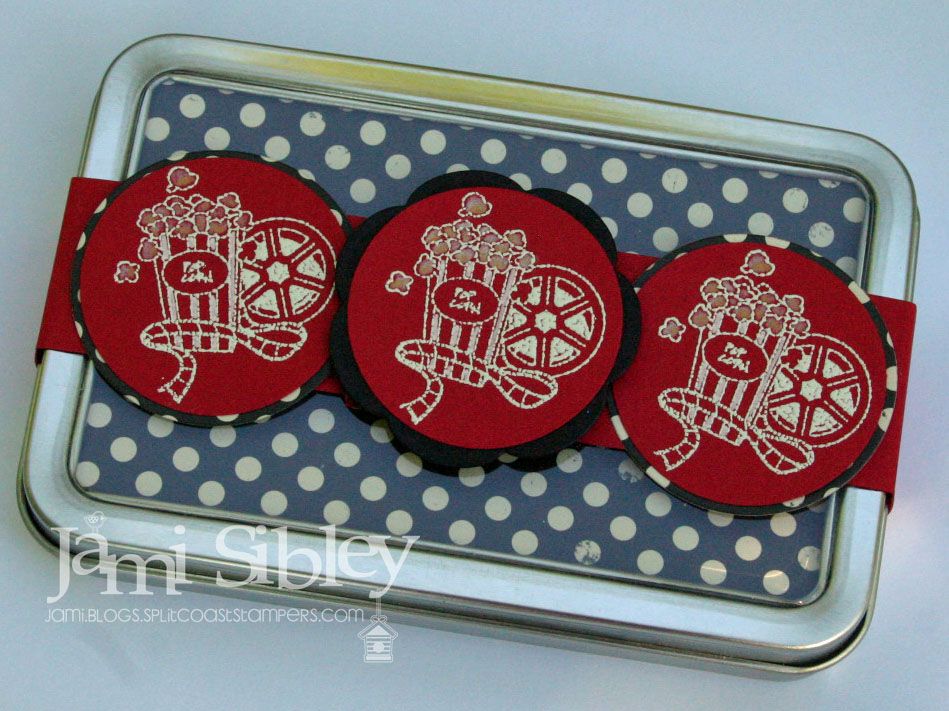
This is a clear top hinged tin (some of you may know them as “nugget tins”) and at 5.25″ x 3.5″ it is just the right size for those tickets! I used some October Afternoon dp in the window of the tin and created a belly band around the outside with some red cardstock. The popcorn and movie reel image was stamped in white craft ink and heat embossed with white embossing powder. The images were punched with a 1 3/4″ circle punch. All of the images in this set were designed to fit into a 1 3/4″ circle punch to make quick gift packaging a breeze.
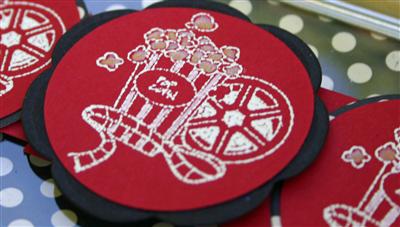
I colored the popcorn with Prisma pencils and filled in the stripes on the box with a white gel pen.

I folded some black cardstock to create a little insert to cradle the tickets.
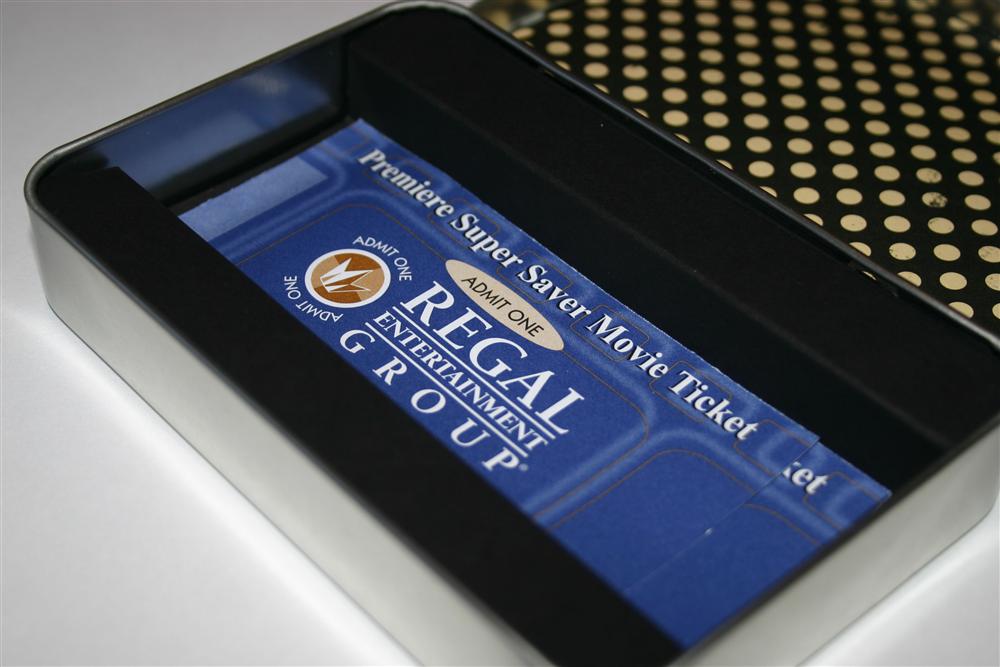
I plan to make up a few more of these so I will have them on hand because movie tickets are a perfect gift for practically everyone!
For my 2nd project I wanted to show how you can throw together a super cute birthday package in just minutes.
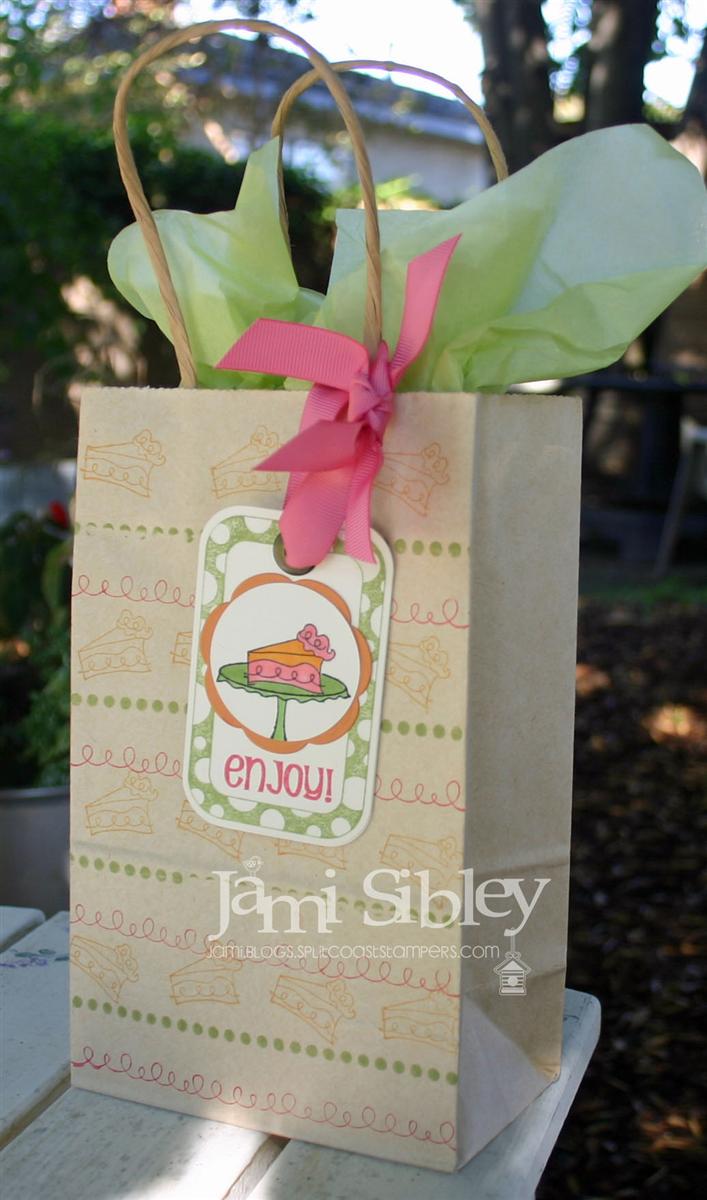
I keep a supply of small plain gift bags on hand – usually in both white and kraft. This particular batch is a little lighter color than kraft and I think they came from Michael’s. I used 2 of the long border stamps from Borderliscious to create a pattern on the bag. I actually put both stamps on the same block and inked one with Pear ink and the other with Regal Rose ink for each impression. This kept the spacing more even. Then I went in with the cake image from Enjoy! and stamped that in Peach Parfait. I created the hanging tag with the frame image and die along with the cake and pedestal (2 separate images for more versatility) and the sentiment “enjoy!” I wish I had had this bag for the birthday party I went to last week, but now I have something all ready to go for next time.
As I mentioned above, that frame fits perfectly on an altoids style tin and I will have 2 of those for you tomorrow along with a little video. In the meantime, let’s go see what the Baker’s Dozen has cooked up with Enjoy!
- Charmaine Ikach
- Danielle Lounds
- Donna Baker
- Jackie Pedro
- Jodi Collins
- Karen Giron
- Karen Motz
- Melissa Sauls
- Regina Mangum
- Sankari Wegman
- Taylor VanBruggen
- Tori Wild
- Nancy McKinney – Whimsical Wishes Illustrator
Oh and before you go I have one more thing to show you. I was in the backyard yesterday morning trying to find some good lighting to take project photos before I left for work. Right in the middle of my photo shoot the camera battery died. I left my gift bag perched on the planter (which is about 2.5 ft tall) and ran in the house for a fresh battery. When I came back out I found Tessa guarding my project. LOL!
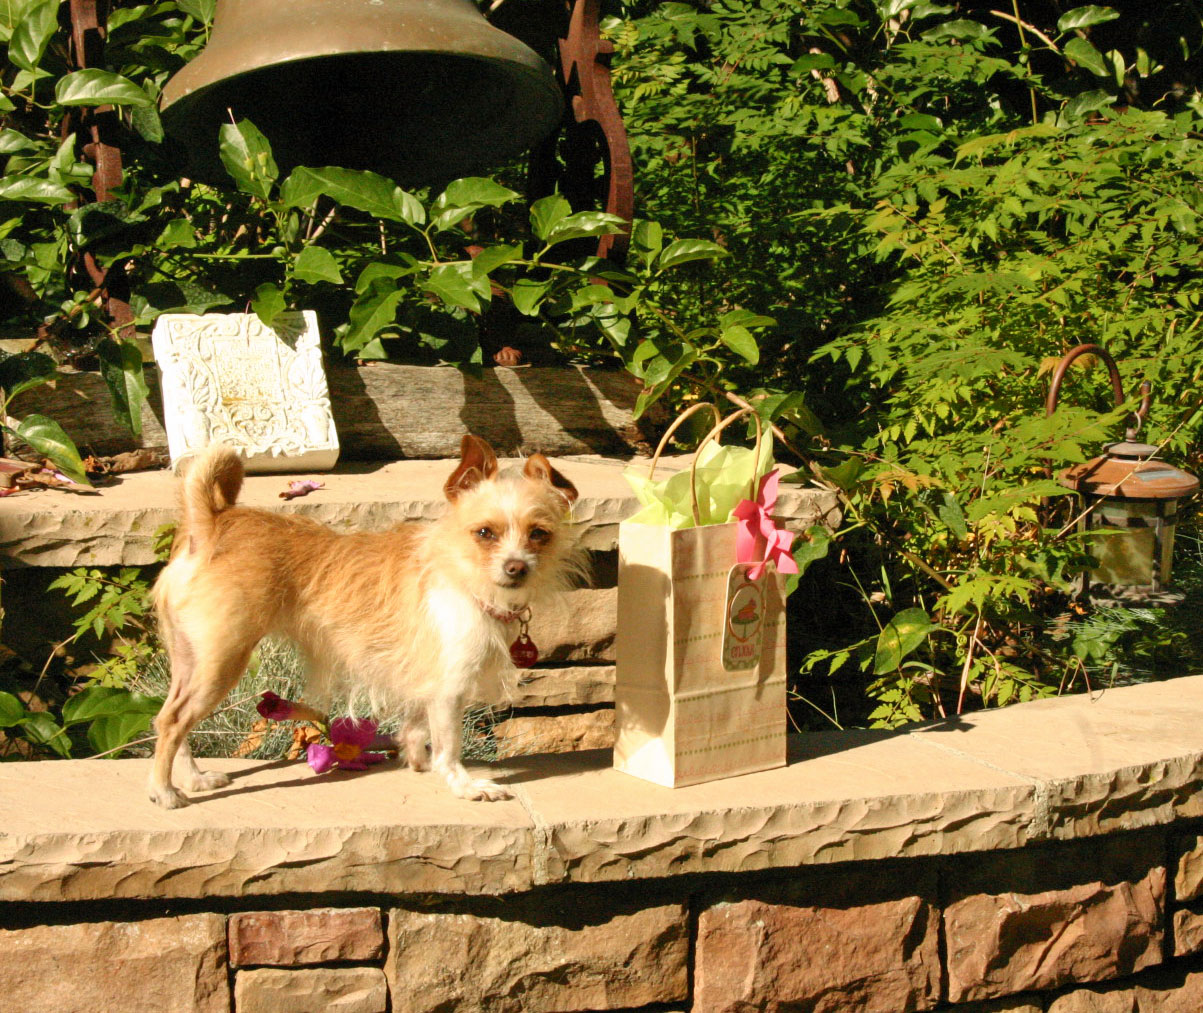
The sun was so bright that she was squinting! It was 94 degrees here yesterday! Happy Hopping! Thanks for stopping by. Please leave me a comment and let me know what you think of Enjoy!
![]()
Taylored Expressions November Sneak Peeks Day 2
November 2nd, 2010

Welcome to Day #2 of the Sneak Peeks for the November Release at Taylored Expressions! On the menu today are two adorable coordinating stamp sets along with a new Taylored Die. From the Heart and From the Heart Funnies were designed and illustrated by Taylor VanBruggen for the “te” line of stamps at Taylored Expressions. From the Heart features 19 images in deeply etched pink rubber including icons for 15 different gifts, hobbies and holidays perfect for making tags and packaging for all sorts of handcrafted gifts.
The first project I want to share with you is a gift card holder with sleeve based on this video tutorial by Dawn Griffith. This is a super easy project. I used the From the Heart Frame Die to create a window in the sleeve. Since the die creates holes where the registration marks are, I used the Winter Wonderland Snowflake die (released last month) along with Winter Wonderland stamps to create embellishments to cover those holes. And I love the decorative element they add!
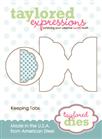
This is a gift certificate to one of my stamp classes. I often have customers purchase GC’s from me at Christmas time so it’s great to have some ready to go. The little rubber stamp image is perfect! It would also be great for a tag on any handstamped gift you might want to give. I created a pull tab with the Keeping Tabs Die.

I will simply print out the specific GC info and adhere it inside. Unfortunately our printer ran out of ink so I couldn’t print up a sample to show you. Designer paper used here is Mitten Weather.
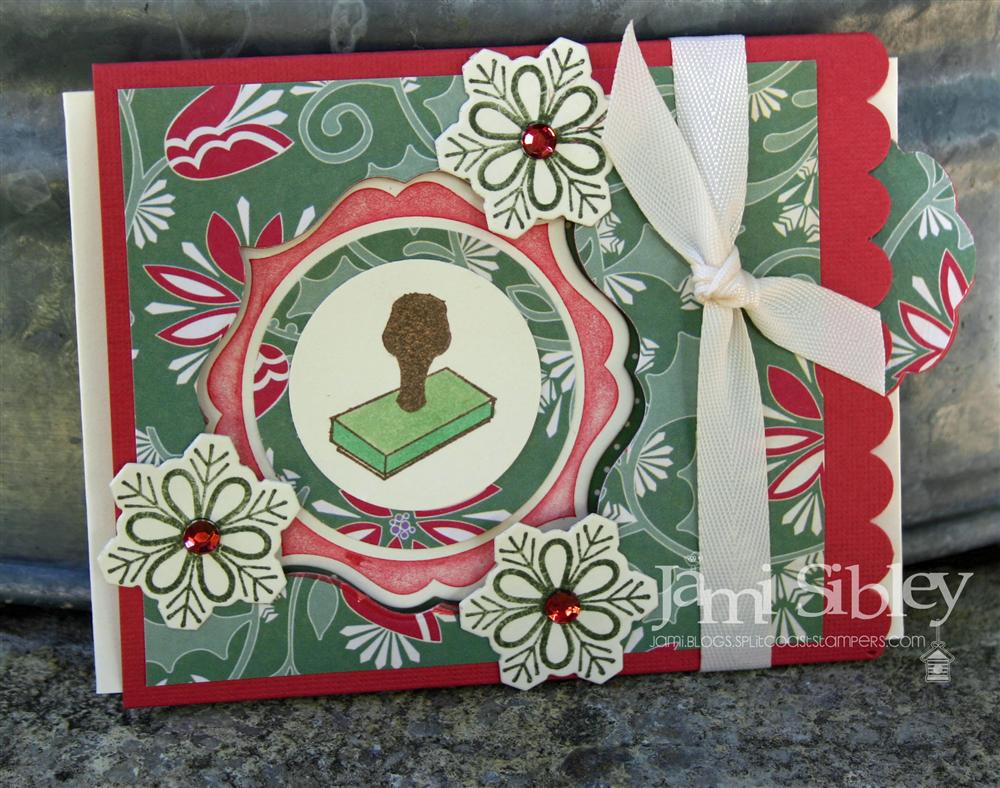
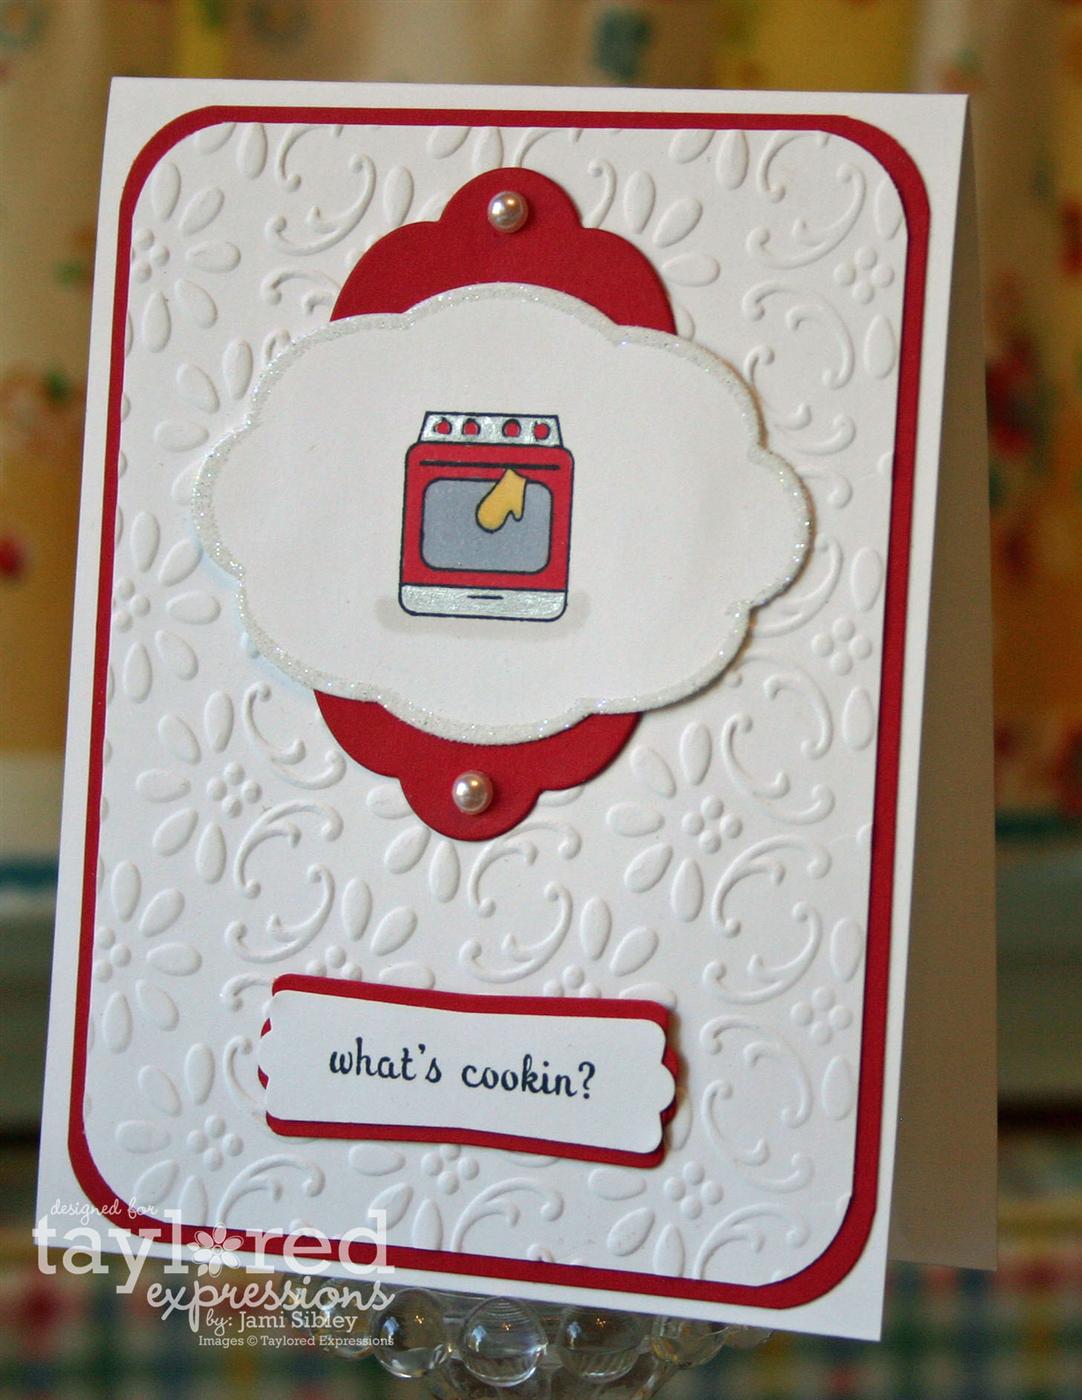
The coordinating mini set From the Heart Funnies features 16 cute sentiments to coordinate with the images in From the Heart for cards, tags and scrapbooking. I whipped up a quick batch of simple notecards to show you some of the fun sentiment/image combos. My original idea was to make one layer cards, but y’all know how tough that is for me…so here’s where I ended up. (click to see them larger)
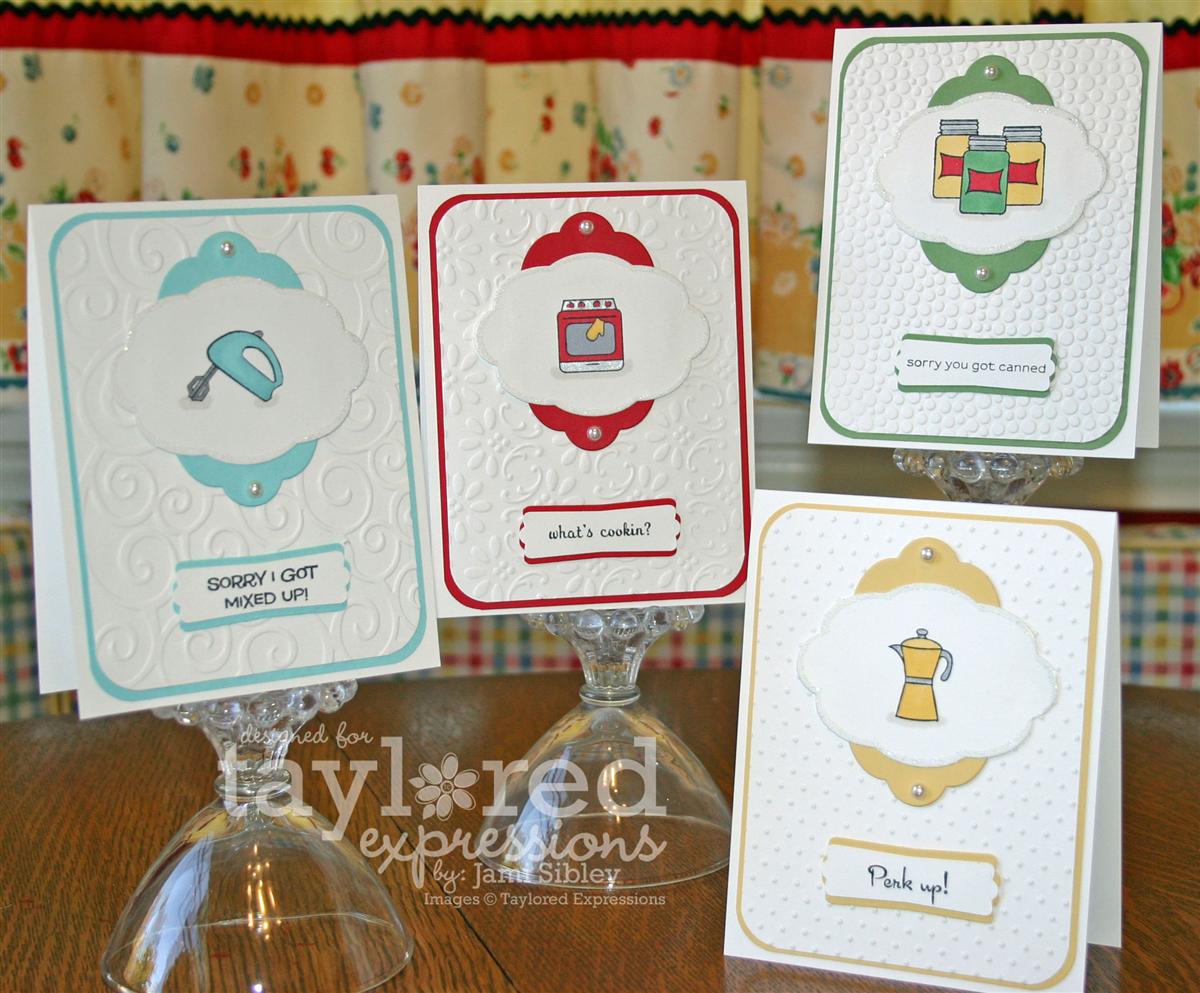
Each card has a Choice Snow White base, then a solid colored layer (SU Cool Caribbean, Real Red, Wild Wasabi, So Saffron) and then another Snow White layer that has been embossed with various Cuttlebug folders. The images were stamped and colored with Copics and die cut with the Take Note Frame #1 Taylored Die and edged with glitter. The same die was used to cut a colored backer shape. Sentiments were stamped and punched with the modern label punch. Here’s a closer look at each card.

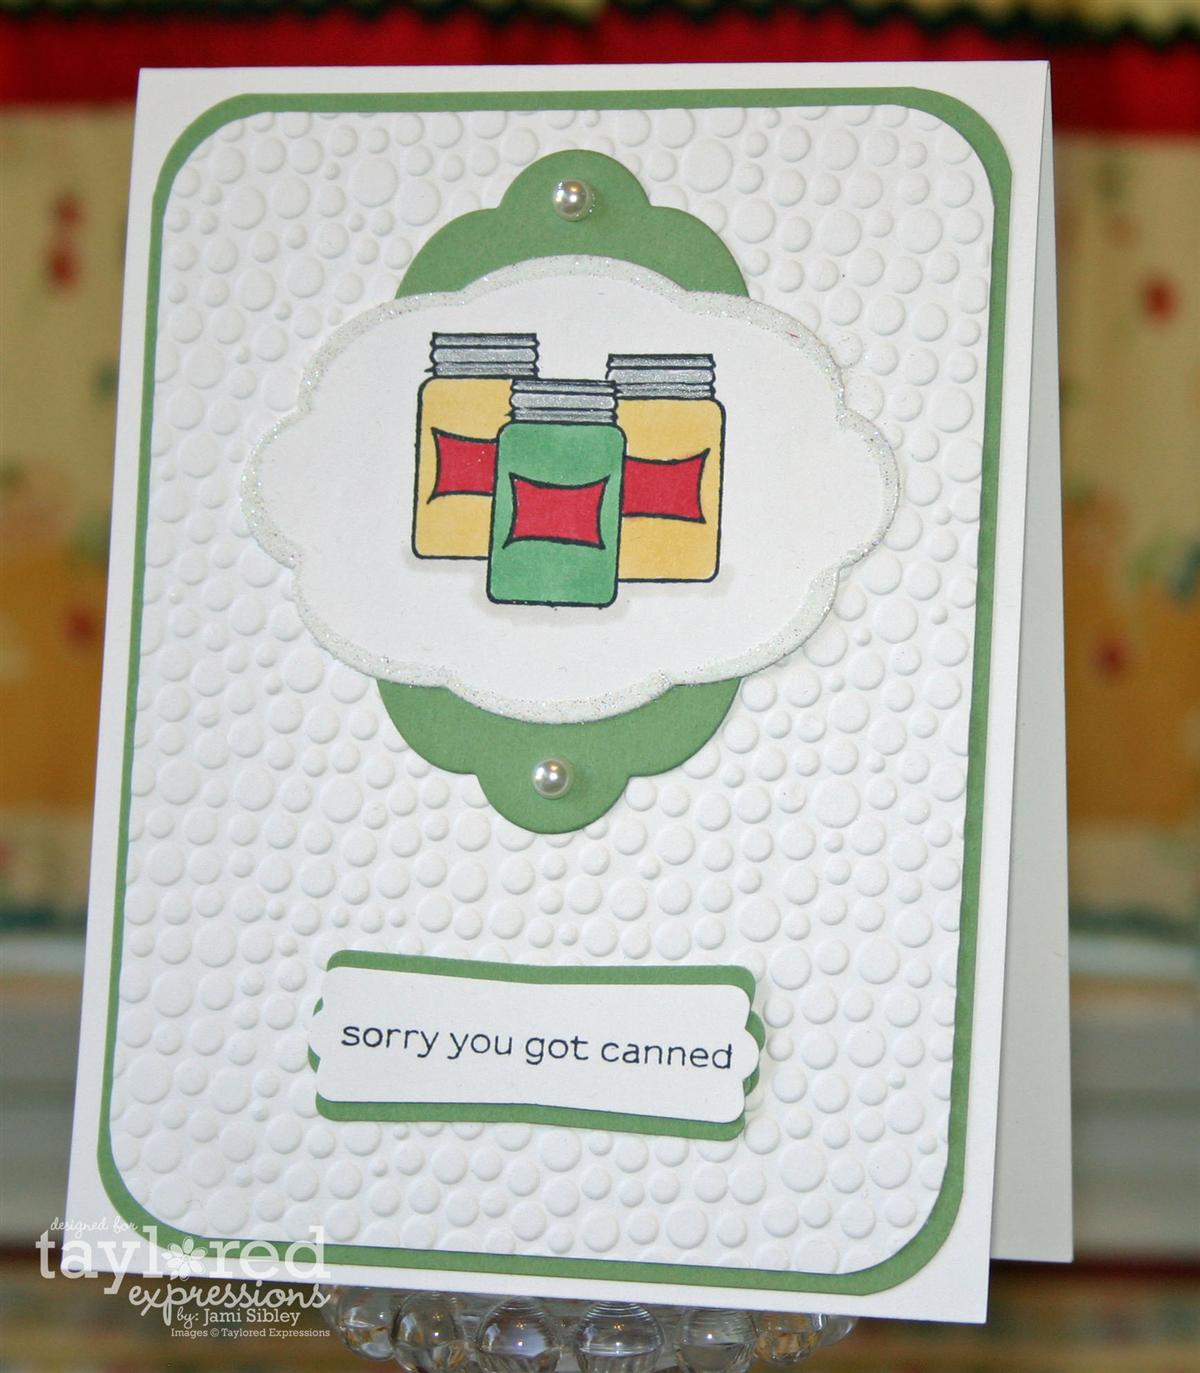
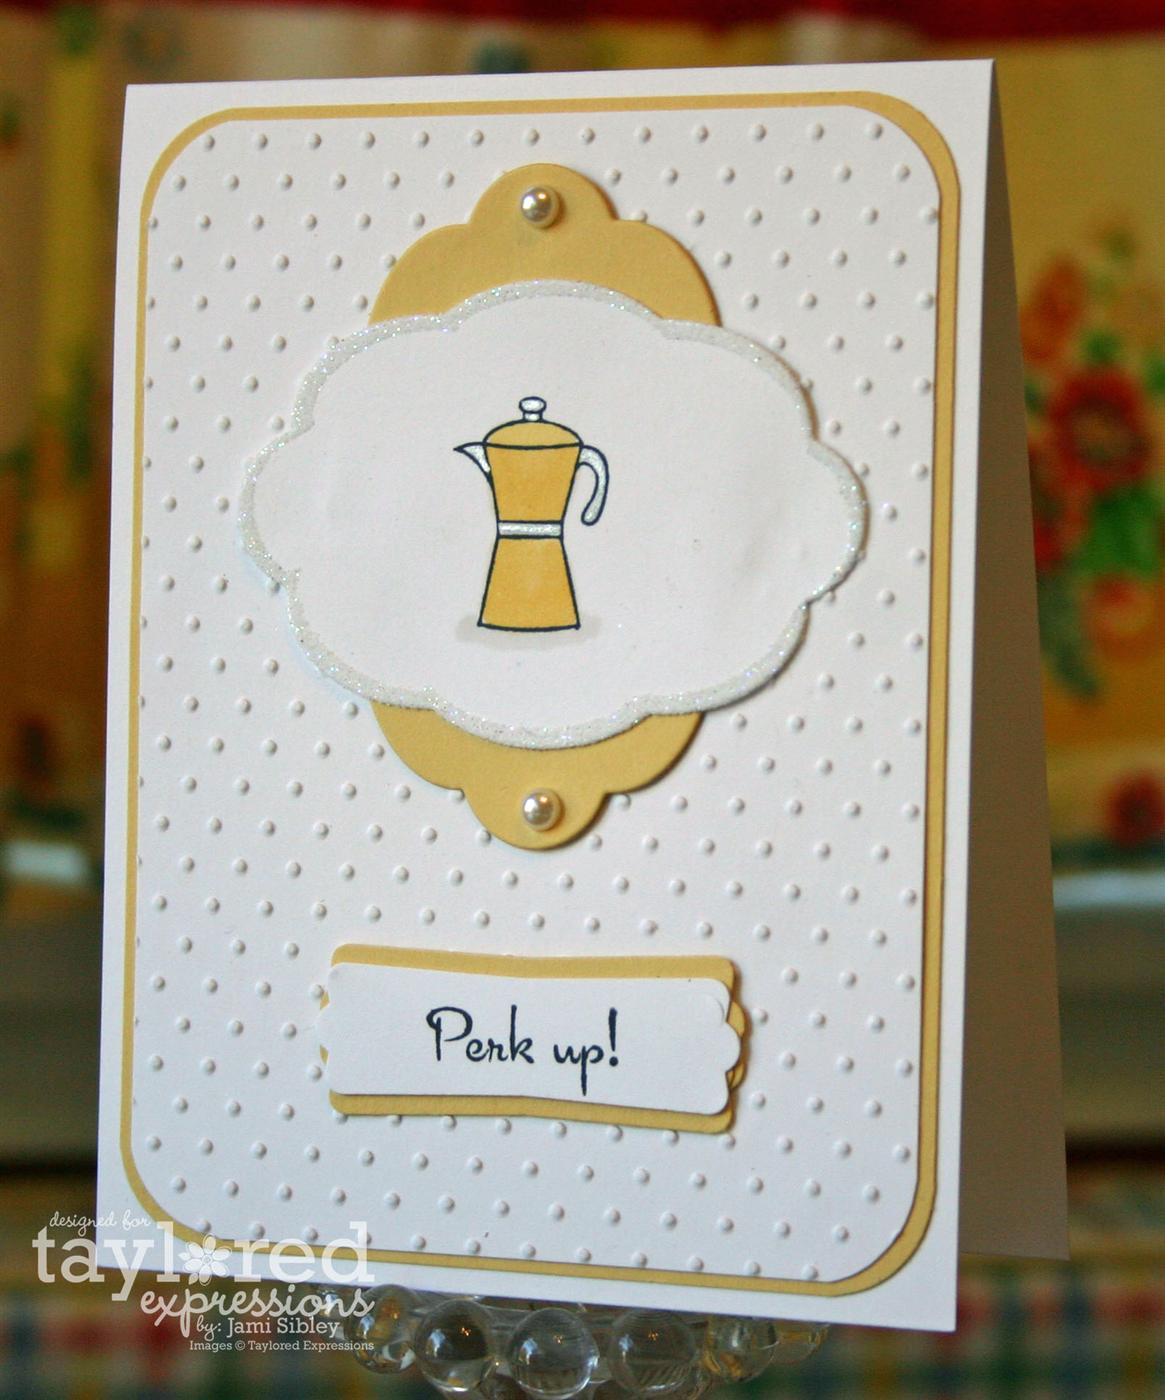
Did you catch the “sorry you got canned” sentiment? *snort* A little edgy maybe, but it makes me laugh! I think these would make great sets for gifts and they’re pretty quick to create! You can adapt them with any colors you like, any CB folders you have and there are a number of options for punches and dies.
Now I’m dying to see what the Baker’s Dozen has cooked up today…let’s go check it out!
- Charmaine Ikach
- Danielle Lounds
- Donna Baker
- Jackie Pedro
- Jodi Collins
- Karen Giron
- Karen Motz
- Melissa Sauls
- Regina Mangum
- Sankari Wegman
- Taylor VanBruggen
- Tori Wild
Thanks for stopping by today. I’m especially excited about the peeks we’ll be showing you tomorrow. You’ll have to come back to find out why. 😉
![]()
Taylored Dies used today:

Taylored Expressions November Sneak Peeks Day 1
November 1st, 2010

Welcome to Day #1 of the Sneak Peeks for the November Release at Taylored Expressions. I’m excited to play along with Taylor and the Baker’s Dozen this week. Everything you see in peeks will be available in the TE Store Thursday morning at 8 am PST. On the menu today is a super fun new set in the Whimsical Wishes line illustrated by Nancy McKinney – What’s Cookin’? This super fun retro kitchen set features 21 different stamps inluding 13 images and 8 fun coordinating sentiments. Not only that, but there are also 2 coordinating sets of Taylored Dies to go with the set as well. I’ll be featuring one of the die sets in my sample today.
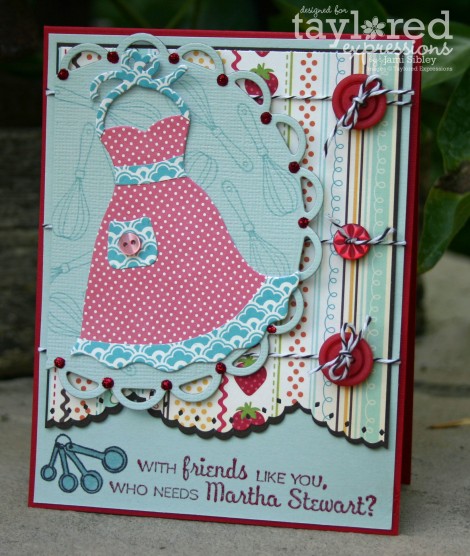
This sentiment was so perfect for the thank you I needed for my friend Denise. She made the most incredible toffee to fill the favor boxes for our niece Kira’s wedding. It was beyond yummy and such a special touch! “With friends like you, who needs Martha Stewart?” And look at that cute little image of measuring spoons! Love it!
The stamp set includes 2 apron images and a coordinating apron and pocket die set. For my card today I didn’t use the apron stamps, but rather just die cut the apron from 2 different pieces of patterned paper. (Papers used are October Afternoon Fly a Kite and the coordinating cardstock kit which looks to be out of stock at the moment.) I simply hand cut the ruffle, sash and ties off the blue apron and glued them onto the red polka dot apron. The sentiment was stamped in Real Red craft ink and heat embossed with clear ep. Measuring spoons were colored with Copics and then with a glaze and glitter pen. Other supplies include: Lacey Circle Spellbinders, Red Stickles, Market Twine, buttons from my stash.
Just wait till you see this whole stamp set! I think you’ll love it as much as I do. In the meantime let’s check out what the Baker’s Dozen has cooked up with this set to whet your appetite:
- Charmaine Ikach
- Danielle Lounds
- Donna Baker
- Jackie Pedro
- Jodi Collins
- Karen Giron
- Karen Motz
- Melissa Sauls
- Regina Mangum
- Sankari Wegman
- Taylor VanBruggen
- Tori Wild
- Nancy McKinney – Whimsical Wishes Illustrator
Thanks for stopping by. I’ll be back tomorrow with a peek of a set that will help you with easy packaging for your handcrafted gifts!
![]()


